
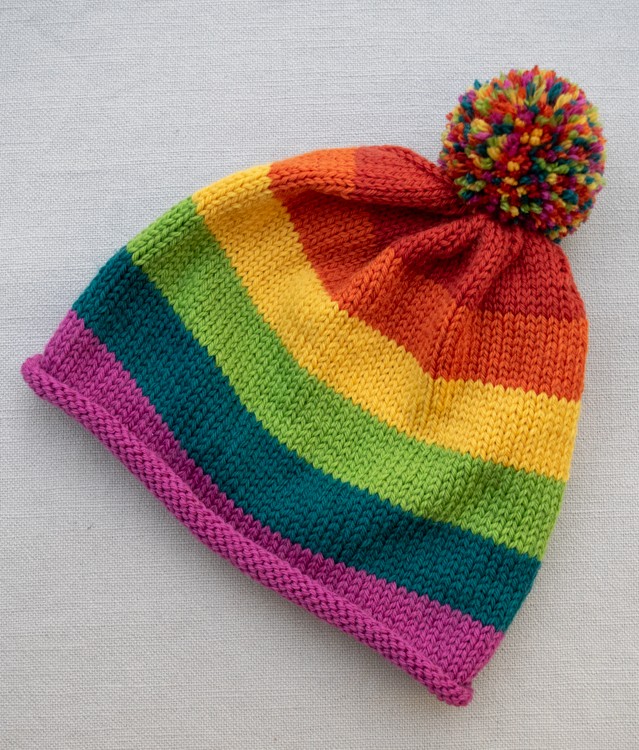
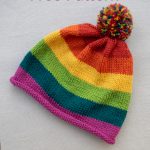
I made a rainbow beanie hat pattern for you. And it’s free! Because sometimes life calls for rainbows… and pompoms, and it’s usually around about now. I bought a kit for this hat at a local yarn store years ago, but since both the store and the yarn are no more, I set out to recreate it.
Rainbows are not my typical color palette (though there is a special place in my heart for those rainbow stickers that were everywhere in the 80s) but this one is just slightly weird enough that it works for me.
You will be able to make at least a couple of hats with all of the yarn (more if you are making the baby size), so make one for the peeps you know who most need some sunshine.
Though the yarn is machine washable, I’d be careful with that pompom!
Supplies
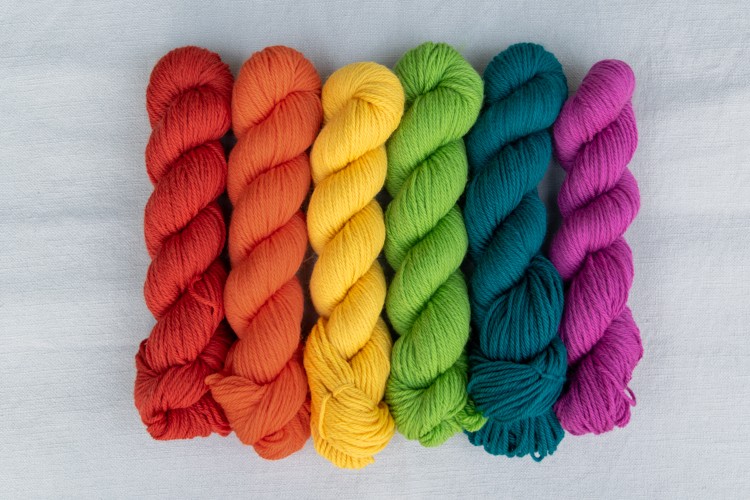
- 6 skeins of Cascade 220 Superwash sport weight, one each of Raspberry (807) (color A), Como Blue (811) (color B), Green Apple (802) (color C), Daffodil (821) (color D), Pumpkin (822) (color E), and Aurora Red (266) (color F)
- US size 5 16-inch circular needles (or size needed to obtain gauge)
- US size 6 double-pointed needles (or size needed to obtain gauge)
- stitch markers
- yarn needle
- pompom maker
- waxed thread or floss
Gauge
5 stitches = 1 inch in stockinette stitch
Size
Baby: 14-inch circumference, 5.5 inches high (without pompom)
Child: 18-inch circumference, 8 inches high (without pompom)
Adult: 21-inch circumference, 9 1/2 inches high (without pompom)
Rainbow Beanie Pattern
- Cast on
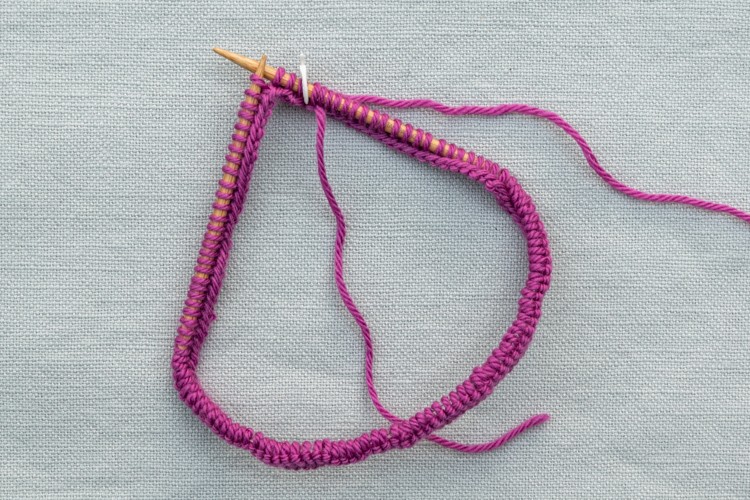
Using color A, cast on 70 (100, 110) stitches using the long-tail cast on method.
- Join the stitches
Join the stitches for knitting in the round, being careful not to twist the stitches and placing a marker at the beginning.

- Knit the first stripe
Knit with color A for 11 (13, 14) rounds. This first color stripe is a little wider since it rolls up quite a bit.
- Change to Color B
At the end of the round, start knitting with Color B (blue). After a few stitches tie the yarn strands together on the inside of your hat.
Knit with color B for 7 (9, 10) rounds.
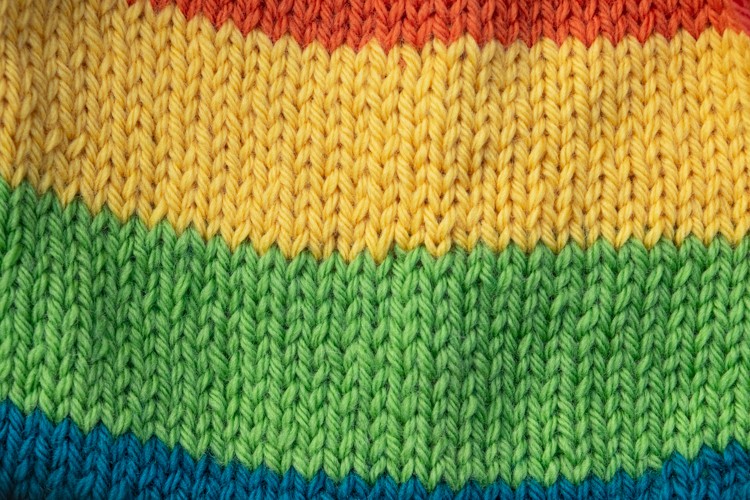
I like to use the jogless stripes method, so the stripes look smoother when I change colors. To do this, slip the first stitch of the second round of every color purlwise. That’s it. This is what the color changes look like with the jogless stripes method: - Repeat for other colors
Repeat step 4 for each of the colors, until you get to Color F (red).
- Start final color and decrease
Knit 1 (4, 5) row(s) with color F (red).
For the next round knit 8, knit two together, place marker. Repeat this pattern until the end of the row.
Next row: *knit 7, knit 2 together. Repeat from * to end of row.
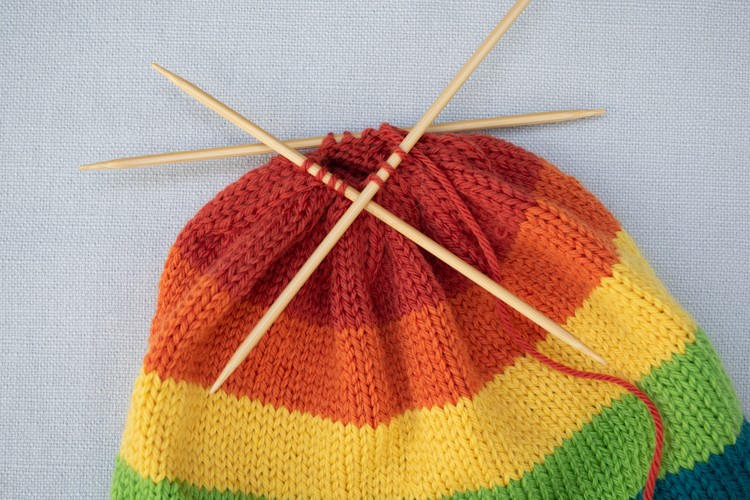
Continue in this pattern, decreasing the number of knit stitches by one for each round (so knit 6, knit 2 together, then knit 5, etc.), until you have 14 (10, 11) stitches remaining. Switch to double-pointed needles when needed. Use the marker to remind you to knit together the two stitches just before it. - Bind off
Cut your yarn, leaving an 8-inch tail. Using a yarn needle, thread your tail through the remaining stitches and pull snug. Tie off on the inside. Leave the tail loose for now — you’re going to use it to attach the pompom.
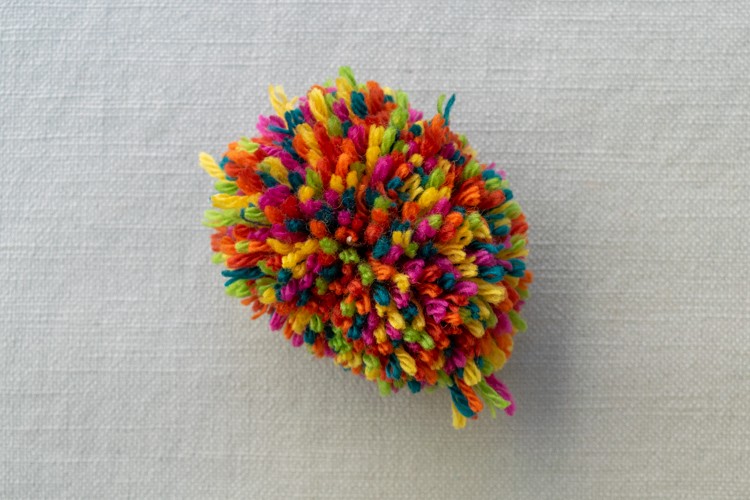
- Start your pompom
[I would leave the pompom off for a baby’s hat, unless you are going to make it very small, maybe 1–1 1/2 inches.]
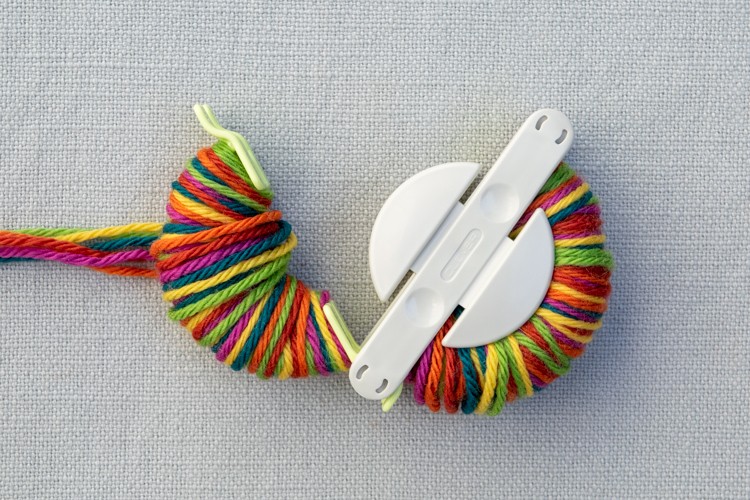
Using a 2 1/2 inch pompom maker, take the ends of all six colors of yarn, and start wrapping them around. Don’t pull the yarn super tight, or your pompom will be too heavy, and you’ll feel like a Charlie Brown Christmas Tree. Wrap each side of the pompom maker until you can still close it, but just. - Cut the wrapped yarn
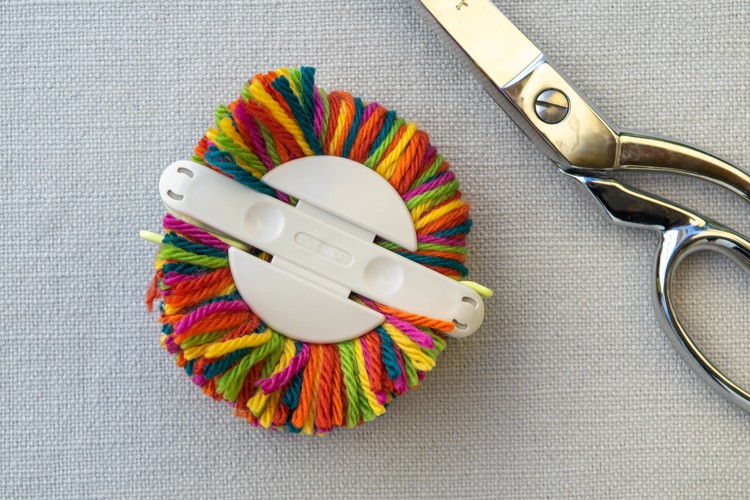
With both sides of your pompom maker closed, snip all your wrapped yarn strands. Make you do it evenly, using the groove between the two sides as a guide.
- Tie off your pompom
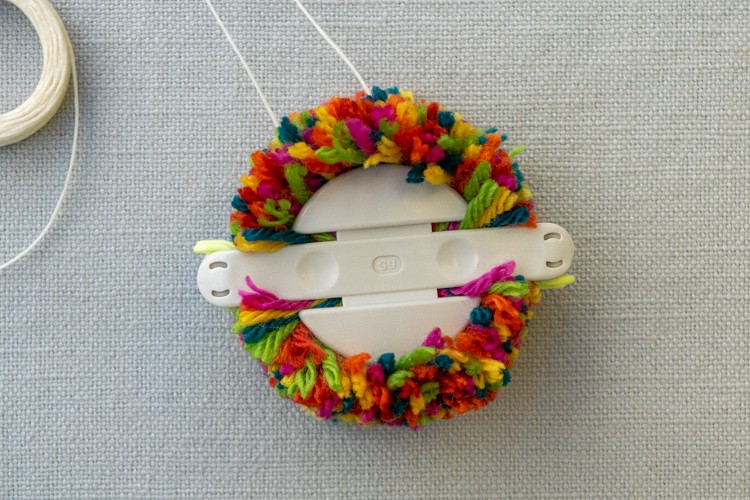
Use waxed thread or thin cord to tie off your pompom by pulling it through the center slit between the two sides of the pompom maker. Tie a surgeon’s knot (wrap it through twice instead of just once) and pull it as snug as you can. Trim the cord ends so they are shorter than your pompom strands.
- Trim your pompom
Trim your pompom so it’s a nice round shape. (They start out looking like the one below.) For some reason, I love doing this. It reminds me of cutting my doll’s hair when I was little, which often turned out terribly. Nevertheless, I persisted… This is just one of those things you have to get zen about — the more time you put into it, the better it will look.
- Attach your pompom
Thread the tail from the red yarn through the needle and pull it to the outside top of your hat. Sew through your pompom center and back through your hat a couple of times. Tie a secure knot on the inside of your hat.
Please pin this post if you like it, and please join my email list!
If you want to do more knitting, check out these Easy Fingerless Gloves!
How do I print this pattern? Thank. you, Sandy
The only way to print it is to print the web page from your browser.
I don’t know if I am supposed to, but I copy and paste the instructions and pictures (if I want them) into a Word document in order to have the printed copy without all the advertising etc. It’s easier to have the printed copy to work from.
I change it to the “reader” view first. Click on the lines at the left edge of the box for the URL to change it to the reader mode.
Thank you