
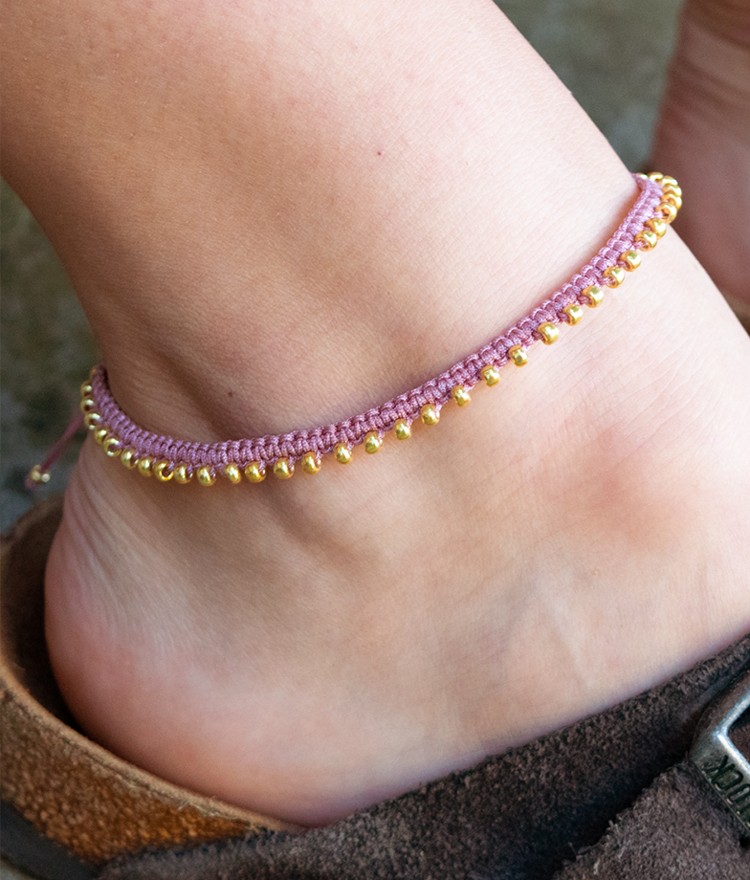
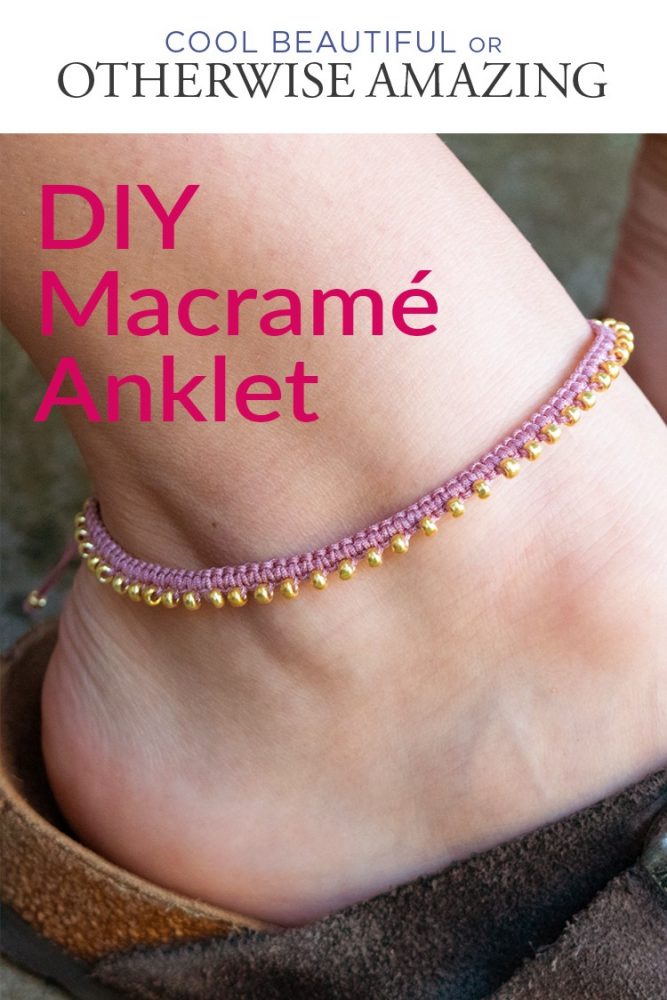
I couldn’t find a tutorial on how to DIY this cute macramé beaded anklet for myself. I spotted it on Pinterest a while back and immediately wanted one for my own flash-the-peace-sign-semi-ironically, it’s-all-good, boho look. I love that they are reminiscent of friendship bracelets but look so much more polished.
If you like DIY jewelry, check out my Friendship Bracelets with Beads tutorial, and also this Daisy Chain Seed Bead Necklace.
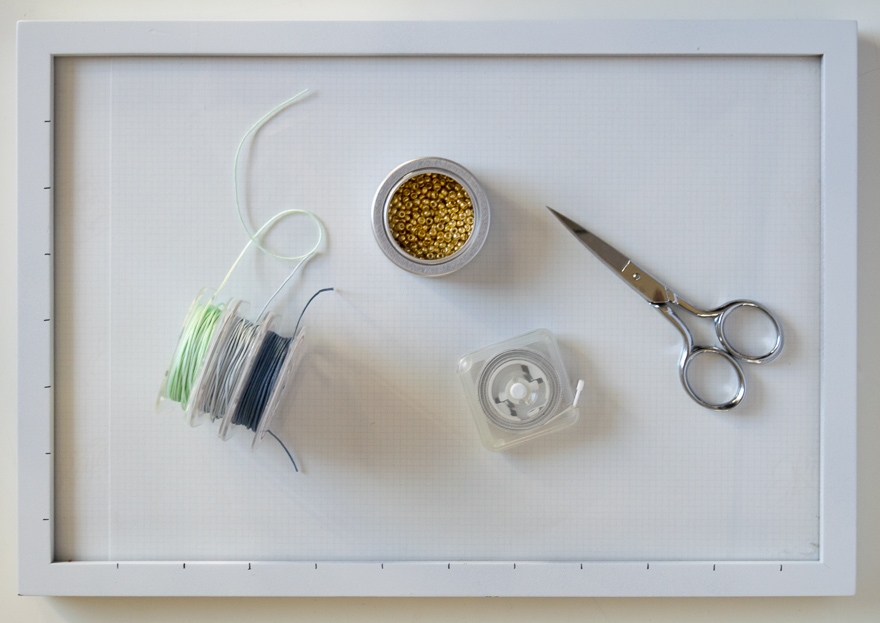
Anklet Supplies
- 4 yards + 10 inches 0.5mm nylon Chinese knotting cord (I used Mauve and Williamsburg Blue)
- 50 size 8/0 seed beads (if you are going metallic, get the duracoat or permafinish)
- scissors
- lighter or cord cutter
- big eye needle
- needle nose pliers
- macramé board, picture frame, or clipboard
- scrap cord or string
Beaded Anklet Instructions
- Cut your nylon cord
Cut 3 lengths of 0.5 mm nylon cord—one one-yard length, one three-yard length, and one ten-inch length.
- Melt the ends of the cords
Using the cord cutter or lighter, melt the ends of the cords so they don’t fray. If you are using a lighter, you don’t want them to fatten out as they melt, so quickly run your fingertips over the ends after you remove the flame. Be careful not to burn yourself!
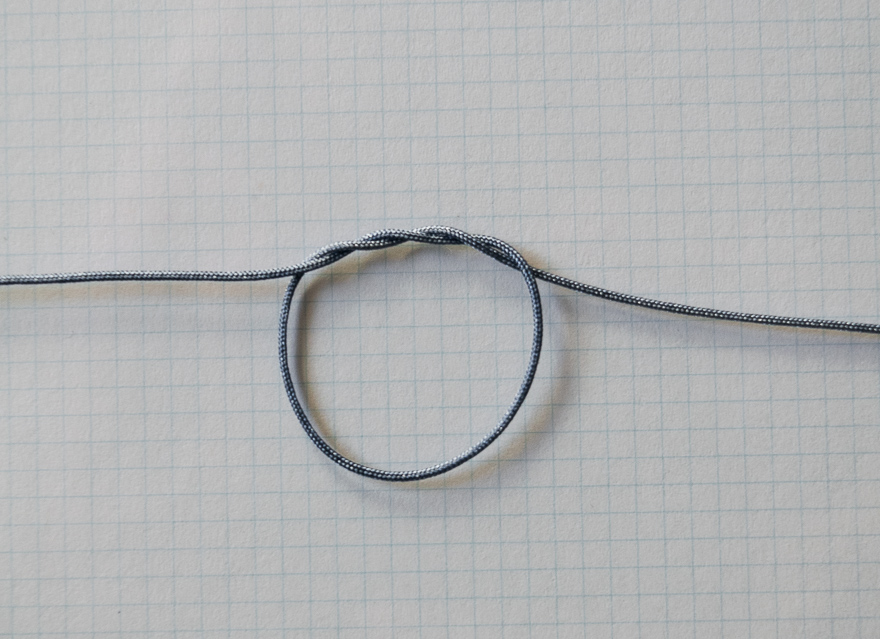
- Tie the first knot and add a bead
Find the midpoint of the one-yard length and tie a surgeon’s knot (wrap the cord through twice instead of once). Using a big eye needle, slide a bead on to both sides of the cord. (This part can be tricky. Definitely do it one side at a time. I catch just the tip of the cord in the needle and pull it through with pliers if it’s being stubborn.)

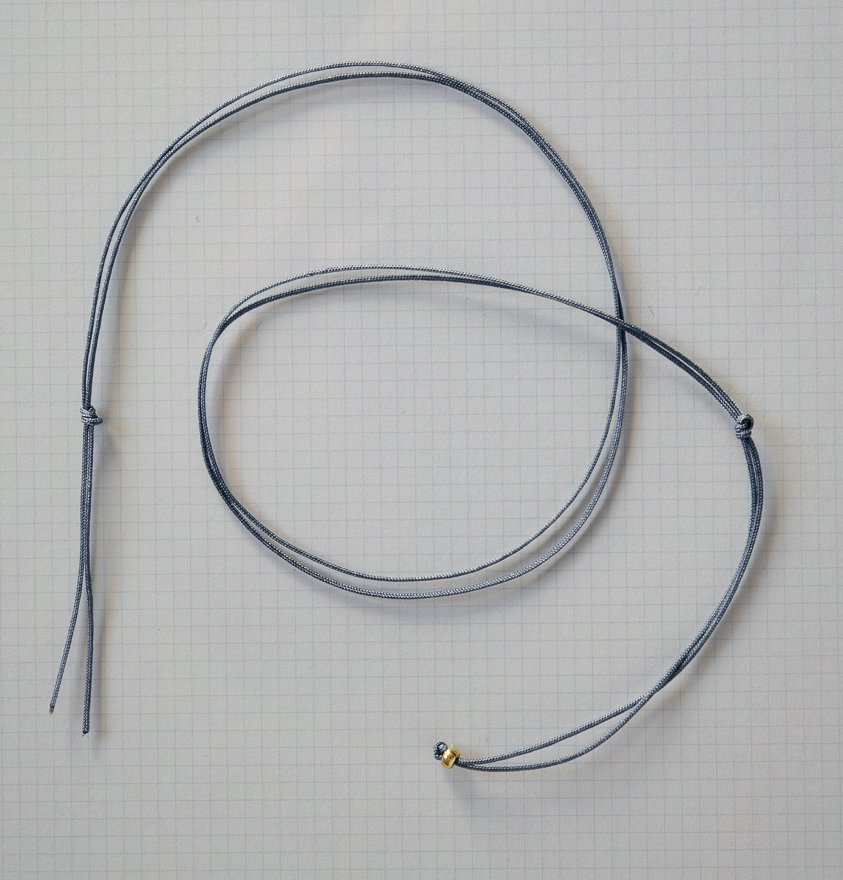
- Tie an overhand knot
Tie an overhand knot about three to four inches down from the bead, and then tie another one about an inch or so from the loose ends.
Your one-yard length now looks like this: - Attach the bracelet to a board, frame, or clipboard
Use a piece of scrap cord to attach this base cord to a base. You can use a macramé board if you have one, a picture frame that’s nine or ten inches on one side, or a clipboard. It’s much easier to tie the knots if you have both ends of the cord secured, so if you use a clipboard, you might want to secure the bottom end of the cord with some strong tape.
- Start making the pretty part of the anklet
[See the video at the end of this post for steps 6–9.] Take the three-yard length of the cord and find the midpoint. Place the midpoint directly below the overhand knot and hold it there with a finger. Now tie your first macramé knot, the square knot. I’ve made a video to show you the rest of the anklet because it’s a little tricky to explain. You are going to tie three square knots before the next step, alternating sides as you tie them.
- Add the beads
String 40 beads onto the right-side cord. (I average about 5 beads per inch, and I want 8 inches of macramé when I’m done. You may need more or less depending on the size you are making.) Slide one bead up so it’s next to the last square knot, then tie another square knot. Then tie three more, alternating sides. Every fourth square knot, you are going to slide another bead up.
- Continue adding beads and knotting
Continue adding beads and tieing knots until the anklet is your desired length. I make the knotted part of mine 8 inches and my ankle is 10 inches in diameter where the bones stick out. When it’s finished the whole anklet is 15 inches around. I would make it a little smaller for my daughter since she’s a little more petite than me, say 7 inches of knotting.
- Finishing the macramé/knotted part
After you slide your last bead up, tie three or four more knots. Then cut the outside cords with a cord cutter, or with scissors. Carefully melt the ends with a lighter if you use scissors.
- Add the last bead and finish the end
Using the big eye needle again, slide another bead on to both sides of the cord. Tie an overhand knot about three to four inches from where your macramé/knotting ends. Cut the cord lengths just after this knot. Seal the ends with the lighter if you use scissors.
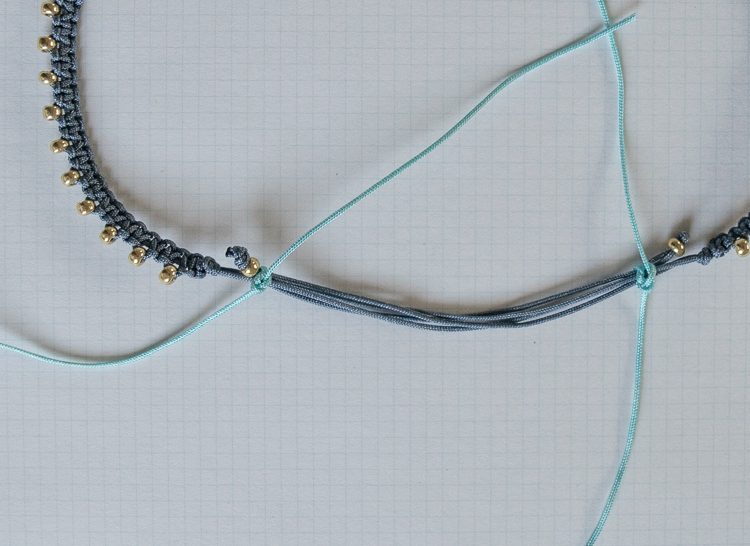
- Tie the two sides together overlapping
Using two shortish (4-6 inches) pieces of scrap cord or string, overlap the two ends and tie them together.
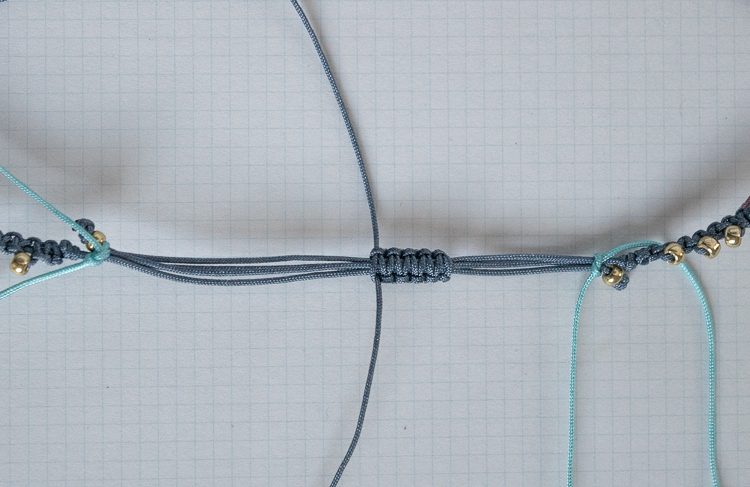
- Add a sliding clasp
Find the midpoint of the 10-inch piece of cord and place it behind the overlapped pieces. Tie about 10 square knots, or until the clasp measures about 3/8 inch. (It’s really up to you how long you make it, so do whatever looks good to you!) Then cut the outside cords with a cord cutter, or with scissors. Again melt the ends with a lighter if you use scissors.
- Enjoy
Show off your gorgeous new anklet!

Please pin this if you like it! And don’t forget to sign up for my email list :).
Love this! So many possibilities. . . . .
Posted too soon . . . . great video!
I love your anklet and have had several request from family for one but I feel that I’m missing something on step 9. After I complete 3 stitches after my last bead, cut and seal the outside cords, will they just stay in place or do I do something more with them?
Hi Jonae. I’m so glad you like it. As long as the cord ends are well sealed, they should hold. What happens is, as the ends melt they bind to the knot just above them, and also flare out/fatten up a bit. Does that make sense? Please let me know if you have any issues. I’ve been wearing mine 24/7 for several months and it looks like the day I made it.
Thank you for your quick response.
How do you attach the first yarn to the frame? Will a clipboard work also?
Yes a clipboard will also work! I have updated that step with more detail and a new picture, to give a better sense of how to attach the cord.
It is unclear to me which right side cord to string the beads on. I have watched the video several times and can’t tell.
Hi Louise. Happy to help. There are four cords —- two are running down the center and are fixed (you tie the knots around them but they never move), and two are on either side of the two in the center, one to the left and one to the right (these are the ones you tie the knots with). The one on the right is the one you string the beads onto.
muito obrigada! fiz meu primeiro macramê com sua ajuda. ficou lindo!
[Many thanks! I made my first macrame with your help. It was beautiful!]
That is so great to hear!
These are beautiful thank you.
I LOVE this ankle bracelet! Thanks for making the tutorial.
love love love i have done about 3 now.
Hello
Gorgeous anklet! Am planning a necklace with pendant for Mum, this pattern would work well,wouldn’t it? Only thing I worry about is whether the sliding clasp would hold well for a necklace? Please guide. Thanks
I think a sliding clasp will work well for a necklace, as long as the pendant isn’t too heavy.
Hi.This tutorial was very nice.I do have a question-how would you add beads to each side-not just one side?Thanks
Absolutely too pretty for words.
Thanking you for sharing,
Yoannu are so kind.
Be blessed.
Love.
Beautiful anklet. What kind of thread are you using for this anklet?
There’s a link to the thread in the list of supplies. It’s a nylon cord.