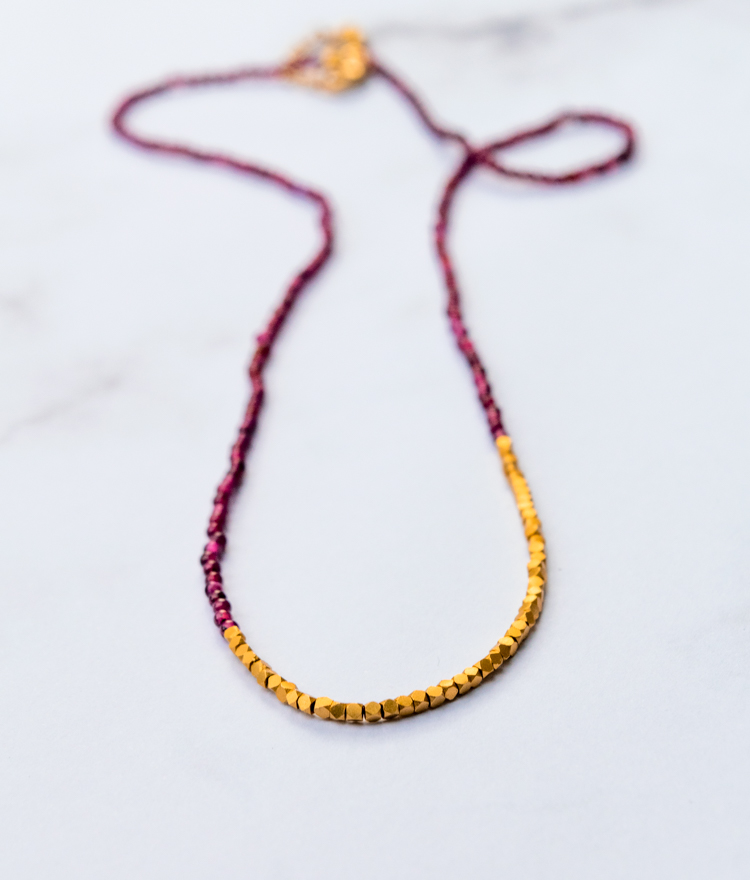
I am posting this simple beaded garnet necklace tutorial in honor of Valentine’s Day. Actually, it’s my daughter’s Valentine’s gift this year, but she doesn’t know that yet.
The summer after I graduated from high school, I was lucky enough to spend a month in Egypt, staying with a friend and her Egyptian relatives. We did lots of shopping in the Khan el Khalili. Picture a medieval Middle Eastern bazaar with a maze of narrow alleys, tiny shops, lots of people and lots of stuff — that’s it exactly.
One of the things I bought for myself was a simple beaded garnet necklace, with tiny beads just like these. I had to restring it recently, but I still wear it. I did add some gold beads to it though — I think they really bring out the color of the garnet.
Supplies
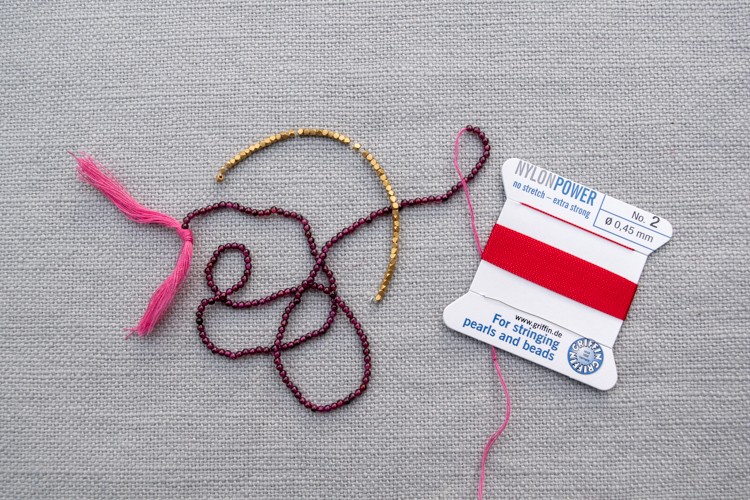
- 1.5–2mm garnet beads (at least 14 inches)
- No. 2 (.45mm) red or pink silk or nylon cord with needle (you need the red or pink because the stone is a little bit translucent)
- bead clips
- 2mm faceted gold beads (I used 50)
- gold lobster clasp
- gold-filled clamshell crimp bead
- 3 4mm gold jump rings
- 1–2 inches round gold chain (if using)
- chain nose pliers
- bent chain nose pliers
- awl
- ruler
Time needed: 1 hour
- Plan out your necklace
Decide how long you want your necklace to be, and make sure you have enough beads. My necklace is 18 1/2 inches (about 19 1/2 with the clasp and jump ring). My daughter is a little more petite, so hers is 17 inches plus an extender.
Decide how long you want each section of beads to be if you are using the metallic beads in the center. My gold beads are 3 inches long, leaving 7 3/4 inch of garnet beads on either side. My daughter’s is 3 inches of beads, leaving 7 inches of garnet beads on each side. - Unwind your cord
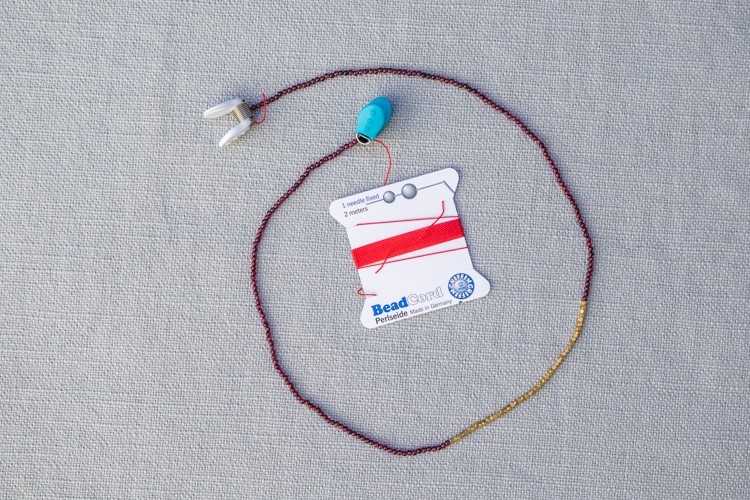
Unwind enough cord to have your finished length plus a couple of inches. Attach a bead clip to the cord near the end away from the needle. Eventually, you are going to unwind all of the cord and slide the beads down to the end, but you don’t want to deal with all of that cord now, and it’s easier to slide the beads all at once.
- Start stringing the beads
Start by sliding a clamshell crimp bead onto your cord, then start stringing your beads. It helps not to drink too much caffeine before you do this, and to have good lighting. I like to have a ruler out as well to check my measurements as I go along. Once you have reached the length you want, slide another clamshell crimp bead onto your cord, and put a bead clip on this end of your cord.

- Unwind your cord and unkink it
Unwind the rest of your cord from the holder, get it a little wet by running it through your wet fingers. Keep running it through your fingers until the kinks are more or less gone, and then let it dry. This will take a few hours or up to a day, depending on the weather and the time of year.
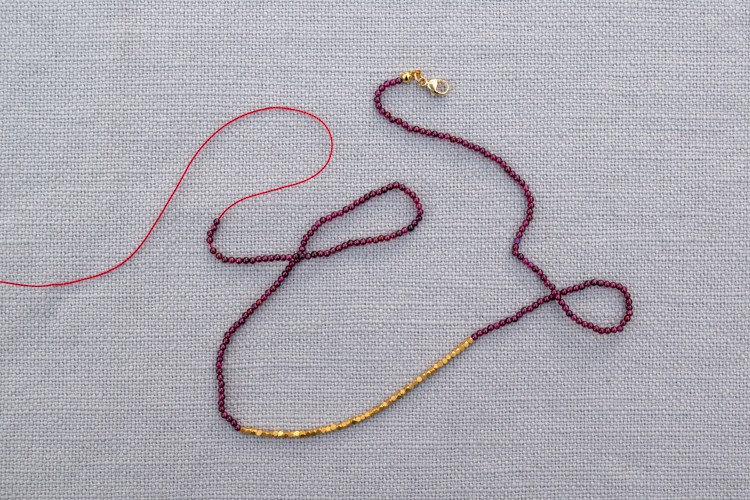
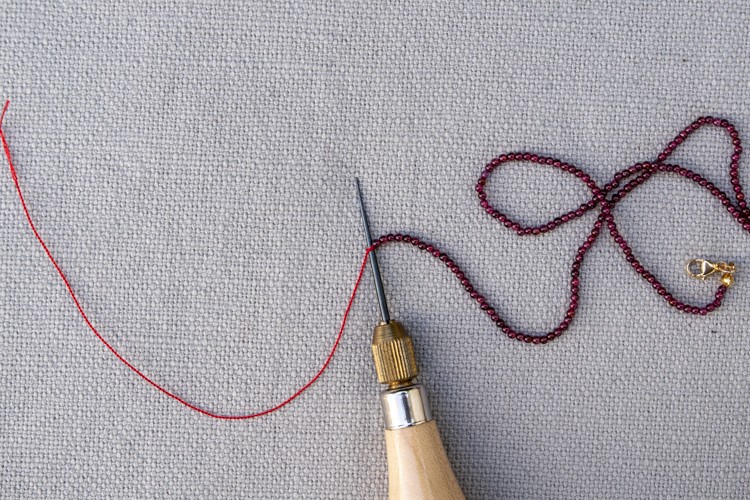
- Tie your first knot, cover, and slide your beads down
Tie 3 overhand knots on top of each other near the end of the cord (the one without the needle. Remove your bead clip and gently slide all the beads down until the clamshell is butted up against your knots. Close the clamshell over the knots with your chain nose pliers. Snip the loose cord end so it is flush with the clamshell.
- Attach your lobster clasp
Open a jump ring with your chain nose pliers and your bent chain nose pliers by twisting it to the side. Attach your lobster clasp to your clamshell with the jump ring, and close the jump ring.
- Tie your second knot and cover
Cut the cord so you have about 4 to 5 inches left past your clamshell. Using your awl and this technique (I love this site by the way — it’s worth checking out Jessica’s other videos and posts), tie 3 overhand knots on top of each other and snug with the clamshell. Make sure your beads are snug all the way down to your first knot before you tie your knots here! Close the clamshell with your chain nose pliers.
- Attach your jump ring and extender chain
Open another jump ring and use it to attach your extender chain to your clamshell, if you are adding extender chain, then add another jump ring to the end of your chain. Otherwise, just attach a jump ring to your clamshell.
Please pin this post if you like it, and please join my email list!
If you want to make more jewelry, check out my Daisy Chain Seed Bead Necklace tutorial!