
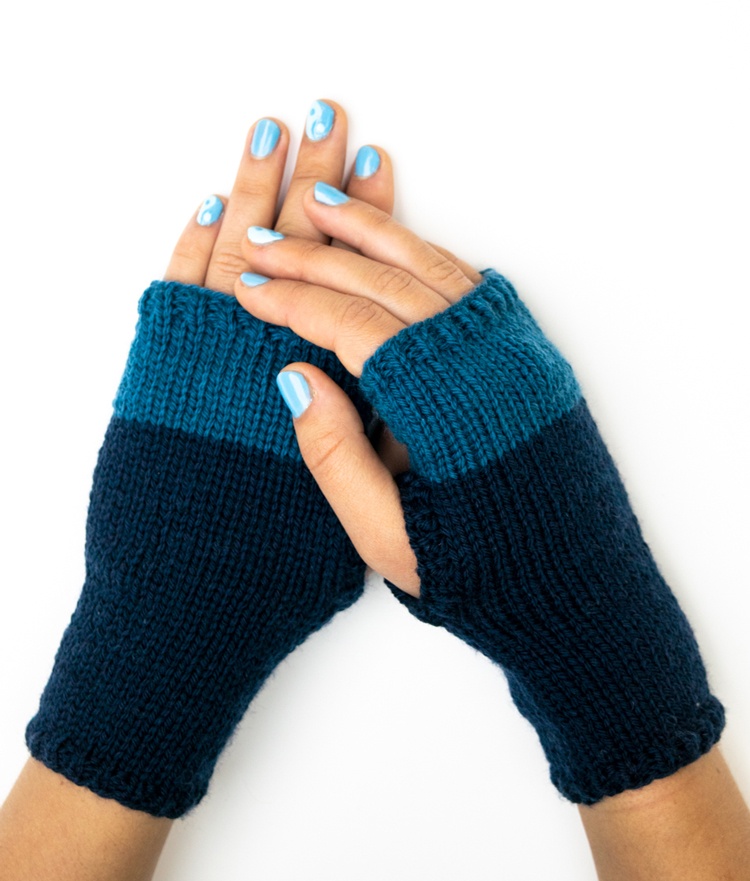
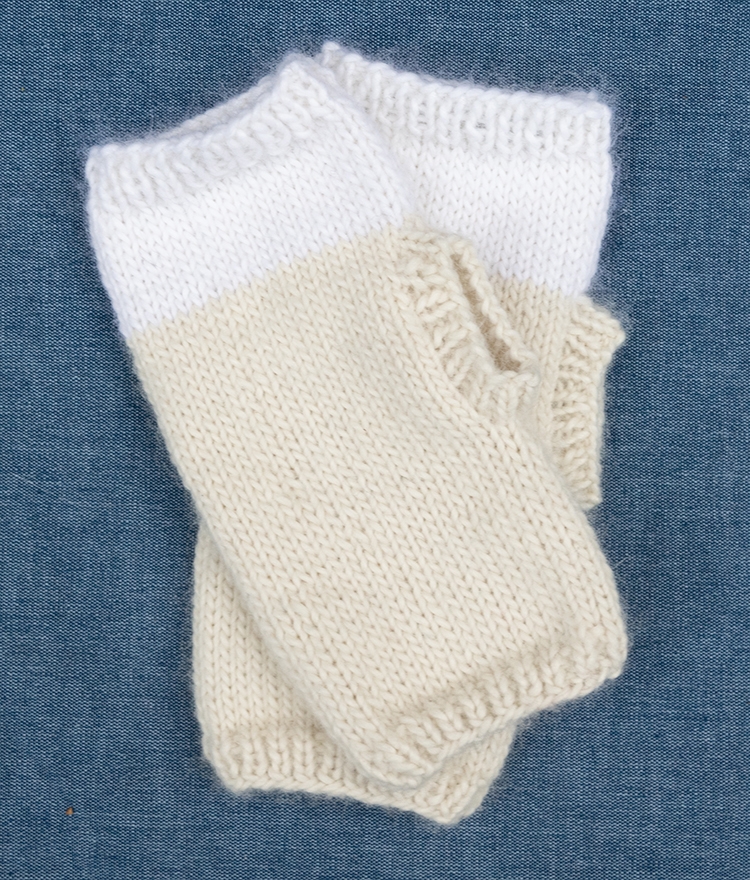
This classic fingerless gloves knitting pattern knits up so quickly and the gloves are perfect for chilly fall days, or California winters. They also make a lovely gift for fall or winter birthdays or the holidays and are easy to bring along in the car or on the plane. Who doesn’t love that?
Once the weather turns in the fall, I am driven to bust out the cozy yarn and needles and start knitting things to keep warm. It’s almost Pavlovian — it just feels right, like a pot of something bubbling on the stove, raking leaves, football games…
Unfortunately/fortunately we live in NorCal, where it doesn’t actually get even remotely chilly until October (and it’s actually hottest in September), so my knitting season is quite short. My projects need to be quick, people. I’m not one to knit warm things when it’s 80 degrees out.
Looking for more knitting patterns? Try my No-Purl Scarf Pattern, or my Classic Cuffed Beanie pattern.
Fingerless Gloves Supplies
- 2 colors of worsted weight yarn (I used Cascade Highland Duo in white and ecru)
- US size 2 and 3 double-pointed needles (or size needed to obtain gauge)
- stitch marker (if you use one, I don’t)
- yarn needle
- measuring tape
Gauge
6 stitches = 1 inch in stockinette stitch
Size
Smaller: 7 inches long, 3 inches wide
Larger: 7 1/2 inches long, 3 1/2 inches wide
Fingerless Gloves Pattern
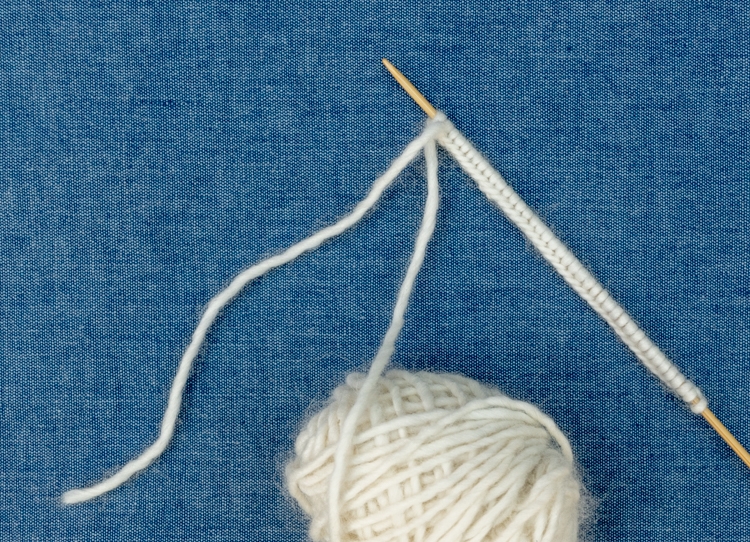
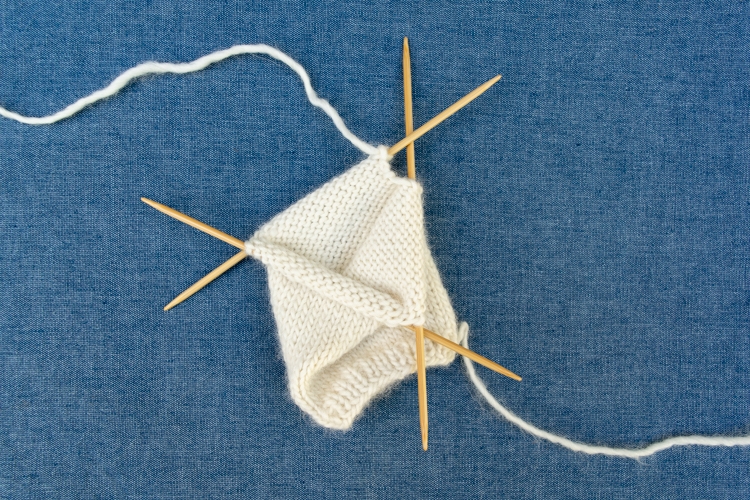
- Cast on
Using the smaller needles and your main color, cast on 36 (40) stitches using the long-tail cast on method. Divide the stitches evenly between 3 needles.

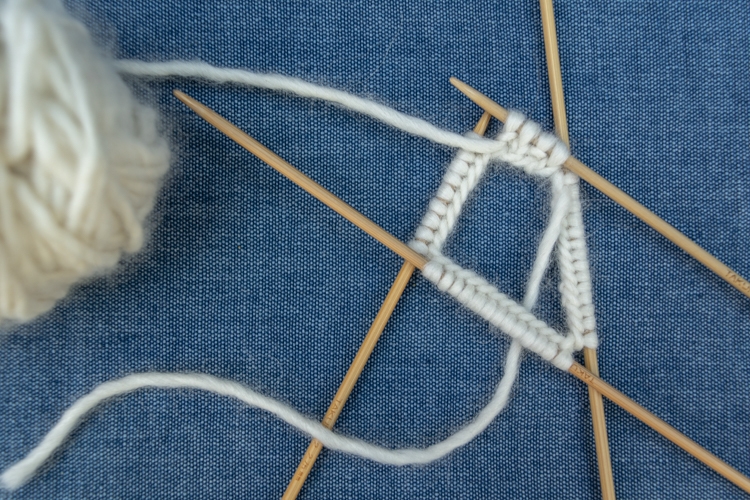
- Join the stitches
Being careful not to twist your stitches, join for working in the round. If you use a stitch marker slide it on now. Mine always falls off so I don’t use them unless I really need to keep track of sections. For these, it’s easy since the end of the round is the end of a needle, and you have the tail from your cast on to help you keep track.
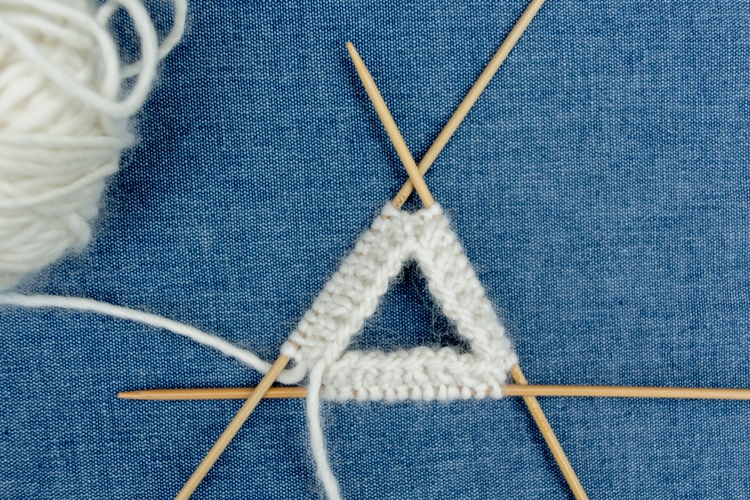
- Make the cuff ribbing
Continue in knit one, purl one (K1, p1) ribbing for 3 rounds. I usually pause at some point in the first round and make sure that the first joining stitch is not too loose. Mine always is, so I go around and tug out the slack. It’s a pain, but it’s necessary to have a nice finished edge.
- Switch to stockinette stitch
Switch to the larger size (#3) double pointed needles and knit all stitches until your piece measures 3 1/2 inches. (You can adjust this length for size or if you want your finished gloves to be a little longer or shorter on your wrist.)
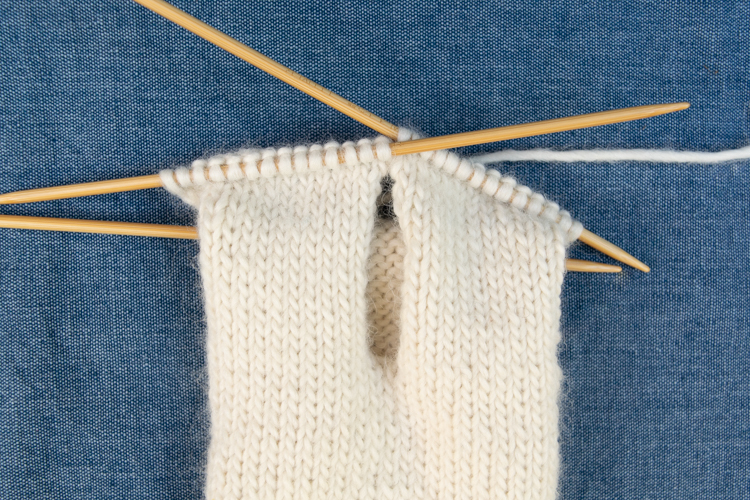
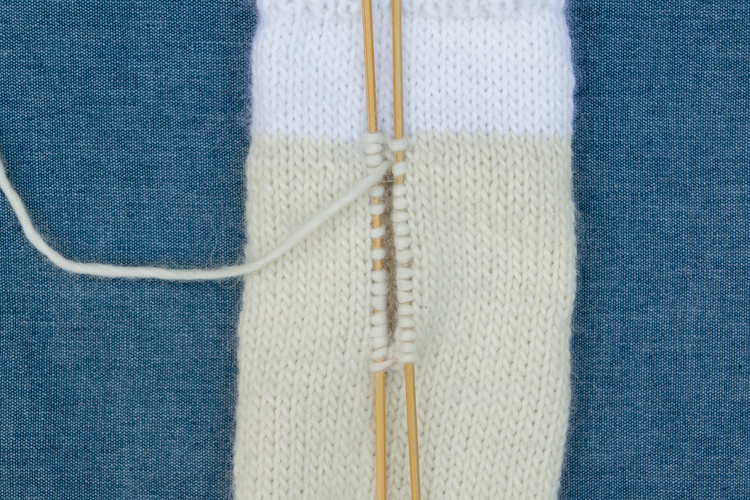
- Make the thumb hole
For this next section, you will knit back and forth, not in the round, in order to create a hole for your thumb. At the end of a round, turn and *purl the next round, then turn and knit the next round. Repeat from * until the thumb hole measures 1 1/2 (2) inches.
Tip: If possible, it’s easy to carefully (don’t pull any stitches off the needles!) slip on the glove at this point and measure if your thumb hole is large enough to get around the thumb in question. If not keep going until it is. - Rejoin the stitches
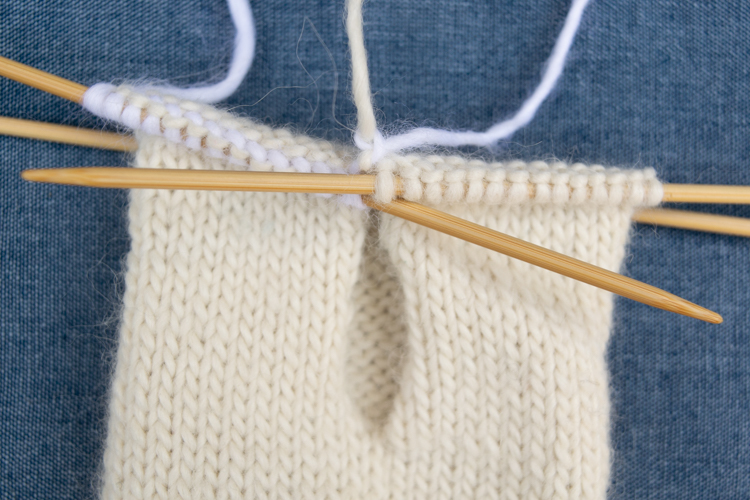
Rejoin your stitches again for knitting in the round and knit one round.
- Switch colors
Switch to your second color and continue knitting in the round for 1 1/2 inches (this is about 10 rounds for me).
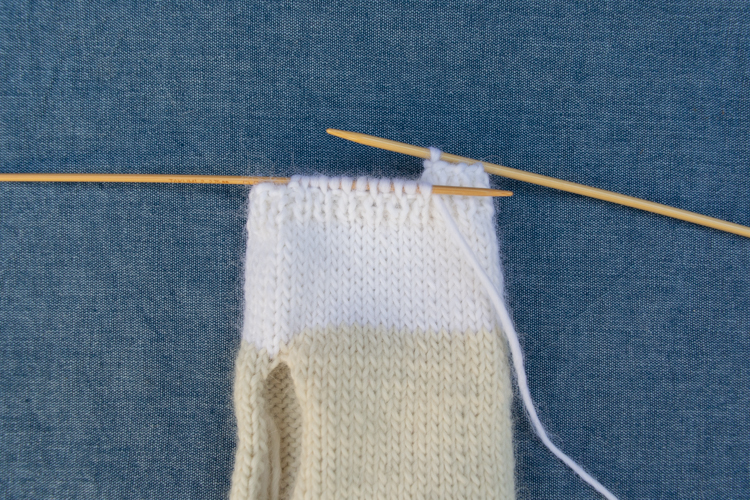
- Switch to rib stitch
Using the smaller (#2) needles, go back to the knit one, purl one (K1 p1) ribbing that you started with. Using the smaller needles makes a prettier, tighter ribbing.
- Continue in rib stitch
Continue in the K1 p1 rib stitch for 2 more rounds.
- Cast off
Cast off all stitches in the K1 p1 rib. I use one of the larger (#3) needles for this round just to make sure I keep it nice and loose.
- Pick up stitches for thumb ribbing and knit in rib stitch
Using your main color, pick up 28 (32 if your thumb hole is closer to 2 inches) stitches around the thumb hole and knit in the knit one, purl one (K1 p1) rib stitch for 3 rounds
- Cast off thumb ribbing
Cast off the thumb ribbing stitches just as you did the other ribbing.
- Sew in the ends
Just like it sounds. Sew ’em all in. Make it all nice and pretty.
Please pin this post if you like it, and please join my email list!
If you want to try another easy knitting pattern, check out this Easy Free Knit Scarf Pattern!
Looks like this might be a great 1 skein project . . . .how much yarn total is needed?
You could easily do it with one skein if you did a one-color variation! You can make two pairs if you use two colors as I did here.
I started your no purl scarf pattern and just love it. It’s great because both sides of the scarf are identical. Just love it!
Perfect to do with two circular needles!
Thanks for pattern.
I am having trouble finding cascade highland duo. I absolutely
Love this pattern for mt granddaughter. Can I order on line.
It looks like Cascade has discontinued Highland Duo, but you can still find it on a lot of sites. Good luck!