
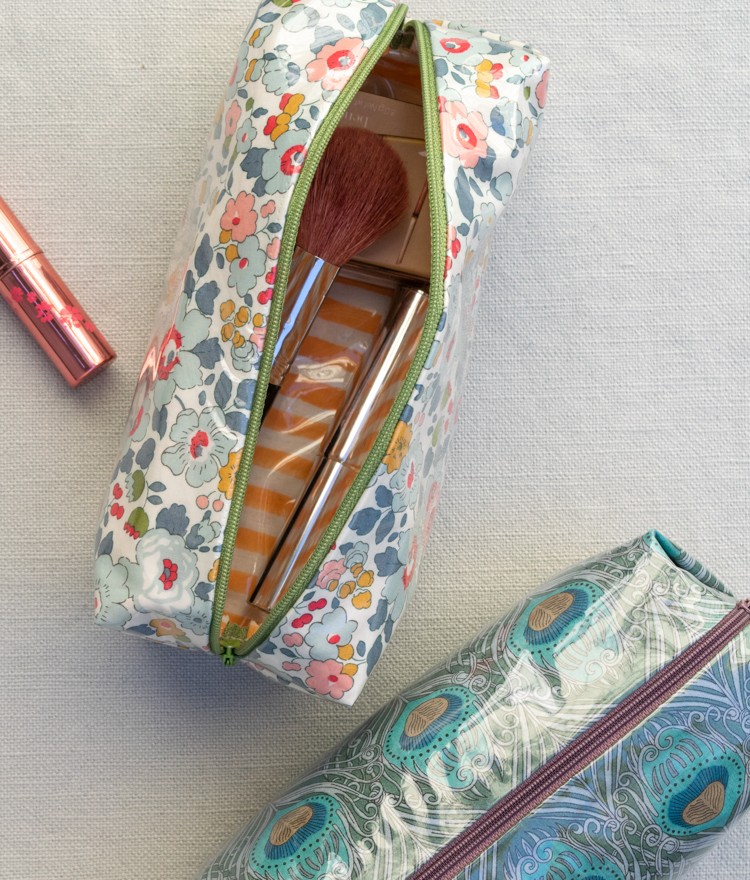
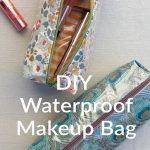
There’s a story behind this makeup bag: my daughter was given the cutest one, which she decided was the perfect shape and had the added bonus of being easy to clean so it would continue to look cute (so important).
But of course, these things don’t last forever and we went looking for a replacement. We found some that passed muster but were way too expensive for what they are. Highway robbery! After looking at them closely, I realized they were just fabric sandwiched between clear vinyl, sewn up with a zipper. And actually, that’s more or less what the original one was too.
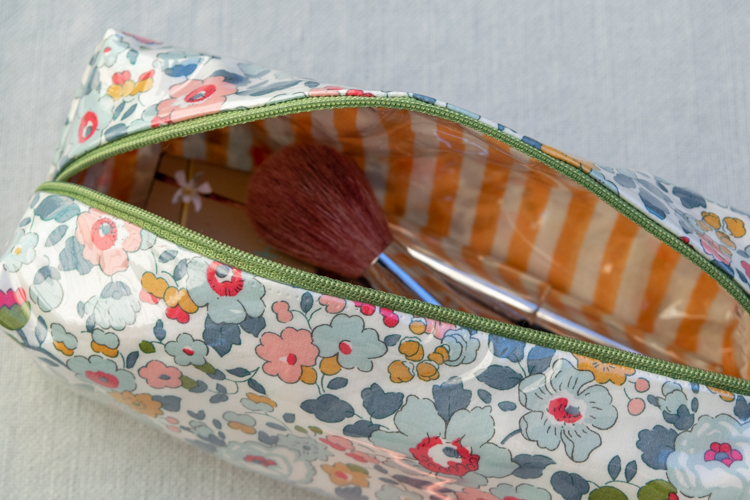
So I set out to recreate it. And at a fraction of the price, I made a few of them. One for her, one for me, one for my friend, one for her friend. We really like this shape — it’s long enough for those long brushes, roomy enough to hold all the things, but still small enough to throw in a purse or tote. The beauty of the vinyl is you can use very lightweight fabrics, like the Liberty prints I’ve used here.
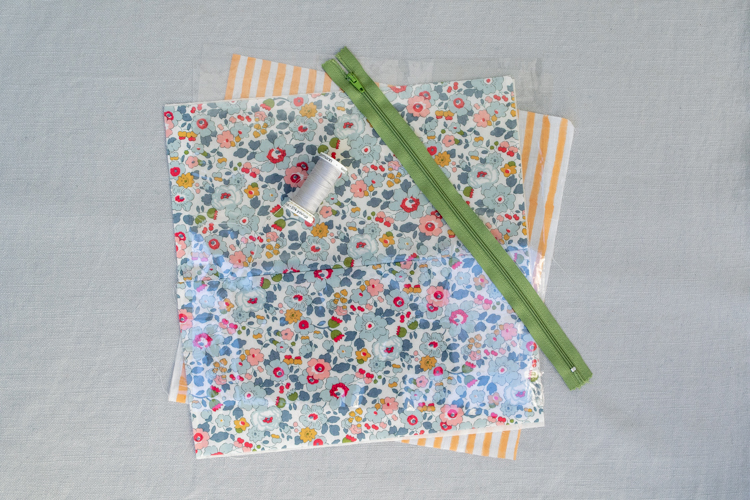
Supplies
- 2 pieces of cotton fabric, 12 inches by 12 inches
- 2 pieces of 8-gauge clear vinyl, 12 inches by 12 inches
- 1 12-inch (or longer) zipper
- thread
- fabric clips (since you can’t use straight pins with vinyl)
- sewing machine
- iron
- zipper presser foot
- pinking shears
Time needed: 1 hour
- Line up all your squares
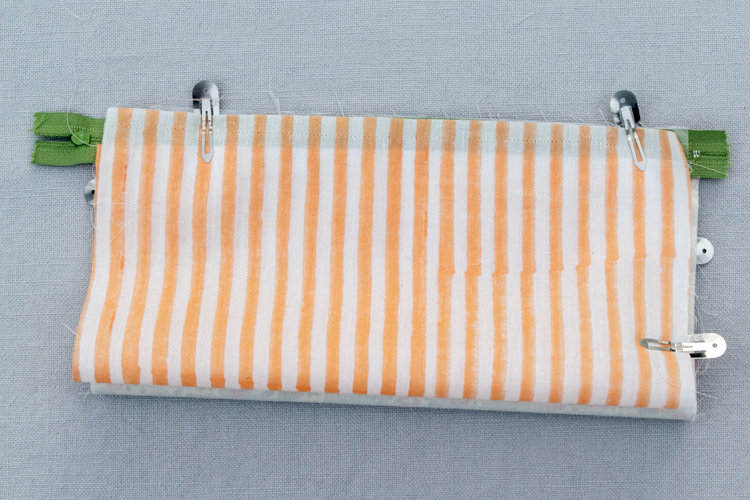
Place your fabric squares right sides together, with the vinyl squares between them. ( I used a square of muslin between my fabrics because there was a lot of show-through. If you do this as well, put the muslin square on the wrong side of your exterior fabric.) If you want your fabric pattern to go a certain way on your finished bag, make sure you align the pattern correctly now. Clip all your fabric squares together on the sides.
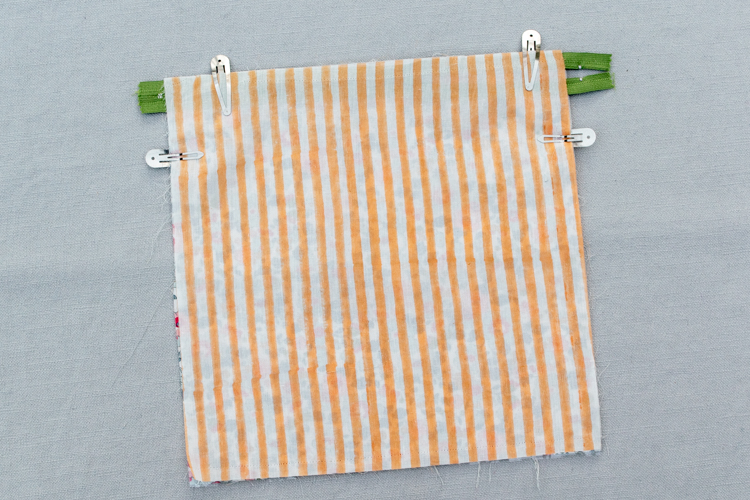
- Align the zipper
Slide the zipper between the vinyl pieces with the right side of the zipper facing your exterior fabric. Clip your zipper to your fabric squares with the edge of the zipper aligned with the edge of your fabric.

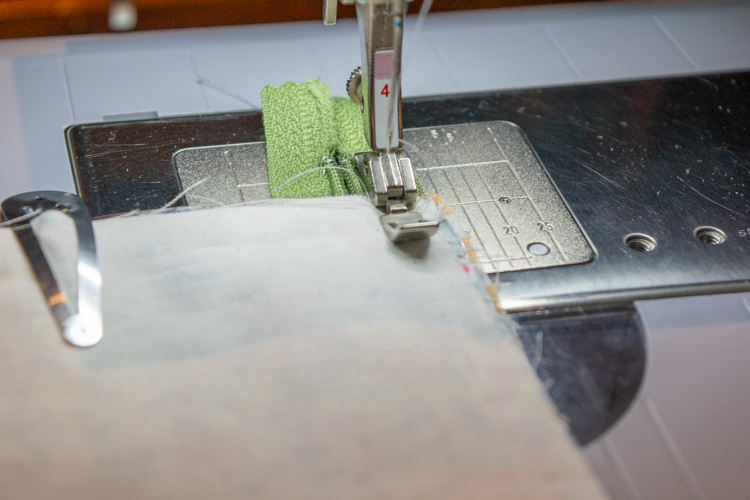
- Sew on the zipper
Using your zipper presser foot, sew the zipper and fabric sandwich as close to the zipper teeth as you can. You should have about a 3/8 inch seam allowance.
- Press your seam
With your iron on the lowest setting and a piece of scrap fabric on top, press flat the seam you just sewed. Test out ironing your vinyl with a scrap piece first!
- Align the zipper on the second side
With all of your layers laid out flat, clip the vinyl to the fabric just below it. This helps keep your layers aligned as you get your edges lined up around the zipper again. Flip each piece of fabric and vinyl around and align the edges to the other side of the zipper. At this point, you should have two tubes with fabric on the outside, and vinyl on the inside. Sandwich the zipper between the vinyl layers again.
- Sew the second zipper seam
Sew the seam on this side of the zipper, using the zipper presser foot again.
- Flip your bag
Now you are going to flip the whole thing vinyl side out. Unzip the zipper all the way first, then carefully invert your tube so that the vinyl layers are on the outside on each side, with your interior fabric facing out. This process may muck up your vinyl a little, so press the whole thing again as best you can (lowest setting, covered with muslin or scrap fabric!).
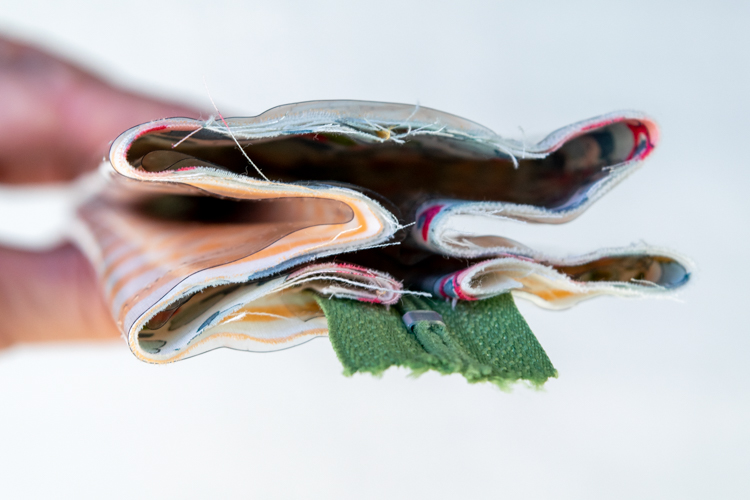
- Make box pleats on both ends
Make sure your zipper is open about 1/4 to a 1/3 of the way. Otherwise, you’ll never get your bag open once you sew the ends. You’re going to create a box pleat on both ends of your bag. It’s tricky getting both sides and all the layers even, especially since the vinyl likes to stick to itself, but you’ll get the hang of it
I recommend getting the first fold on either side of the zipper even first. Make sure the zipper is centered: measure from the center of the zipper to the side edge of the bag when your bag end is flat, then divide that number by 2. That’s how wide each section of your pleat will be on either side of your zipper. Once you get the zipper centered and the top pleats the right width, clip these first folds. Then get the inside folds to meet right under the zipper. Make sure all of your layers are playing nicely and not bunching up. - Sew the ends
Sew each end with a 5/8 inch seam allowance using your straight stitch presser foot, backstitching at both ends and over the zipper to reinforce it a bit. The vinyl can be sticky so sometimes you have to give it a little tug.
Trim your seam allowance to 1/4 inch. I use pinking shears for this to give it a nicer finish, though it’s a bit of a chore given how thick the ends are at this point. - Flip your bag
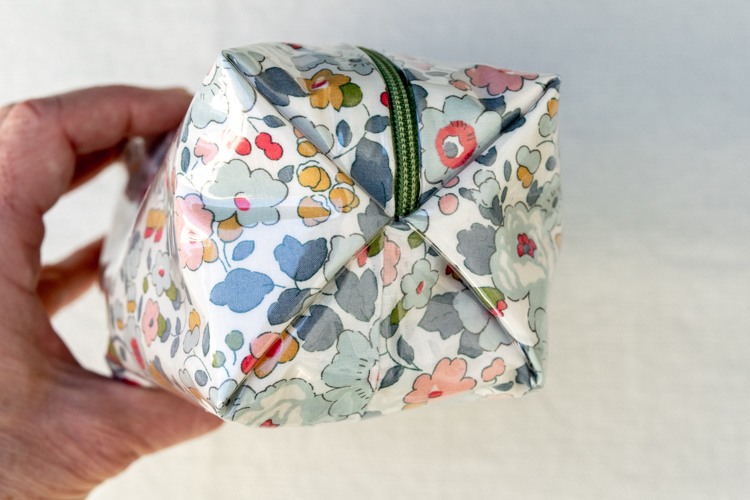
It’s time to flip it! Unzip the zipper completely and gently flip your bag right side out. Start from the center and work your way to the ends. Use your fingers to gently poke out the corners until the bag is shaped like a box. The bottom corners are easy, but the top ones are a little trickier so just keep at it.
- Shape your bag
Once you have your bag nicely shaped, stuff it with tissue or socks or something so it holds its shape. Then carefully use a blow dryer to warm up the vinyl all over the outside. This will help smooth out the vinyl and help your bag to hold its shape.
Please pin this post if you like it, and please join my email list!
I want one. Great gift idea!