

Making cyanotypes on fabric is easier than people think and lots of fun. It’s a quick and simple process that lends itself to all sorts of interesting experimentation. You can use cyanotypes for lots of projects: pillows, quilts, bags, clothing, banners, tablecloths, placemats — too many things to list.
Cyanotype doesn’t require much in the way of technical skills. You can easily play around with it and get great results without investing a lot of time or money. And it’s great for kids.
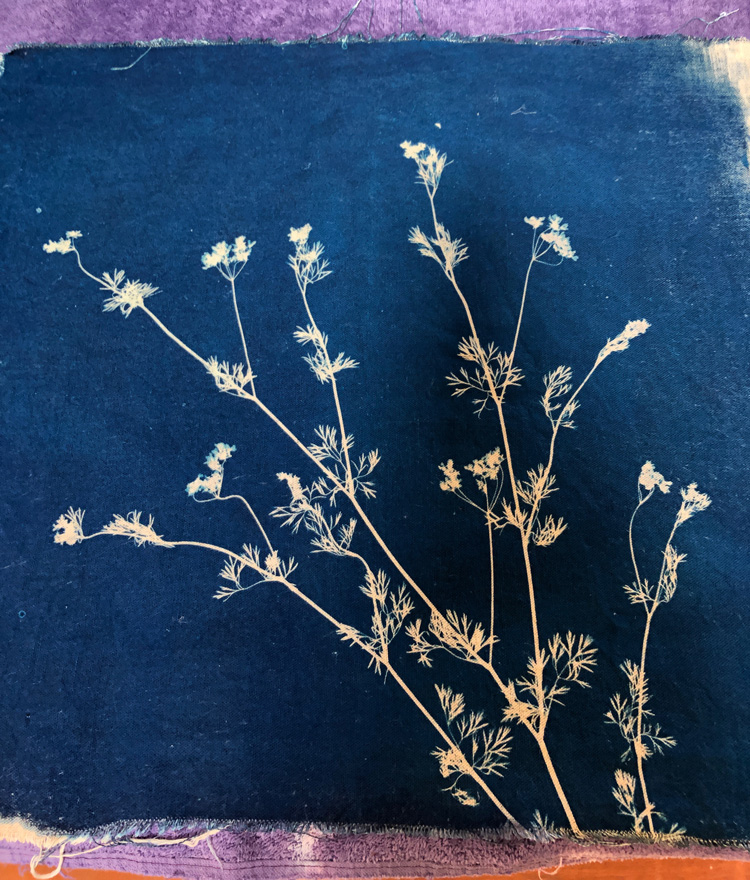
Cyanotype also offers many possibilities for combining with other media and techniques, like embroidery, painting, underdyeing (dyeing first and then doing a cyanotype on top), and shibori. On the other hand, I find the simple photograms of flowers and objects, the stark patterns of the white on Prussian blue, the most compelling.
There are four basic steps to the process:
- coat your fabric with solution
- place something on top of the fabric
- expose it to UV light
- rinse the fabric out
That’s it.
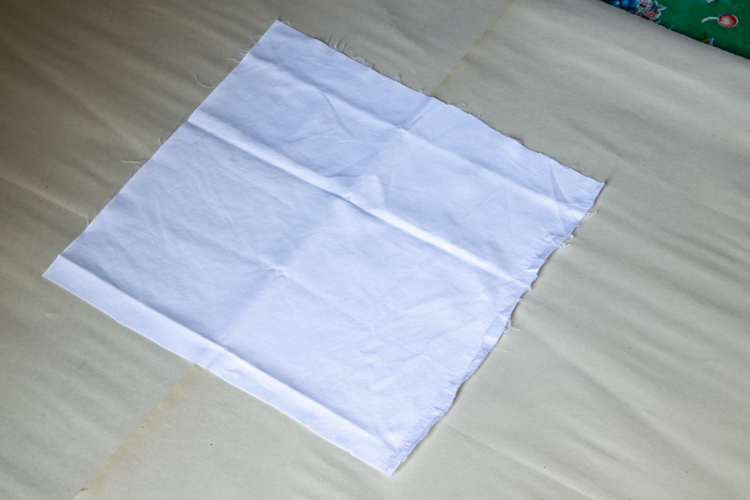
Choose and Prepare Your Fabric
Use fabrics made of natural fibers — cotton, linen, hemp, rayon, and silk work well (wool does not). The molecules in your cyanotype solution will not bind to synthetic fibers and your image will wash away (sad face).
Before printing, wash the fabric, without fabric softener, to remove any sizing or oils. You will need to scour silk with soda ash [weigh the fabric you want to scour then take 10% of that weight in soda ash (washing soda) and dissolve in 40 times that weight in water].
If you are thinking about using non-white fabric for your cyanotype, keep in mind that the blue is transparent, so the color will be additive. Lighter and brighter colors work better than very dark colors.
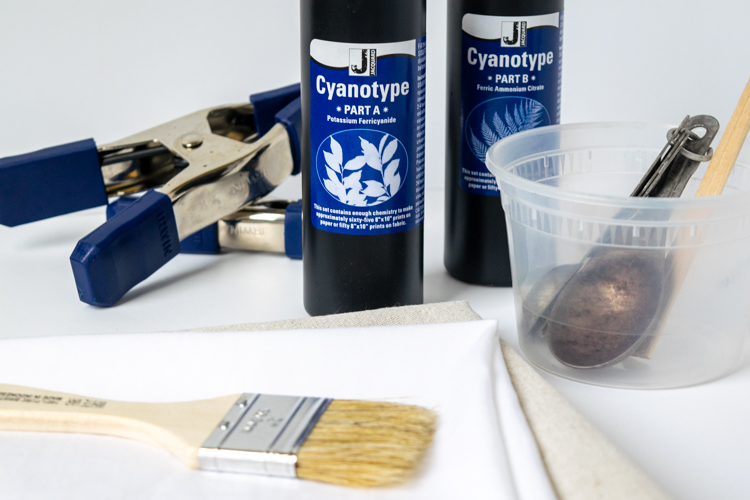
Cyanotype Supplies
- cyanotype chemicals or pretreated fabric
- glass, plastic, or stainless bowl or container
- plastic, stainless, or wood stirrer
- inexpensive paintbrush, 2 or 3 inches wide
- latex or rubber gloves
- dust mask
- measuring spoon/cup (not to be used for food)
- darkish room (more on this below)
- clothesline and clothespins (not outside), old towels, clothes hangers with clips
- cotton, silk, or linen fabric (if not using pretreated)
- watercolor paper or fabric swatches/scraps (if you want to do some tests)
- base or foundation: a piece of plywood, wood, stiff cardboard, or thick polystyrene a couple of inches larger than your fabric
- clear plexi/acrylic plastic or glass the same size or slightly smaller than the board
- clamps or bulldog clips that fit onto your board and plexi/glass when stacked
- Helpful but not essential: straight pins, glue dots, masking tape, clear acetate film for printing, gouache, film marker
Create Your Cyanotype Design
This where the fun begins! While you are gathering your supplies, also gather and think about objects, images, and techniques you can use to make your prints.
Collect Objects
Of the three kinds of cyanotypes, a photogram is when you lay an object on a light-sensitive surface and its shadow creates an image on the surface. Anything with an interesting shape will work:
- leaves, branches, seedpods, pressed flowers, vines, ferns
- natural materials like feathers, mushrooms (sliced?), bones, skeletons, and insects
- everyday objects like scissors, jewelry, toys, Christmas ornaments, buttons, glass stones and beads
- translucent things like plastic bottles and bags, cut or broken glass, bubble wrap, scotch tape
- lace, mesh, fringe, wire
Use Clear Film for Images and Text
You can also print text, images, handwriting, or drawings onto clear acetate film (be sure you get the right kind for your printer) and use these in your exposures.
Be aware that the edge of the film will be visible in your print. You can choose to trim it to a particular shape or cover the edges with other objects, or figure out some other way to disguise it or incorporate it.
Holding Elements in Place
Unless you are working on a completely still day and the sun is directly overhead, you are going to want to hold the design elements in place while you are exposing your fabric. The glass/plexi and clamps will work very well for flat elements like film, lace, feathers, etc. You can also tape things to the top side of the plexi.
Use tacks, straight pins, tape, and removable glue dots to hold 3D items in place. Just be careful about putting tape or other sticky things on your fabric — make sure it isn’t going to leave a residue. And keep these fasteners inside the outline of your object so they won’t show in your design (unless you want them to).
If you are going to use pins or tacks to secure things, make sure you can get them into your board. Anything pinned close to the fabric will print with a crisp edge, and items that are farther away will have a blurred, fuzzy edge. You can use this to great effect with things like branches and plants.
Exposure and Light
- You will need a place to work that has very low natural light. Artificial (fluorescent, incandescent, or LED) light is ok because there is so little UV light that the reaction will be very slow. Still, try to keep all light as low as possible. If your fabric or solution starts turning blue, there’s too much light. A dark garage, basement, or workshop is perfect.
- If you can, make your cyanotypes on sunny days between 10 am and 3 pm when the temperatures are around 65–75º F. Late spring and early fall days are usually good, depending on where you live.
- You will need to angle your board so that it is perpendicular to the sun’s rays. This isn’t geometry class so don’t worry about being precise. Just generally prop up the board on something sturdy so it is fully and evenly exposed.
- The exposure time is usually about 10 minutes, given optimal conditions. Anything outside of full sun, in the middle of the day, on a mild day, will vary the exposure time. You can experiment with this. Weaker sun will create a less intense blue. A longer exposure time will allow light to get through things like flowers, leaves, or film, revealing the internal structure or texture. Clouds and shadows will also affect your exposure.
- I recommend doing a test exposure with elements similar or the same as what you are using in your actual design. Set up a test piece, then set 3 alarms/timers for 5-minute intervals, so you’ll be testing 5, 10, 15, and 20-minute exposures. With a light-blocking board or fabric, when the 5-minute alarm goes off, cover 75% of your cyanotype, then move it to cover 50% at the 10-minute alarm, and 25% at the 15-minute alarm. Once you rinse and dry your fabric, you’ll know what each of those exposure times will look like and can decide on the best time for your print.
- Pick a spot for your exposures where you won’t have any shadows on your board, nothing will fall onto it, and no one will bump into it.
How to Make Cyanotypes on Fabric
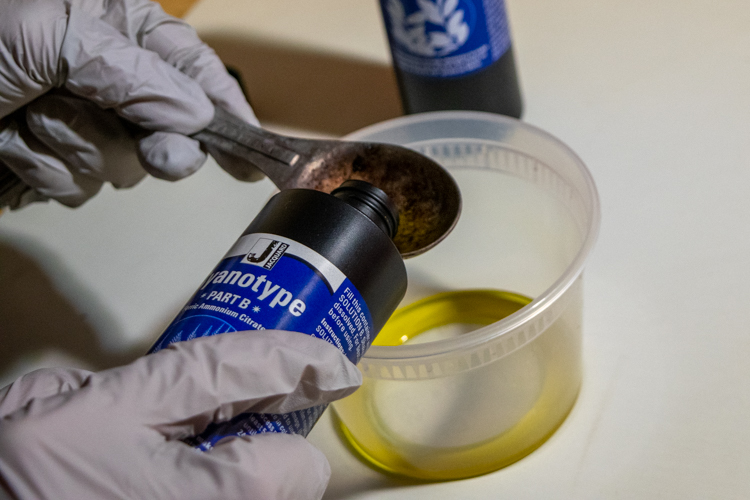
- Make the two solutions (the day before)
Add water to the two chemicals according to the directions on the bottles. Wear your gloves and mask, and work in an area away from food and wind. Let them sit for 24 hours to dissolve completely. Once these are mixed, they can last for months if kept in a cool, dark place. Once the solutions are made you don’t need to wear the mask anymore.
- Prep work area
In your workroom, lay some newspaper down on a work surface that is large enough to fit your fabric. (I use the floor of my garage.)

- Mix solutions
Still in your workroom and wearing gloves, mix together equal amounts of each solution in your container, and gently stir to combine. I only make up a small amount at a time, like a quarter of a cup, so I don’t have any left over. If you store it in a lightproof container in a cool, dark place the combined solution may last a few weeks or even a few months.
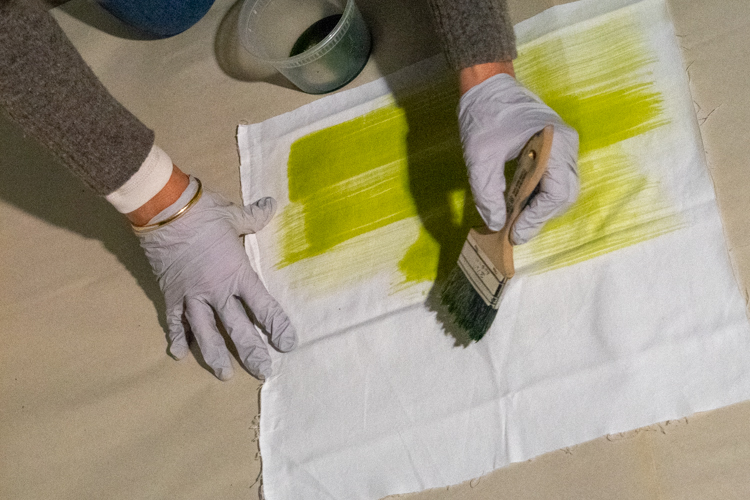
- Paint solution on fabric (or paper) and let dry
Dip your paintbrush into your solution, and then remove any excess on the edge of the container. You don’t want the brush fully loaded or the solution won’t go on evenly. Using long, even strokes paint the solution onto the fabric, making sure it is evenly applied. It should be wet but not dripping. Hang your fabric up to dry somewhere dark on a clothesline or hanger until completely dry. If you aren’t going to use it right away, put it in a lightproof box or bag and tuck it away in a cupboard.
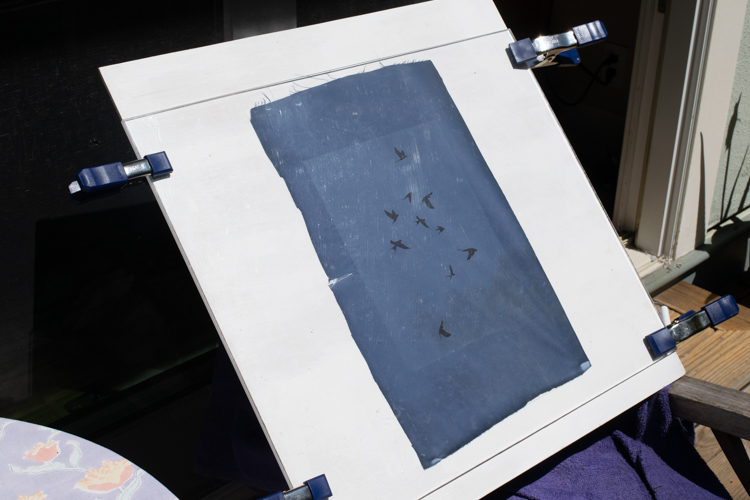
- Lay out your design
In your workroom, spread out your fabric on top of your board. Then arrange the design elements on top of your fabric.
Once you have your elements arranged, if you are only using flat elements, place your plexi/glass on top of the fabric and secure at the corners with clamps. Make sure you leave the bottom edge free of clamps, though.
If you are using 3D elements without plexi/glass, make sure you secure the fabric to the board as well.
If you are planning a complicated or intricate design, work out your composition before you lay out your fabric so that you aren’t spending more than 15 to 20 minutes with your fabric out and exposed to any light. If your fabric starts turning blue, it’s being exposed! - Expose your fabric
Moving with purpose, carry your board to your exposure spot and place it so it is facing the sun and angled towards the sun’s rays. If the sun is directly overhead then you don’t need to prop it up. Start a timer for your exposure time.
Don’t move or jiggle your board while it’s being exposed. If you are removing elements during your exposure, be sure you can do so easily so the board doesn’t move or shake.
When your fabric is properly exposed it will look light, greenish-gray where the sun’s rays have hit, and yellow-green where it is unexposed. - Rinse your cyanotype fabric
Once your exposure is finished, quickly carry your board back to your workroom and remove the clamps, glass, and design elements. Rinse your fabric in a clean bucket of fresh water, changing the water a few times, until the water is clear. It takes a few rinses to get all of the solution out, more if the fabric is thicker or particularly absorbent.
The blue will deepen in color over the next 24 hours, as it oxidizes. If you are impatient like me, you can add a little hydrogen peroxide to the rinse water and the color will deepen immediately. A teaspoon of the peroxide is enough for small pieces of fabric. - Dry your cyanotype fabric
When your fabric is well rinsed, either hang it up to dry or lay it out flat on towels or clean absorbent paper somewhere away from direct sunlight.

Taking Care of Cyanotypes on Fabric
- Cyanotypes don’t react well to basic (ph above 7) environments, so don’t use any soap or detergent that contains phosphates. (Phosphates were banned from laundry detergents in the U.S. in 1993). Don’t use fabric softener or bleach. Do not use Synthrapol or SolarFast Wash. Be as gentle with them as you can, but you can machine wash them. You might want to test your soap or detergent on a piece of scrap cyanotyped fabric to be safe.
- Be careful when ironing your prints. However, if you do end up with an iron mark on your fabric, do not despair. It may go away. I was heartbroken after I ruined a print with an iron mark; when I woke up in the morning, the mark was gone!
- Do not put your finished cyanotypes in the sun! They will fade.
Learn More
More on Using Film and Images
It’s easy to turn images into negatives, if you want them to print as positives, using the Jacquard Cyanotype Negative Generator. You can get beautiful effects by printing negatives and positives together. Things really start to get interesting when you start combining objects with images…
One of my favorite places for images is The Commons on Flickr, a digital archive of images in the public domain. It includes many museums, libraries, historical societies, and universities. I have created a small gallery of my favorite high-quality images. It’s fun to just search on a word and see what comes up. Then you can filter by image size, date created, and many other criteria.
Another option: you could write or paint on film — be sure to use an opaque paint (like gouache), or a film marker or china marker. Try doubling up layers of film for higher contrast.
History of Cyanotypes
Cyanotypes, invented in 1842, were popular in Victorian England until being replaced by other forms of photography. Anna Atkins, an English botanist, used the process to create beautiful images of algae (seaweed). She is probably the most famous cyanotypist (I’m making that a word). Once photography, as we know it today, became common, cyanotypes were really only used by engineers and architects to make blueprints.
Books about Cyanotypes on Fabric
If you find yourself really getting into making cyanotypes on fabric and want to learn more, there are a couple of great books available, Cyanotype on Fabric by Ruth Brown, and Blueprints on Fabric by Barbara Hewitt. Both are very thorough, but the one by Ruth Brown was written more recently and has an extensive section on digital artwork.
Please pin this post if you like it, and please join my email list!
Thanks so much
Very easy to read instructions
Just what i wanted to read. Thakyou. Slso for the futher reading
Just discovered this process, haven’t tried it but sure will after reading your instructions. Thanks so much for sharing, and the wonderful easy to follow instructions. I love what you made. Many thanks !
Hello Diane,
I am attempting to cyanotype on fabric. I bought the Sensitizer Set rom Jacquard. I let the solution soak for 24 hours, brushed on the fabric and let it sit until dry. Exposed the prints and then rinsed off like instructed. The issue is that when I rinsed with cool water the whole print washed off. Do you have any idea why that is happening?
I read that that could happen on synthetic fibers but I’m working on linen and hemp.
Thank you and stay well! Love your site and writing,
Emily
Thanks for the process above. I arrived here searching for unido as I have experienced the same today as a first foray into cyanotype. I tried on hemp cloth and hemp paper as well as watercolour paper. The hemp cloth print literally washed out the others looking good at this point. I’ll be interested in anyone’s feedback on the rinsing of hemp cloth as I have some more prepared hemp cloth and paper. Maybe there is something we can add to the rinse water ?
Thanks for this clear explanation. I’ve been making cyanotype prints for several years and combining them into large art quilted pieces. But your notes are clear reminders of the process. Much appreciated.
Many thanks, your writing and examples are both lucid and beautiful,