
We are making so much homemade sourdough bread these days, and have been struggling with how to keep our bread fresh longer without adding a bread box to the kitchen clutter.
I’m tired of using paper bags in the microwave, which ends up making a mess anyway. And plastic bags, well, no thanks.
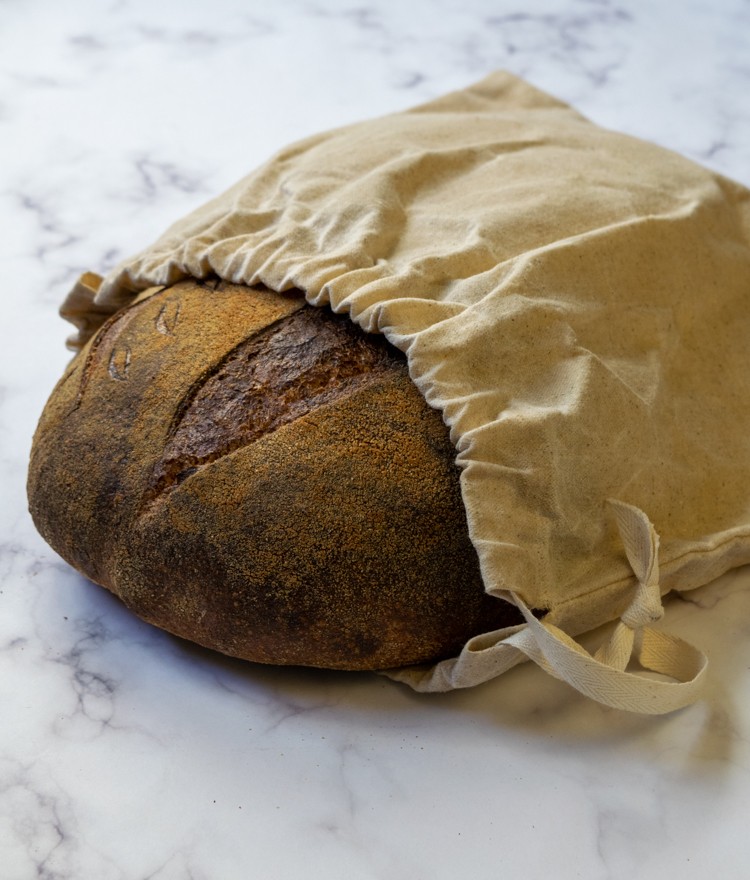
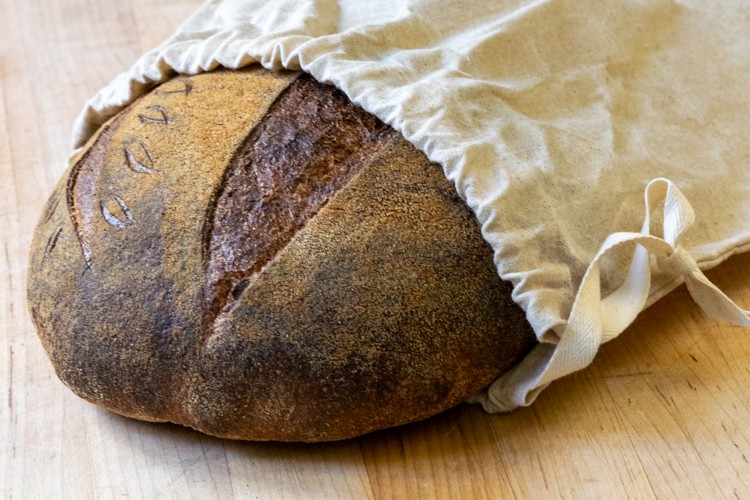
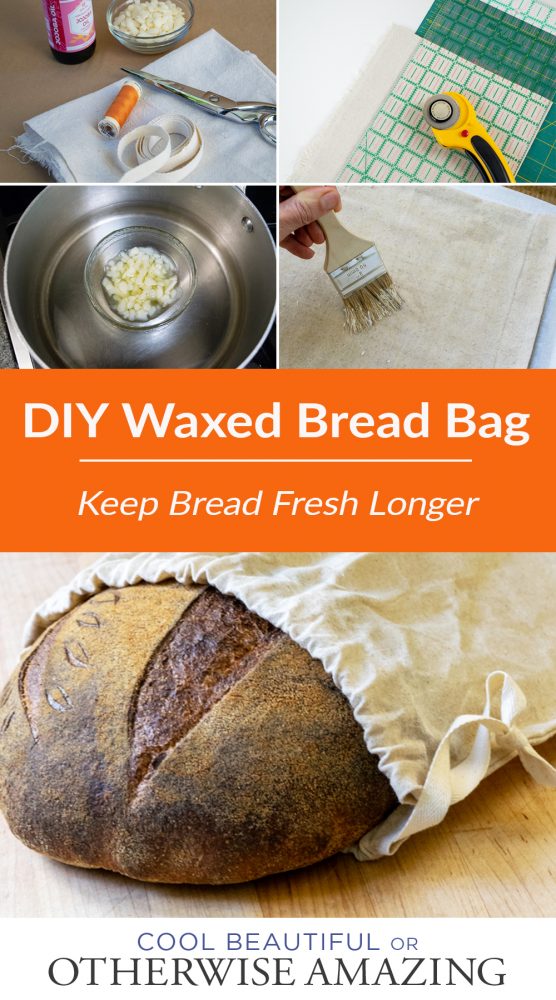
I saw a bunch of sites selling linen bread bags — so pretty, so french. But they get terrible reviews! Apparently the linen itself isn’t enough to hold the moisture in. So I decided to try waxing the linen with beeswax, like all those wraps you see everywhere now. And presto. Perfection.
This bag fits a boule shaped loaf that is roughly nine inches in diameter. Of course, you can make the bag any shape you want to fit the kinds of loaves you eat. The dimensions for the ribbon channel would stay the same.
Supplies for Making the Bag
- linen or cotton fabric, prewashed, at least 14 inches x 28 inches (I used Osnaburg fabric for mine)
- thread to match your fabric
- sewing machine
- iron
- cotton ribbon, twill tape, or cotton cording, about 3 feet
- fabric scissors
- pinking shears (optional but nice)
- rotary cutter
- cutting mat
- straight edge (ruler, quilting ruler, or something similar)
- fabric marking pen or chalk
Supplies for Waxing the Bag
- parchment paper
- baking half sheet, 13 x 18 inch or larger
- beeswax pellets ( about 3 tablespoons)
- jojoba oil (1 tablespoon)
- small heatproof glass bowl
- 2-inch paintbrush (use a cheap one — you won’t be using it again for anything other than beeswax)
Time needed: 1 hour and 30 minutes
Instructions for a Sewing a Waxed Bread Bag
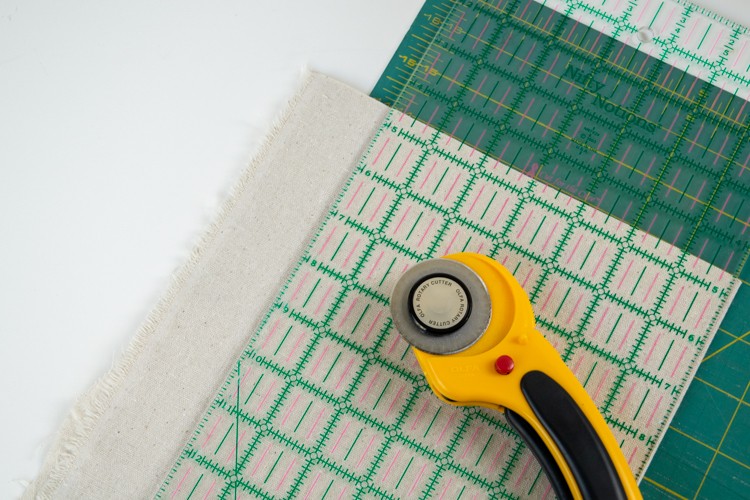
- Cut your fabric
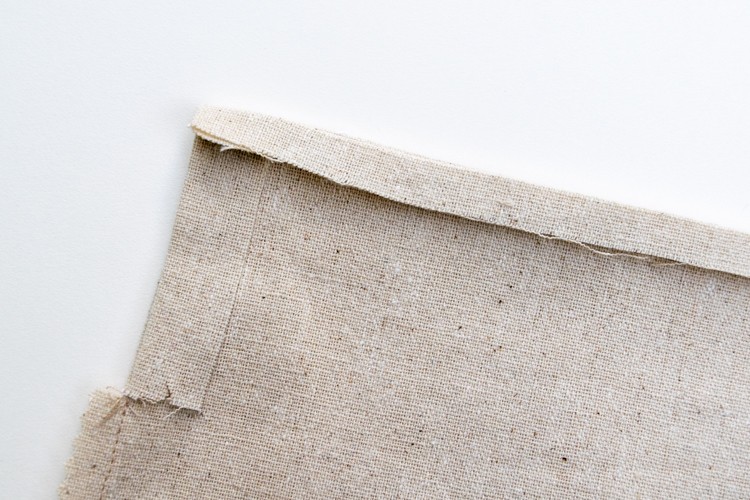
Make sure you have pre-washed your fabric to remove all the chemicals. (You also need to iron it.) Using your cutting mat, ruler, and rotary cutter, cut a piece 14 inches by 28 inches.

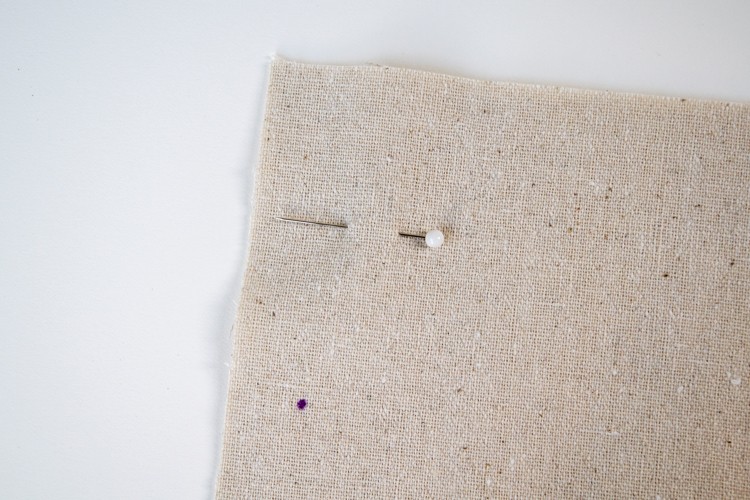
- Pin and mark your fabric
Fold the fabric in half lengthwise, right sides together, and pin the side edges. You should now have a 14-inch by 14-inch square.
With the folded edge closest to you, measure 3 inches from the top edge, and make a mark 5/8 inch in from each of the side edges. Do this on both sides. - Sew the edges
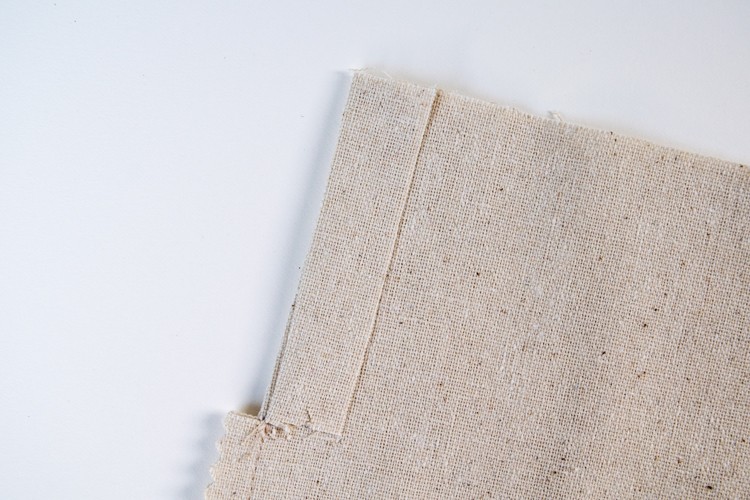
Sew a 5/8 inch seam on each side from the bottom folded edge up to the mark you just made. Backstitch at the beginning and end of each seam.
- Clip and press seam allowance
Clip the seam allowance on each side at the 3-inch mark you made. Fold in the top 3 inches of all four pieces of fabric along the seam line. Press them flat.
- Create the ribbon channel (step 1)
Fold down the top edge of the bag 1/4 inch and press.
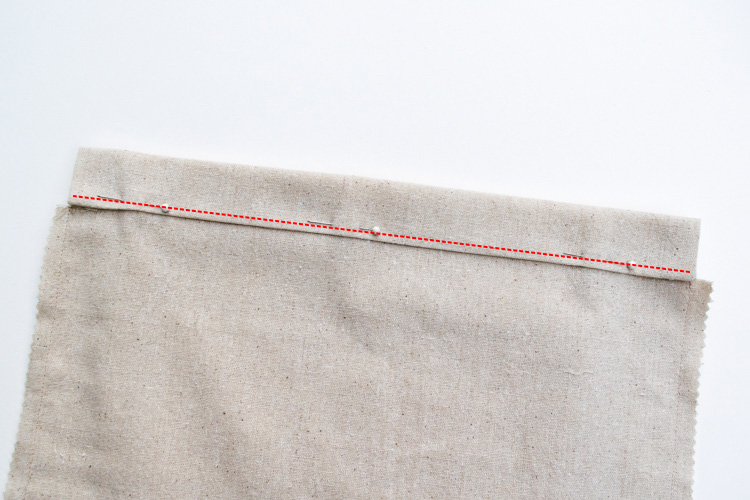
- Sew the ribbon channel seams (step 3)
Sew a 1/8-inch seam along the edge on each side of your bag to create the channel for your ribbon or cord, backstitching at the beginning and end. Make sure you have pulled the other layer clear so you don’t stitch the two sides together!
- Trim the seam allowance
Trim the seam allowance on each side with the pinking shears, and turn the bag right side out. (I trimmed mine before I pressed and sewed the ribbon channel.)
- Prep for waxing your bag
Preheat your oven to 225º. Cut a piece of parchment paper to cover your baking sheet and lay your bag out on the paper.
- Melt the wax
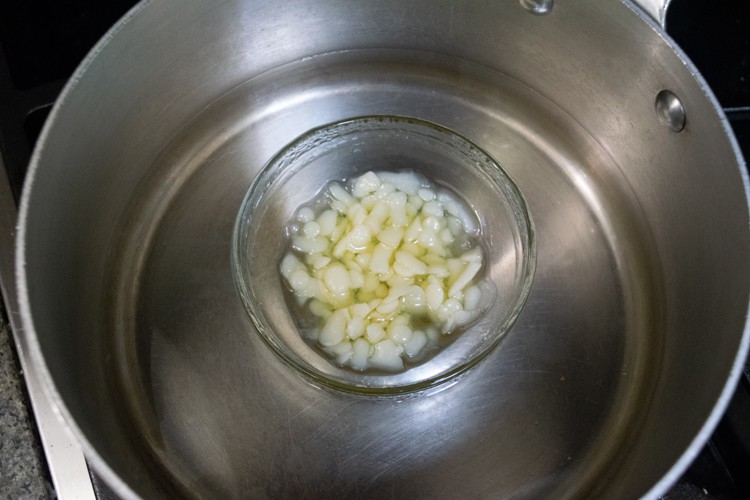
Bring a cup or so of water to a simmer in a saucepan. You want the water about an inch to an inch and a half deep. Put 3 tablespoons of beeswax pellets and 1 tablespoon of jojoba oil in a heatproof glass bowl. Make sure you use a bowl that is tall enough that the water won’t come over the edge, or pour out some of the water.
Turn off the heat under the water and carefully set the glass bowl into the water, and wait for the wax to melt. It’ll take about 5 to 10 minutes. You might need to turn the heat back on for a few minutes. Keep it very low.
Another Technique Not to Try
The first time I tried waxing the fabric, I sprinkled the beeswax and the jojoba oil on the fabric and then put the whole thing in the oven to let it melt. Then I spread it around with the brush and popped it back in the oven for a few minutes.
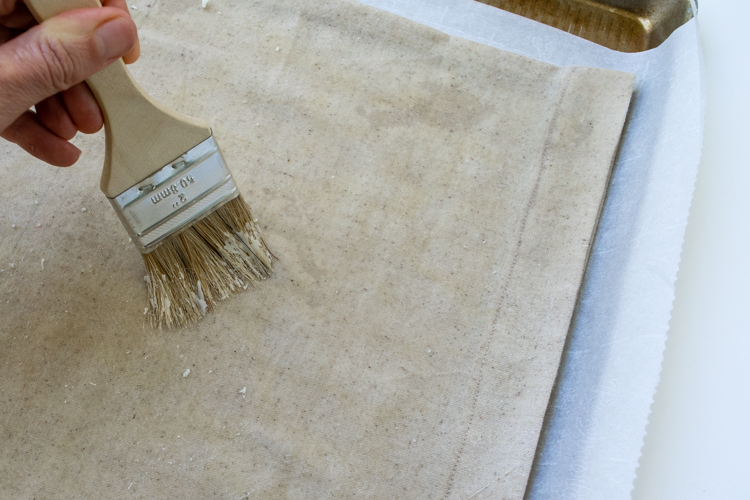
A lot of people use this technique for making beeswax wraps. As the fabric cooled though it got this mottled pattern to it, and in the parts that were darker the fabric wasn’t as stiff. I think it was because the wax and the oil didn’t blend together very well. So don’t make my mistake and skip this step! - Brush the wax and oil mixture onto your bag
Use the brush to stir the melted wax and oil a little. Then start brushing the wax mixture onto your bag. The wax will cool and harden as you brush it on — that’s ok. And you don’t need to cover every last inch of the bag. It’ll spread out. But do put some on both sides.
- Put the bag in the oven
Pop the bag on the half sheet into the oven for 5 to 10 minutes so that the wax remelts.
- Spread the wax around again
Use the paintbrush to spread the wax around more and even it out. Make sure you get it on the seams so those are sealed as well. I also used a scraper (anything will do, a piece of stiff cardboard or plastic) to remove any excess.
- Let your bag cool
Stick a couple of wooden spoons or dowels inside your bag to open it up while it cools. I held the wooden spoons up in the air with the bag on top of them and gently waved it back and forth to get it to cool faster.
- Thread and tie your ribbon
Use a yarn needle or a large safety pin to thread your ribbon or tape through the ribbon channel on both sides. Then even up the ends and tie an overhand knot with the ends.
I’m going to be honest with you, when I made the first waxed bread bag I wasn’t sure if it would actually keep the bread fresh. I really thought that it would work, but we all know how that goes sometimes…
Actually, the waxed bag ended up working better than I thought it would! After three days, with just a little nub of the bread left, it was still very soft on the inside and nice and crispy on the outside.
Update: Washing Your Waxed Bread Bag
I recently washed one of my bags. It wasn’t looking so great after months of use. I hand-washed it in lukewarm/tepid water with a mild soap. (I use Soak for all my hand washing, but anything similar will work.) It’s important to use the right temperature water: too hot and it’ll dissolve the wax and oil and wash it off, too cold and the bag is stiff and hard to work with, and that will wear the fabric.
Hang it up or lay it flat to dry, and then hit with the blow dryer or pop it back in a warm oven for a few minutes to smooth out the wax again. Mine looked almost new!
If you are interested in baking your own homemade sourdough bread, check out this step-by-step tutorial for beginners.
Please pin this post if you like it, and please join my email list!
I really want to try this! Is the bag washable after it’s been waxed? Does it even need to be washed? Lovely post, thanks!
I rinsed my bag out in the sink with warm water once, just to give it a refresh. If you’re ok with bread crumbs, then it definitely doesn’t need regular washing. You can also just turn it inside out and give it a good brushing.
A brushing! Good idea.
I get a reaction from jojoba oil. What type of oil would serve the same purpose? Thanks.
Jojoba oil is unique because it is actually a liquid wax, so it doesn’t spoil and smell rancid the way an oil does. I have read that fractionated coconut oil lasts indefinitely as well so that would be one you could try. Fractionated means it is more liquid at room temp than regular coconut oil. Hope that helps!
These are great! How do you clean the bag?
I just rinse it in warm water. The bag is pretty much the same as the beeswax food wraps that you see everywhere, except since you are only using the bag for bread it won’t get as dirty. I’ve only washed mine once since I made it.
Thanks for this tutorial! I already have some linen bags so just need to wax them! I’ve seen bread bags for sale that also include resin (in addition to beeswax and jojoba oil), but do you find it wasn’t necessary here since they don’t need to stick per se (unlike beeswax wraps)? Thanks!
Yes — that was my thinking at least! Why make it sticky if it doesn’t need to be?
This is a great idea! I am planning to make one tomorrow but I think I’ll use French seams because I think it will be easier to “de-crumb”. Also, do you think if you put a piece of parchment, cut to size, inside the bag before you brush on the melted wax/oil it would penetrate the linen? I was thinking it would keep it from sticking together?
French seams are a great idea! You could use the parchment between the layers — I don’t think the fabric sticks together so I don’t know that it’s necessary so much.
I’m so excited by this idea but looking for a bread bag to put into the freezer. Have you tried using this in the freezer?
I haven’t tried it in the freezer. I would think it would just create more wear and tear on the fabric, so maybe use a canvas or other thicker fabric. Try it and if you get freezer burn, maybe try two bags?
To freeze bread : wrap in Saran Wrap and then in foil. When your ready to eat . Heat the bread in the oven for five-ten minutes. Enjoy and place in your cotton/linen waxed bag.
Does your bag actually close tightly with the drawstring? I’ve tried and can’t produce one that does. The waxed fabric is too thick. Thanks.
I haven’t had a problem with that. Maybe it’s the thickness of the fabric you are using?
do you even need to wax the casing? Does that compromise it’s ability to keep bread fresh?
Not sure exactly what you mean by casing…
The casing (sewing lingo) would be what you referred to as the “ribbon channel”.
I love this idea! Did you brush the wax on the outside? It seems like it. I would’ve thought it would be waxed inside so I’m questioning if I understood.
Thanks!
Thanks! The wax goes on the outside, but it soaks through the fabric, so it really makes no difference.
Hello! I make several small loaves at a time and freeze all but one – do you think these waxed bags would be okay in the freezer too?
Thanks,
Emma.
The wax gets quite stiff when it gets cold so the fabric will get damaged more easily. If you use a pretty sturdy fabric it might work better, and seal it up more tightly… I think it’s worth trying. Let me know how it goes if you do!
Is Jojoba oil a must have? Can I use olive oil or grapeseed oil instead?
Unlike most oils, jojoba oil never goes rancid. So no, you can’t substitute other oils.
very good point. That should be printed in your article as an update. Many different oils get tacky, go rancid and are too thin. Like grapeseed oil would be. And it has to be food grade. Tung oil for instance hardens well once cured, and is food safe. I might try that one.
Hi Merel,
I do not have Jojoba oil on the farm, but I do have olive oil. Can I replace it with that?
Regards
Sicilie
No, because the olive oil will go off (rancid) after not too long. Jojoba oil doesn’t go off.
The reason jojoba oil doesn’t go rancid is because it’s technically a wax, not an oil.
I will definitely try to make this bag to keep my homemade sourdough bread fresh!! One question though, I was thinking that these bags would look great with some personal touches, since the wax goes on the outside, could I apply the HTV before or after waxing it? Or would it be better to apply the wax on the inside?
Thanks!!!
-Ana
Hmm not sure how heat-transfer vinyl would work with the hot wax and the oven… did you try it? I’ve thought of doing some embroidery on the bag before waxing, or maybe applique.
Do you need the oil at all?
Apparently the oil makes the beeswax more flexible so it doesn’t crack.
Hi! I’m super confused about how to make the drawstring channel. What sides do we sew to make the 1/8 seam? I’ve tried several different ways.
Hi Natalie. It’s tricky to explain. I have uploaded a new image for that step so you can see where to stitch. Just be sure you don’t sew the opening of your bag closed! Only sew through one side of the bag at a time.
Could I substitute soy wax for the beeswax?
Thank you so much!! This was super helpful 🙂
Worked great! Thanks so much for the “how to”. I used a double boiler (the bowl fits over the saucepan) and it worked great. I didn’t need to reheat the wax throughout the process (30 minutes). I put the bags (did 2) in the oven for 10, spread around wax…added a bit more wax and back in the oven for another 10. Did this one more time till I used up the wax! Now the test to see if it keep my bread from drying out. I have pics but couldn’t load them. Thanks again!
Hi! Curious How your bags turned out, did it keep your bread from drying out and going hard? I’m having trouble w mine.
Thank you so much for such clear instructions! I made four bags and am so pleased with the results.
Trying to make this and the directions are so difficult to follow. There’s missing information and the photos don’t help at all. Very frustrating.
Sorry to hear you are having trouble! If you can be more specific with your challenges, maybe I could help?
Food grade or cosmetic grade beeswax pellets?
I use 100% pure organic beeswax, safe for cosmetics or food.
How thick is your twill tape? Just want to make sure I purchase the correct supplies so that it will fit through the channel properly. Thank you!
About 1 centimeter or a half inch.
It might be helpful to those with limited sewing knowledge if you add more info to Step 5. Mention that the fabric should be folded down a 2nd time so that it meets the side seams. Then it will be ready for sewing the casing/channel shut. I’m eager to try making a bag!
Whats the oven temp supposed to be set at?
Just the warming setting should be fine. You just want the wax to spread out & soak into the material
Do you brush the melted oil and wax on both sides of the bag? Also I’m confused. Do you wax the inside or outside? I would think inside since that is what the bread is touching.
Thank you 😊
Well…I made two bags. How do you know if you used enough beeswax? 😄
Hope they are good to go!!