This recycled sweater tote was kind of an impulse project that came together very quickly after I came across this sweater while cleaning out our storage. Can I say it was quick if I’ve been saving the sweater for 20 years? I think so…
I have a stash of sweaters that I’ve saved over the years, pretty colors or patterns that still spark joy but that I’ll never wear again. (At some point I thought I looked good in boxy sweaters in a men’s large, which isn’t actually true…) This blue one dates all the way back to college, and I have photos of me wearing it traipsing around Italy on my study abroad program con bello ragazzi. I’ve always thought it was a beautiful color and was very happy to revive it into something useful.
Of course, if you haven’t been hoarding sweaters for decades, there are plenty of wool sweaters out there just waiting to be turned into something! And since the fashion industry is one of the most wasteful and polluting, anything we can do to minimize that is a win all around.
Supplies
- large adult size wool sweater
- thread to match your sweater
- sharp sewing scissors
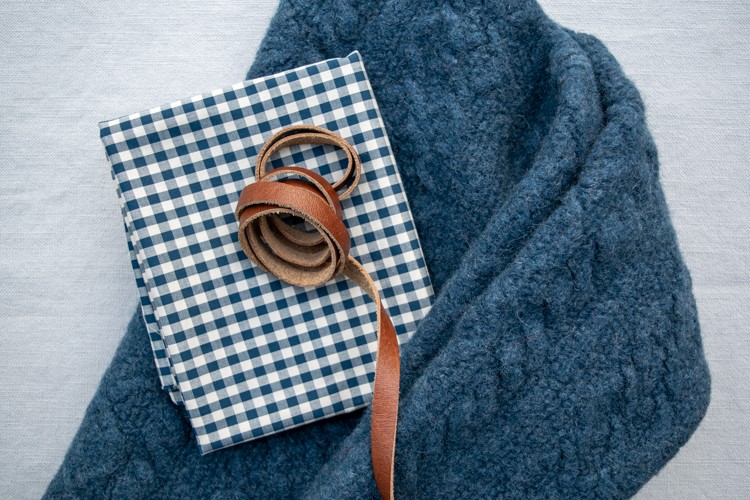
- fabric for lining, if you choose to line your bag
- straight pins
- sewing machine
- hand sewing needle
- iron
- leather strap (length depends on how long you want your handle)
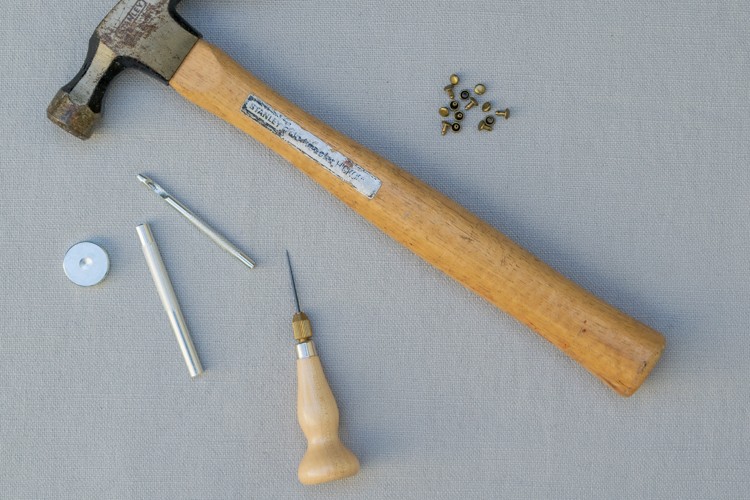
I used this one, or premade handles - rivet kit with 1/4 inch or 1/3 inch size rivets
- hammer
- cutting mat
- utility knife
- awl
Instructions
Time needed: 1 day and 3 hours
- Felt your sweater
Felt your sweater in your washing machine. Make sure you use hot water. I ran mine through my front loader twice on hot, low spin speed, with a little detergent. Worked perfectly. You want a nice dense material, especially for a bag. Let dry completely.
- Cut your sweater pieces
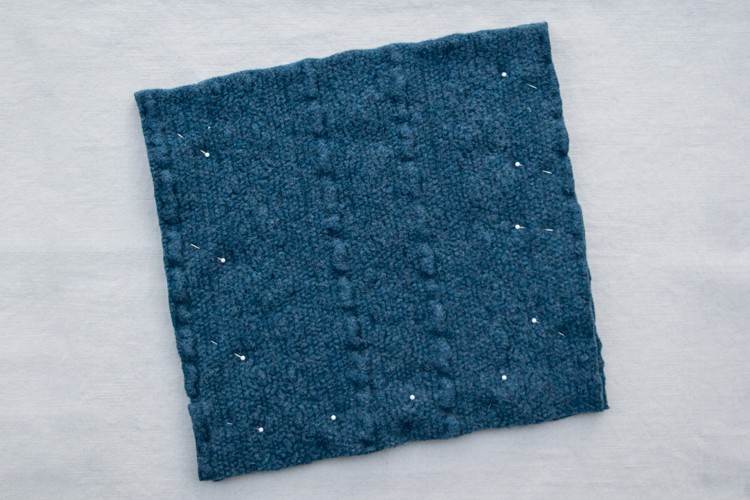
Using your scissors and your quilting ruler(?) cut two rectangles, 17 inches wide and 16 inches long, from the front and back of the sweater, paying attention to any pattern or ribbing that you want to keep (or not). Cut off any ribbing if it’s distorting the fabric.
My sweater had a nice finished edge at the bottom so I kept that to use as the top of the bag. Of course, you can adjust these measurements to make any shape bag you want. Just make sure to adjust the lining shape as well if you choose to line it. - Sew your sweater pieces
Place the right sides of your sweater together and pin the side and bottom seams. Sew the two side and the bottom seams with a 5/8 inch seam allowance, backstitching at the beginning and end. Adjust the pressure of your presser foot so it doesn’t squish down your felt and distort its shape.

- Trim the seam allowance
Trim the seam allowance of your sewn pieces to 1/4 inch.
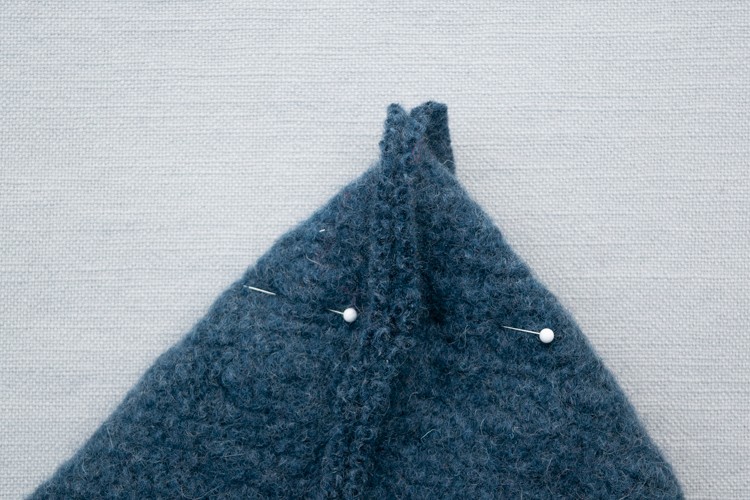
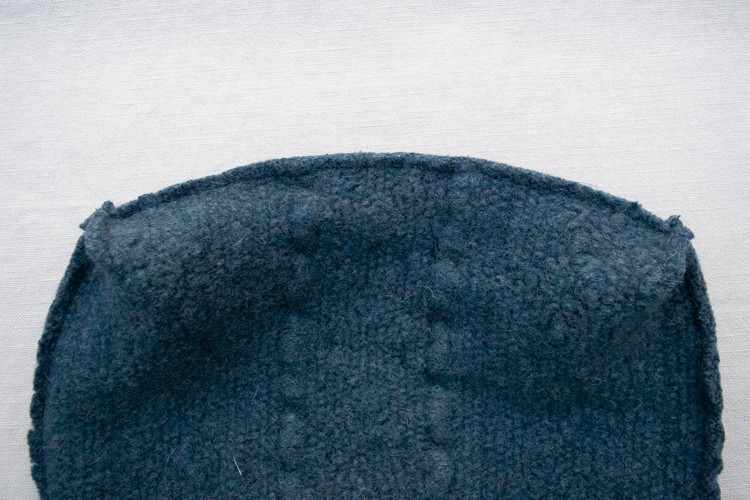
- Sew the gusset seams
Match up the bottom and side seams in each corner of the bag so you have a triangle shape. Pin the felted fabric together. Measure 2 1/2 inches down the sides of your triangle and sew a seam across it. You can use pins to mark your measurements or chalk. The seam will be about 3 1/2 inches long.
- Trim the gusseted corners
Trim off both the triangles in the corners, leaving a 1/4 inch seam allowance.
- Cut the lining pieces (optional)
Cut two pieces of fabric the same size as your sweater fabric, so 16 inches by 17 inches if you are using the same measurements as me.
- Add a pocket to the lining (also optional)
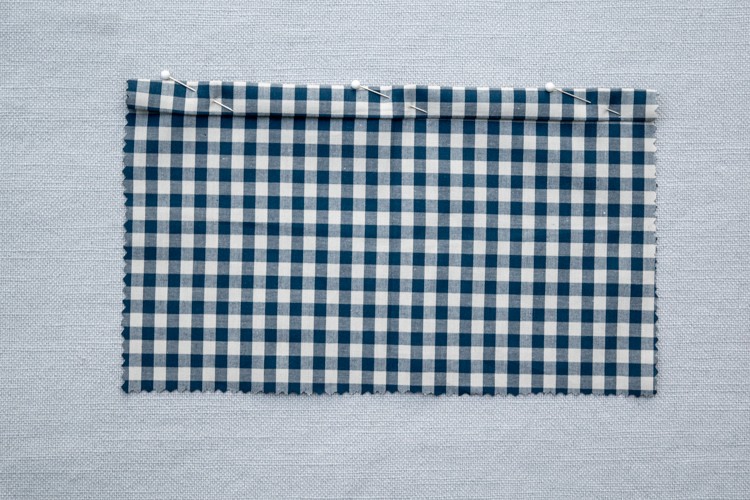
Cut a piece of fabric 6 5/8 x 10 inches. Fold over the top 1/2 inch of your pocket towards the wrong side, then fold it over again another 1/2 inch. Press and pin in place. Topstitch this fold in place 3/8 inch from the top edge. I used pinking shears on the sides and bottom.
Fold the side edges in towards the wrong side 5/8 inch and press, then do the same with the bottom edge of your pocket. - Sew on your pocket
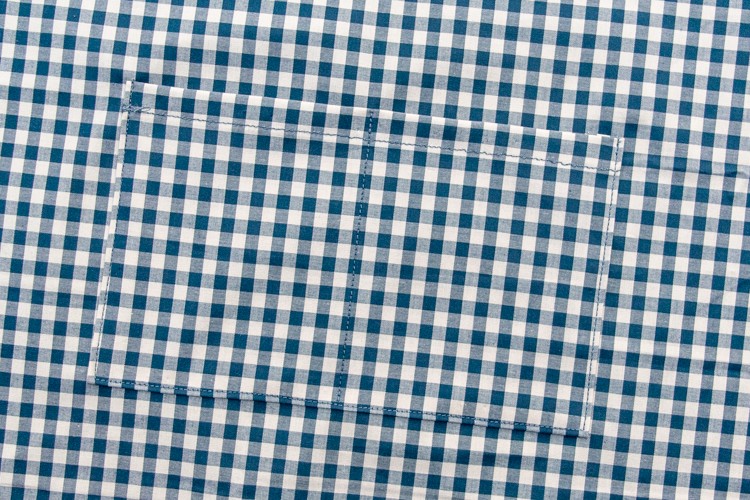
Pin your pocket to the right side of one of your lining pieces about 4 inches from the top and centered side to side. Topstitch the pocket in place along the sides and bottom, backstitching at the beginning and end. If you want to divide your pocket into two smaller pockets, sew a seam down the center of your pocket (or wherever you want to divide it), backstitching at both ends.
- Sew your lining pieces
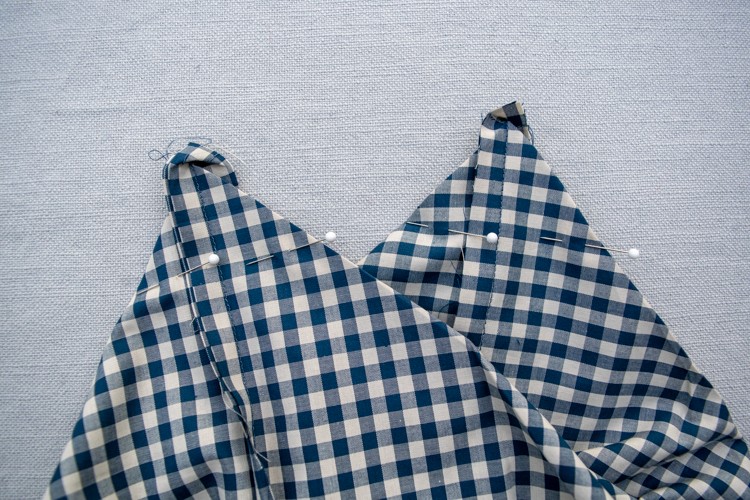
Pin the right sides of your lining pieces together (pocket on the inside) and sew the sides and bottom together using a 5/8 inch seam allowance.
- Sew the lining gusseted corners
Sew the bottom gusset seams of your lining exactly as you did for the sweater pieces, 2 1/2 inches from the corner, straight across on the diagonal. Trim the corners leaving a 1/2 inch seam allowance.
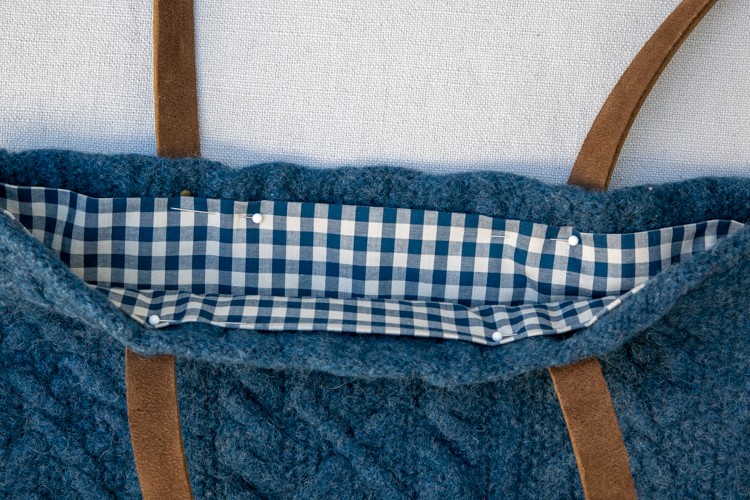
At this point, it’s a good idea to turn your sweater tote right side out and slip the lining inside to make sure you like how everything is matching up. Remember that you are going to fold down the top inch (or more) of your lining when you sew it in place. Make any adjustments needed to make it amazing, or at least fit right! - Figure out your straps or handles
I chose to use rivets to attach the leather strap to my bag, but you could take it to a shoe repair shop and have them sew on straps or handles. I recommend doing some tests with the rivets to get the feel for it. Pro tip: you really only need to tap them with the hammer. If you hit them too hard they bend and get all messed up.
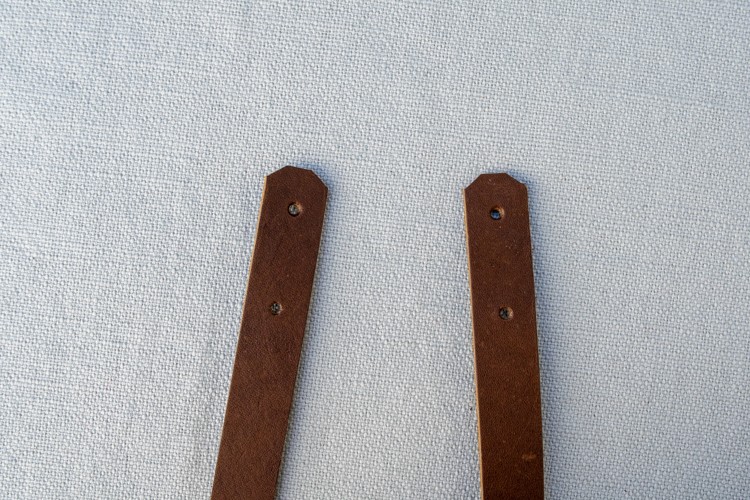
Decide how long you want your straps to be. Hold it up to you and look in the mirror, measure the handles on other bags, whatever it takes to get a sense of what you want. My handles are 32 inches long, which includes 2 1/2 inches at each end to attach to the bag, so really 29 inches. - Cut your straps, shape the ends
Cut your straps to your desired length, and shape the ends if you want them rounded or angled. I made a little mockup out of paper with the corner cuts and rivet holes marked and then taped that on with double-sided tape. (Careful with the tape — stick it on your jeans first so it doesn’t take the finish off your strap.)
I cut the corners with my utility knife and used my awl to mark the holes for the rivets. Once you have one done, you can use it to shape the other three ends. I drew a very faint line on my ends with my awl to mark where the top of the bag would be, 2 1/2 inches for mine. - Punch the holes for the rivets
Use a hammer and leather punch (one came with the rivet kit) to punch holes where you’ve marked on the ends of your straps. Do this on a cutting mat or another surface you don’t care about.
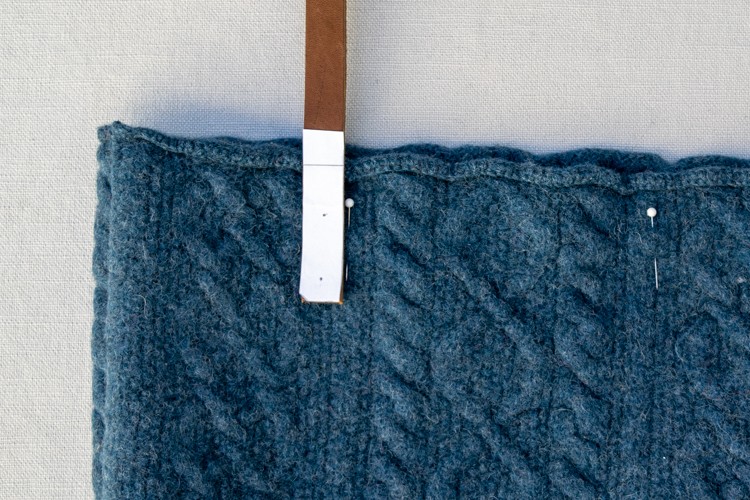
- Attach your straps
Measure how far apart you want your straps attached to your bag, and make sure you center them. Place a pin to mark the spots.
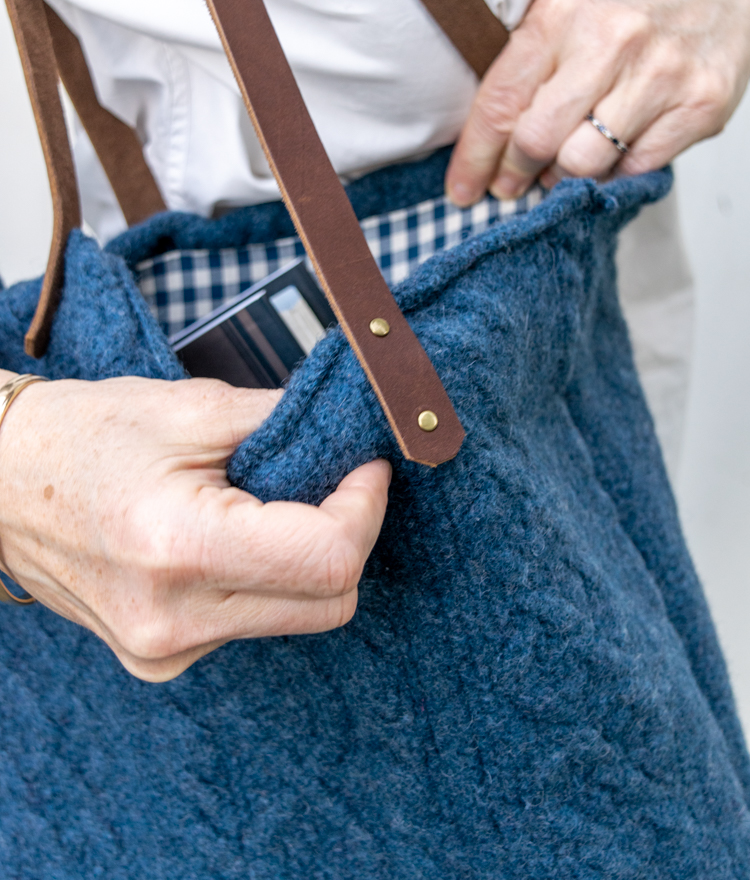
Hold one end of your strap in place on your bag, then push the rivet up from the inside through the felt and through the hole. Honestly, this was the trickiest part of the whole process! I stuck my awl through the strap hole and felt, flipped it to the inside so I could see the awl tip, pulled the awl out and then shoved the rivet through where it left a little hole. Patience. It got easier. - Sew in your lining
Press the seam allowance for the top of your lining to the outside or wrong side of your fabric. Put your lining into your sweater bag and pin the top edge of your lining in place evenly. Sew the top of your lining in place by hand using a running stitch. Don’t go all the way through your felt with your needle, just enough to hold it in place. You could also tack the bottom corners of your lining in place with a couple of stitches.
- Enjoy your new tote!
Take your bag out for a spin!

Please pin this post if you like it, and please join my email list!