
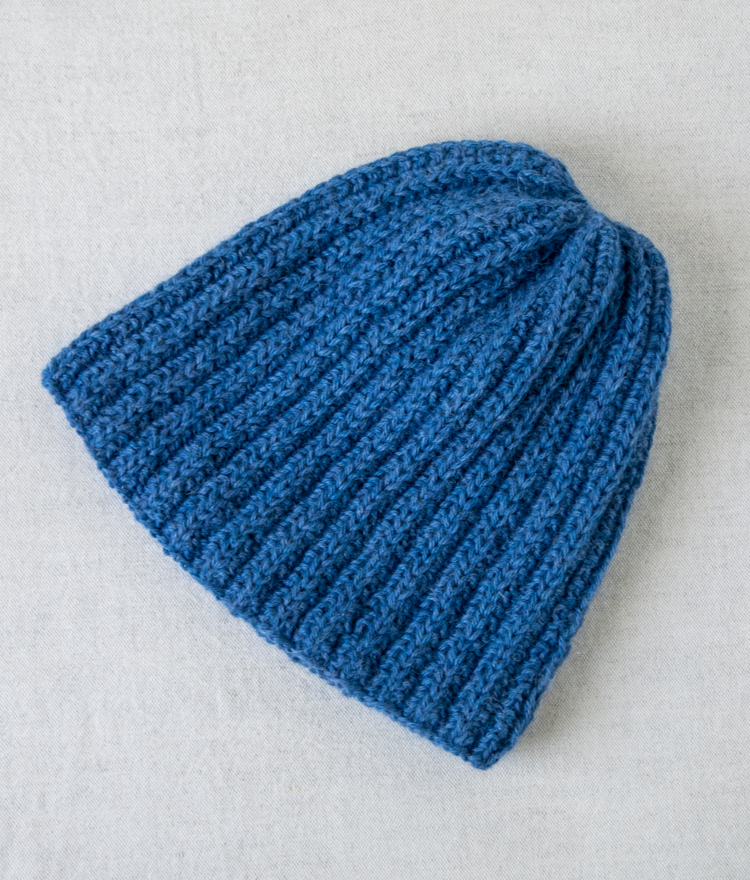
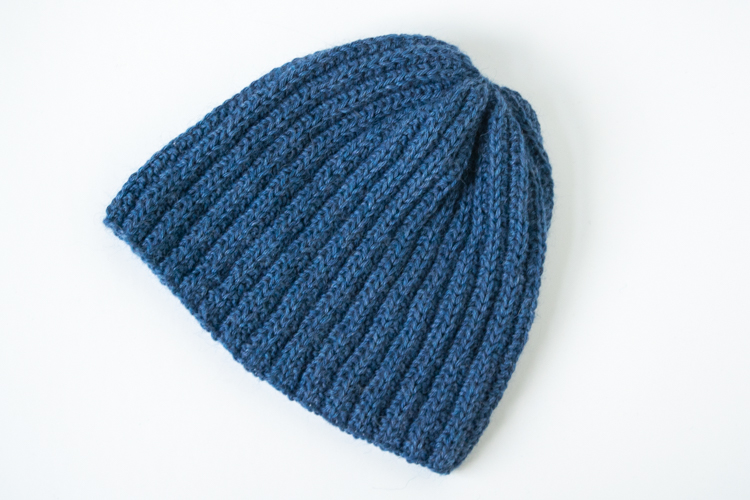
I hope you like this free knitted hat pattern for a ribbed beanie in Cartridge Belt Rib. This stitch is very popular for scarves, but I couldn’t find many hat patterns using it.
Cartridge Belt Rib is also called False Rib because when you knit it on straight needles, you create a ribbed look without any purl stitches. For that reason, it’s a great for beginners — you create this great looking pattern, completely reversible, without needing a lot of experience.
However, knitting Cartridge Belt Rib in the round? On circular needles? Completely different! In order to achieve the same pattern, you have to knit a different pattern of stitches every other round.
Basically, since you are always knitting on the right side/outside when you knit in the round, every other round you have to knit the opposite/inverse of what you would knit on straight needles. So what was knit is now purl, and what was yarn in front is now yarn in back.
All this to say, this is not a pattern for a newbie knitter, or for someone who doesn’t like detailed pattern work. Once you get in the groove of the alternating rounds, it isn’t too demanding.
For the four decreasing rounds, you need to pay close attention, so pause the Netflix. And I recommend you do all four rounds without any interruptions if you can.
Looking for more knitting patterns? Try my Rainbow Knit Beanie Hat pattern, my Classic Cuffed Beanie pattern, or my Fingerless Gloves pattern.
Supplies
- 1 skein of worsted weight yarn (also known as Aran weight or 10-ply).
I used Cascade Pure Alpaca in denim (100 grams/220 yards/200 meters each). - size US 6 (4 mm) 16-inch circular needles, or the size needed to obtain gauge
- yarn needle for sewing in the ends
Gauge
20 stitches = 4 inches in pattern
Knit a swatch with the recommended needle size
Cast on 20 stitches and knit 20 or so rows in the pattern. If it’s too loose, go down a size or two. I always knit a swatch, and if I’m not happy with how it looks then I knit another with a different size needle. Needle size is one of the most important parts of making sure that your knitting looks good.
Size
Small Adult: 20-inch circumference, 9 inches high
Large Adult: 22-inch circumference, 10 inches high
Knitted Hat Pattern: Ribbed Beanie
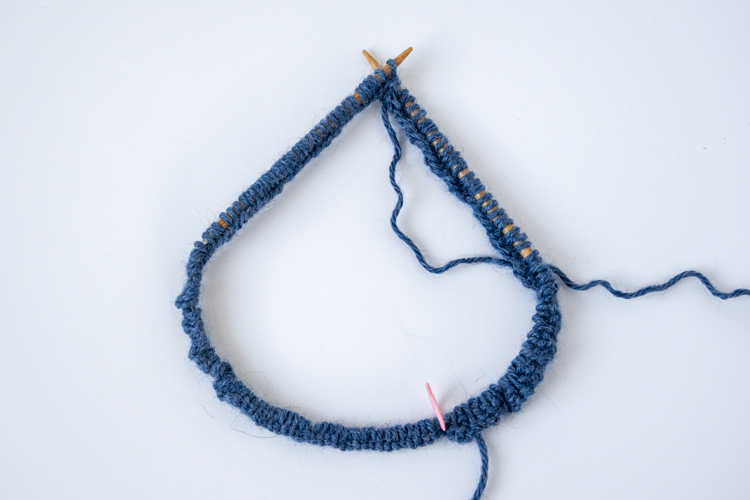
- Cast on
Cast on 120(132) stitches. This pattern is worked over a multiple of 4 stitches. If you want to adjust the size up or down, four stitches equal slightly more than half an inch in the pattern.
- Join the stitches
Join the stitches for knitting in the round, being careful not to twist the stitches and placing a marker at the beginning.

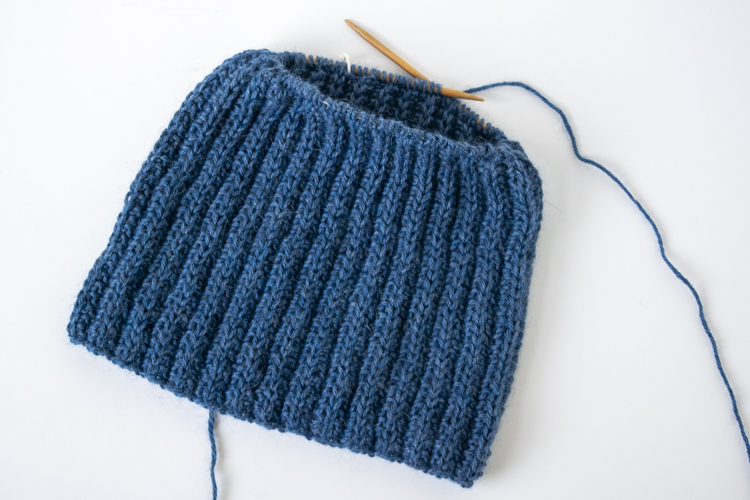
- Continue in pattern
The pattern is created by two alternating rounds of stitches:
First round (and alternating rounds):
Knit two stitches, *bring your yarn to the front, slip one stitch purlwise (as if you are going to purl it), bring your yarn to the back, knit three stitches. Repeat these steps from the * for the rest of the row, until you have two stitches left before your marker. For the last two stitches: slip one with yarn in front, knit one.
Second round (and alternating rounds):
Slip one stitch purlwise with yarn in back, bring your yarn to the front, purl 3 stitches. Repeat this for the rest of the row to your marker.
In knitting shorthand:
1st Row: k2, *sl 1 wyif, k3. Repeat from * to 2 stitches before marker, then sl 1 wyif, k1.
2nd Row: sl 1 wyib, p3. Repeat to marker - Tips on this pattern
Other than keeping track of which row you are on, the pattern is pretty straightforward.
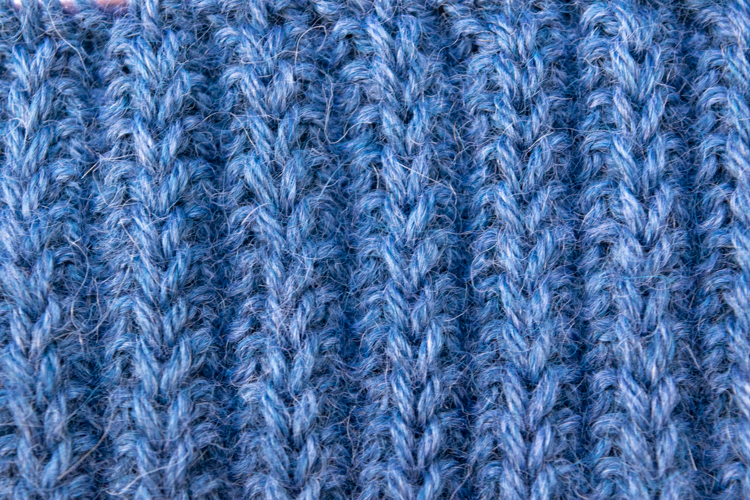
Once you have a few rows finished, you will start to see the pattern emerge, and the
stitches get a little easier to keep track of. See the ridges that are starting to form?
You’ll notice that the top of the ridge is a very pronounced knit stitch (shaped like a V) —
this stitch is the middle stitch of the three that you knit (it’s also the one that you are slipping
on the purl side, which is why it pops out like that).
If you lose track of where you are in your pattern, just make sure that the top of the ridge —
that big knit stitch — is in the middle of your three knit stitches if you are on the first/knitting row, and is the stitch you are slipping on the second/purl row. Now you know where you are and can keep on rolling!
One other thing: the first stitch of the round, the one just after the marker, tends to be looser than the others, so give it an extra tug when you knit it. It’ll look better. - Decrease your stitches
When your knitting reaches 8.5 (9.5) inches high, begin your decreasing rounds:
First decreasing round:
Knit two stitches, *bring your yarn to the front, slip one stitch purlwise (as if you are going to purl it), bring your yarn to the back, knit two stitches together, knit one stitch. Repeat these steps from the * for the rest of the row, until you have two stitches left before the marker. Slip one purlwise with yarn in front. Remove the marker and knit the last stitch of the round together with the first stitch of the next row. 90(99) stitches
[k2, *sl 1 wyif, k2 tog, k1. Repeat from * to 2 stitches before the marker. sl 1 wyif, k2 tog with first stitch of next round.]
Replace the marker after the last stitch (the two you just knit together).
Second decreasing round:
Purl two, slip one stitch with yarn in the back. Repeat to the marker.
[p2, sl 1 wyib. Repeat to marker.]
Third decreasing round:
Knit one stitch, knit two together. Repeat to the marker. 60(66) stitches
[k1, k2 tog. Repeat to marker.]
Fourth decreasing round:
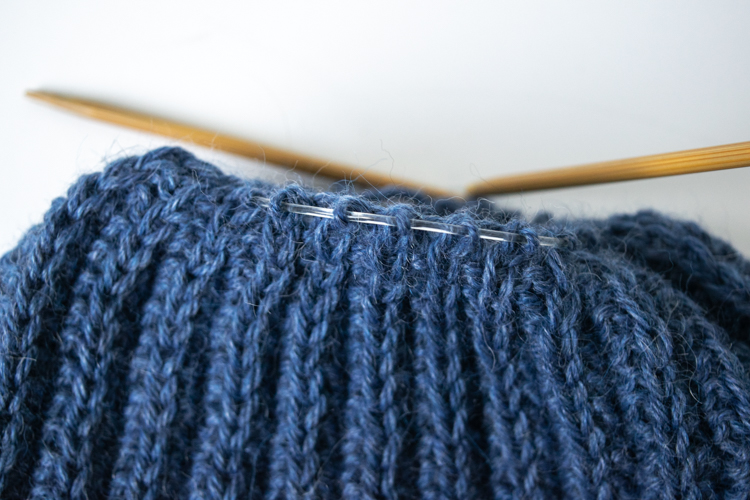
Knit two together. Repeat to the marker. 30(33) stitches
[k2 tog. Repeat to marker.] - Bind off
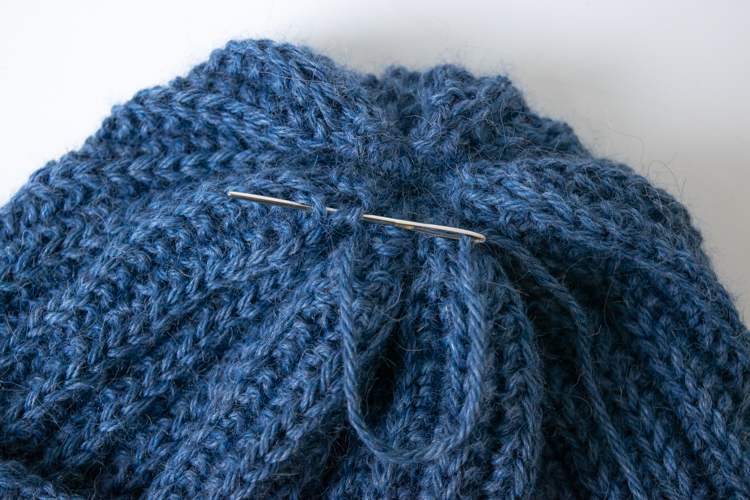
Cut your yarn, leaving a 10-inch tail. Using a yarn needle, thread your tail through all of the stitches on your needles and pull snug. Tie off on the inside, and sew in the end.
Love your posts. Love the patterns. I won’t be able to start your pattern for a few months. I have several babies due in August and September. Baby blankets take awhile.
But I have grandsons who camp and those hats in a lovely wool will be perfect stocking stuffers.
Thank you! That’s so nice to hear. Good luck with the blankets! You must be a fast knitter to get multiple blankets done that fast!!
Thanks for the hat pattern. I’ve already made/ sent 88 hats for Ukraine, but I’m making more!
How can I get a copy of the free blue beanie? I knit for Charity so I,m always looking for easy free patterns. Thank you
Right now it’s only available here on my site, but there’s no downloadable pattern yet.
Did you use the whole skein? I’ve got nearly a whole one but not quite, so debating whether to use it or if there won’t be enough for the large size.
Love the no purl hat pattern, can you email me the directions for knitting it on straight needles. Thank You very much. [email protected]