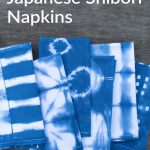
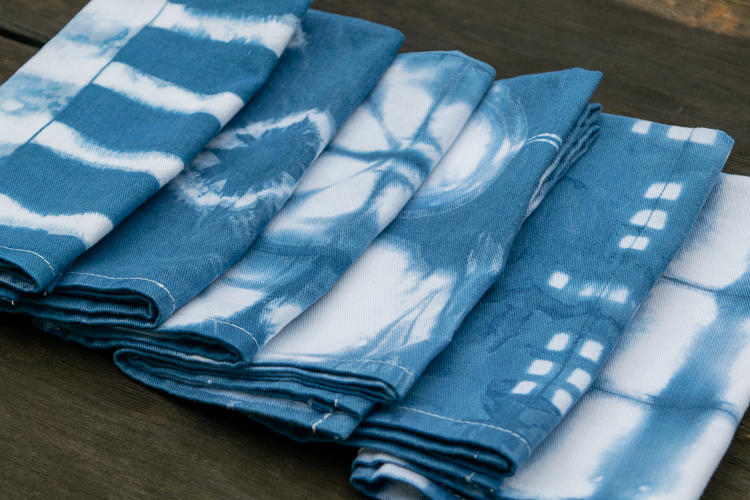
This was my first solo attempt at an indigo vat. I was really nervous about it and procrastinated for a while until I just bit the bullet and put it in the calendar. These indigo shibori napkins are super easy and so satisfying to make. Ten out of ten would recommend.
This past summer we were fortunate to have some generous friends loan us their beautiful home on the shores of Lake Winnipesaukee. We had a few precious days of family time there before dropping our beloved sweet boy at college for the first time.
I am actually crying as I write this, remembering just how hard a time that was for me. I adore our son and miss him terribly, and I was and am incredibly grateful for those moments in that peaceful spot with just our OG squad. I mean, Is there anything better than a lake in New England in the summertime?! No, people. No. There is not.
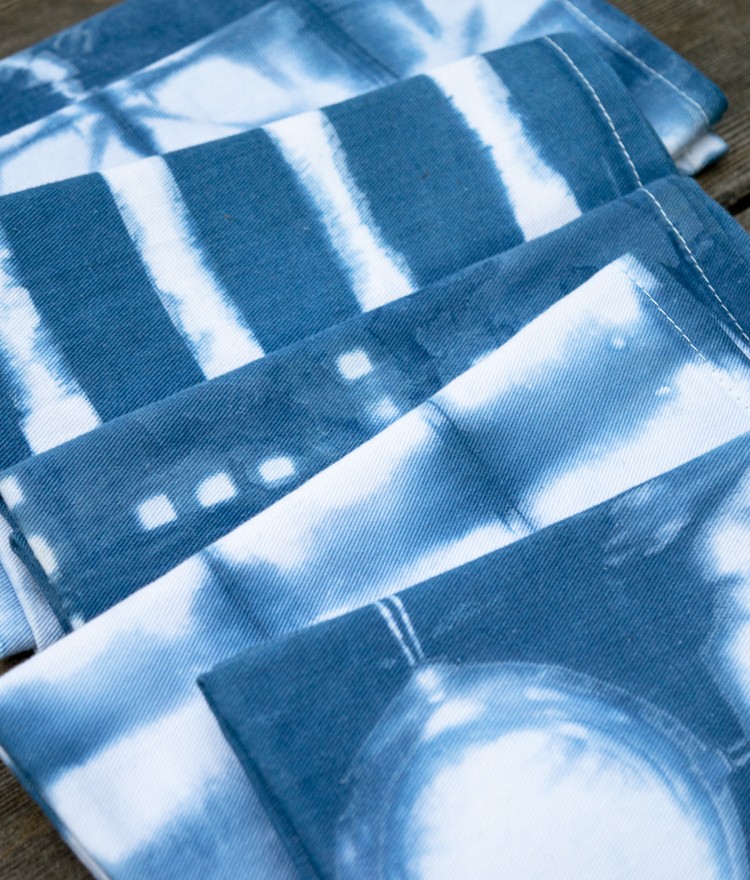
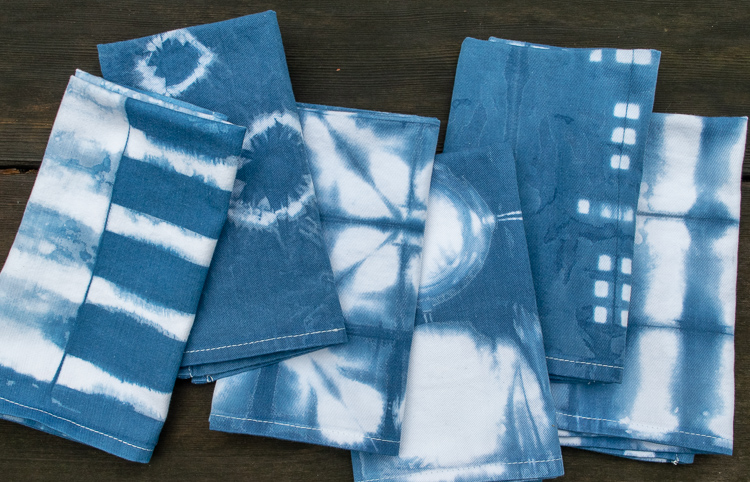
Anyhoo, that was a long backstory for these napkins that I made as a thank you gift for our friends. I know the whole shibori thing is super trendy and is maybe starting to feel a little overdone, but I am still in love with it! I can’t see ever getting over it.
Blue has long been my favorite color (and I am not ashamed to have a favorite color, get over yerself). And then there’s the whole transformation, wabi sabi magic that happens. And you get to mix powders in a big bucket and stir it with a big stick! Plus fabric, and Japan, and ack I could go on. Enough. Here’s what I did:
[One thing: I carelessly didn’t realize the napkins were cotton/poly blend. I’m happy with how they look and feel, but I can see how the polyester gave the patterns a softer, almost watery effect. I’d like to see how pure cotton would turn out.]
Supplies
- 6 cloth napkins (this is what I used, but I’d probably get these next time)
- Jacquard Indigo Kit
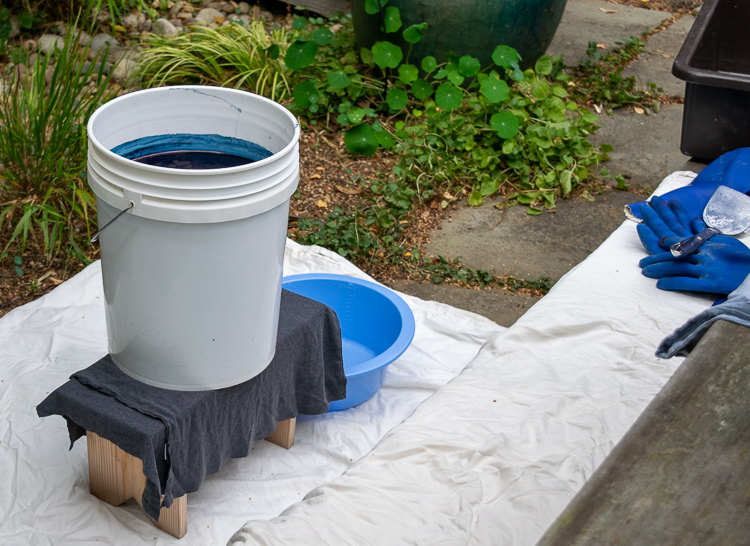
- 5-gallon bucket with a tight-fitting lid
- Long stick or spoon for stirring
- Things to use as resists, i.e. buttons, aluminum can ends, rubber bands, string, clothespins, clamps (the kit includes rubber bands and two woodblocks)
- Long rubber gloves
- Drop cloths to protect surfaces
- Bucket for clean water soak
- Small pan or bowl to squeeze out your pieces
- Pan or tray for dyed pieces to oxidize in
- Clothesline
- Synthrapol or Dharma Professional Textile Detergent
Instructions
- Set up your work area
Drape your work area with drop cloths. Fill up your soak bucket with fresh water. Get all your supplies laid out so you aren’t hunting around for stuff — ya know, your basic mise-en-place. Also, you will spend a certain amount with your hands in the vat, so think about the ergonomics for that. Put your pan for drips and squeezing right next to the vat.

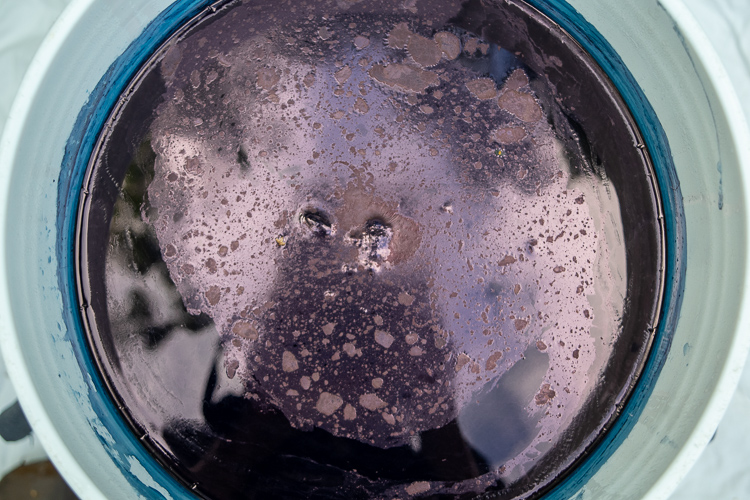
- Get your vat started
Mix up your vat according to the directions in the kit. It will need to sit for an hour after you mix it to reduce and let the sediment settle. It should look like Mountain Dew after an hour of reducing.
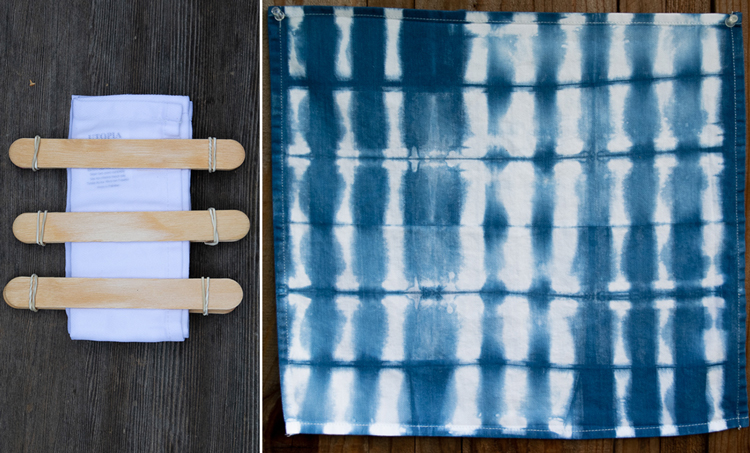
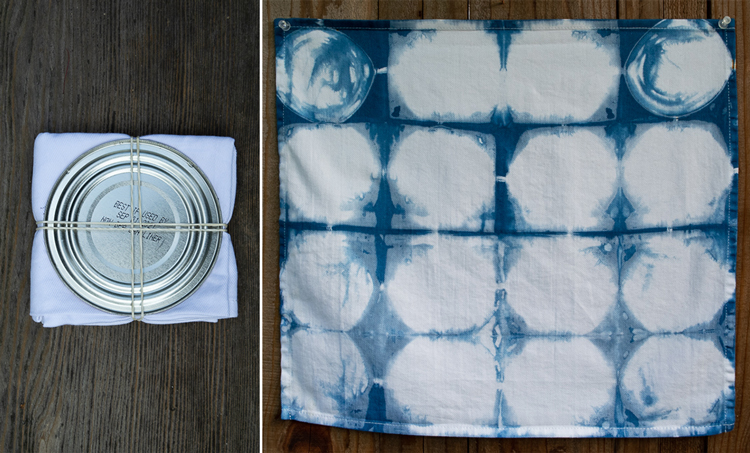
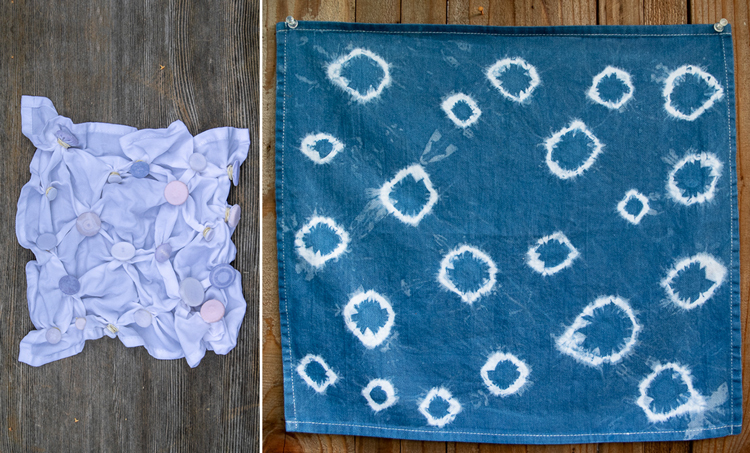
- Fold, clamp, tie your pieces
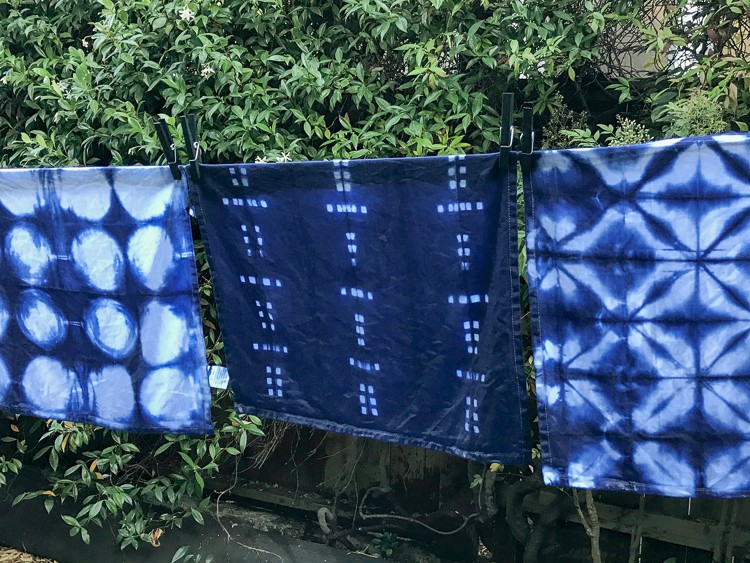
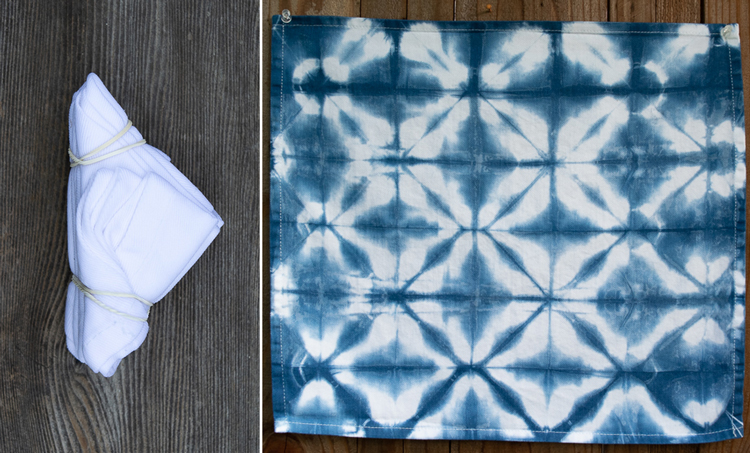
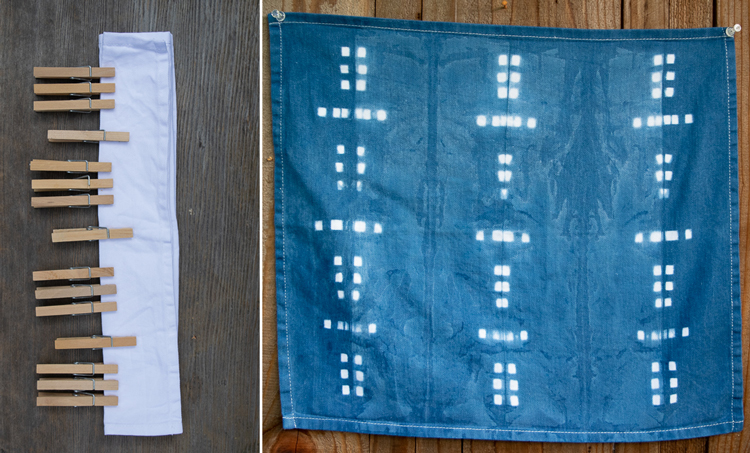
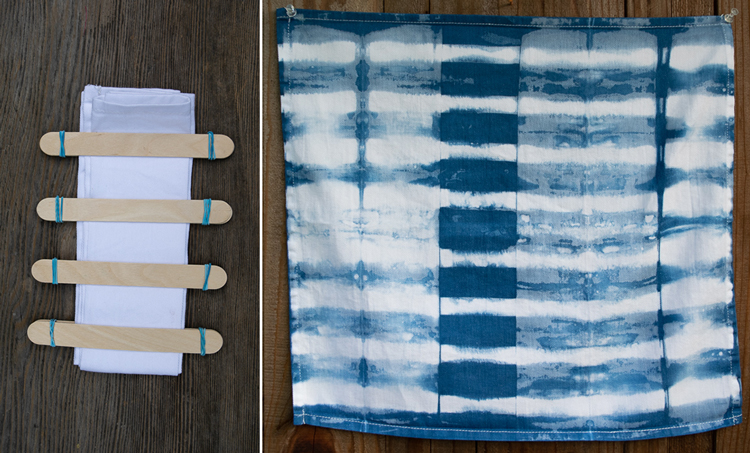
You can get started on this long before you get your vat going, even days or weeks in advance. If I see a technique I want to try, sometimes I’ll just do the folding, binding, stitching, or whatever and then set it aside until I’m ready to set up the vat. There’s tons of info out there about all the different kinds of shibori. Some of the most common are itajime (fold/clamp), arashi (storm), tesuji (hand/stripes). I love learning all the names. See the photos at the end for how I did each of the patterns for these napkins. Most used an accordion fold.
- Prewet your pieces
Put everything you are going to dye into the bucket of clean water. Everything needs to be soaked through and then squeezed out before it goes in the vat. It helps to squeeze the pieces when they are submerged to make sure they are thoroughly soaked.
- Start dyeing
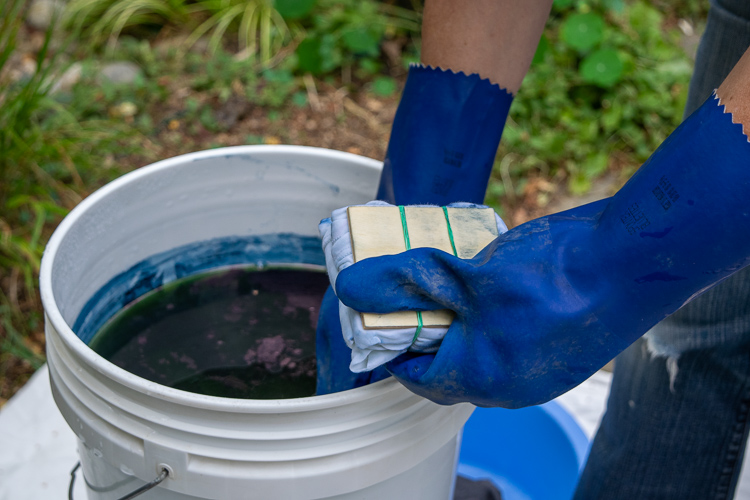
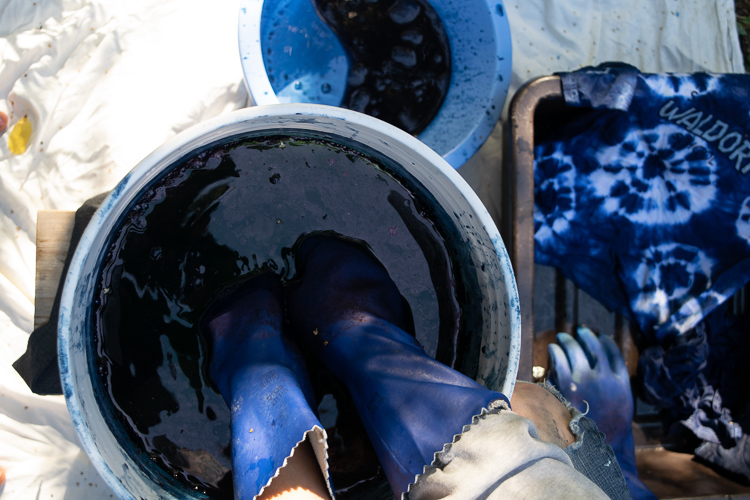
Wear your gloves! You need to push the flower (the scummy foamy bits floating on the top) to the side before you carefully slide your pieces in the vat. Only do as many as you can hold at one time. You want to gently move the pieces around or separate layers so that the indigo can penetrate into the layers. But be very careful not to agitate the vat—no bubbles, no splashing, no drips— so that you don’t speed up the oxidizing of your vat. I did one 10 minute dip for these napkins.
- Set aside to oxidize
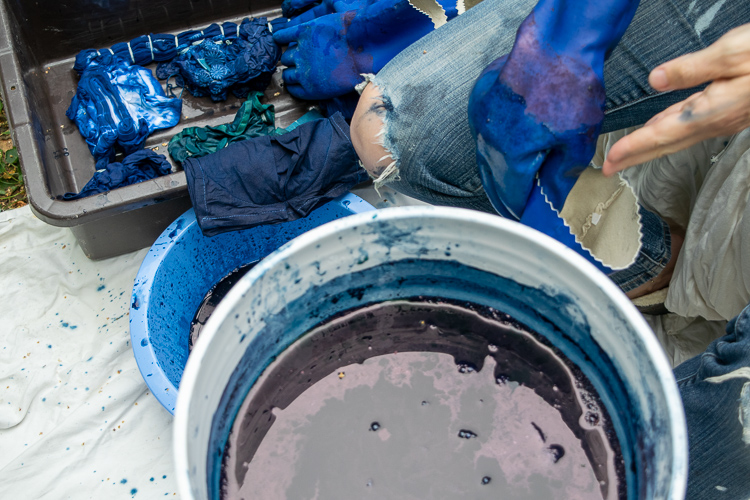
After you carefully remove your pieces from your vat, squeezing them out over your pan or bowl next to your vat, allow them to oxidize fully. Your pieces will be Mountain Dew green when you take them out of the vat, but almost immediately they will begin to turn blue as the indigo oxidizes. Once they have fully oxidized, you can redip.
- Redip (optional)
If you want a darker color, do more dips of 10 to 15 minutes each. Remember that the color will go much lighter once it is completely washed and dried. Redipping will also even out the color and make it a more consistent blue.
- Let sit overnight (optional)
If you want and have the time and patience, you can leave your pieces to sit overnight and come back and unbind them the next day. I’ve done it both ways (rinsed them the same day and hung them to dry, and left them overnight and rinsed the next day). If the darkness of the blue is important to you, then try to leave it overnight.
- Rinse your pieces and hang to dry
Rinse your pieces in a bucket or sink until the runoff is clear or almost clear. Hang to dry (in the shade if possible).
- Wash your pieces separately with Synthrapol or Textile Detergent
You can now wash your napkins and other dyed pieces in the washing machine with Synthrapol or Dharma Professional Textile Detergent. Follow the instructions on the bottle. I usually run them through again with regular detergent.
- Enjoy your beautiful work
Show off your new napkins to everyone and anyone til people think you are an impossible bore.
Please pin this post if you like it, and please join my email list!
Check out this Easy DIY Shibori Indigo Wool Scarf for more dyeing techniques!