
Cross stitch is perfect for beginners! It isn’t hard to learn and to get good at it quickly so you can make (and finish!) beautiful pieces.
I’ve recently gone crazy for cross stitch. I love the methodical quality of the stitching and the structure, combined with the creativity of choosing colors for the floss and fabric. It’s just the right amount of structure and freedom, and it’s easy to get great results even as a beginner.
I don’t particularly care for the very traditional patterns, but fortunately there is a whole world of cross stitch with a more contemporary aesthetic.
There are lots of patterns for free as well! I found lots of great patterns and supplies on two sites: Stitched Modern and LoveCrafts. You can see some of the patterns I’ve favorited on LoveCrafts here.
As I said, I love the more modern-looking cross-stitch, but I also love the connection stitching has to the past. I’m a huge fan of period piece dramas — all the Jane Austen adaptations, Bridgerton, Outlander… And of course the women are always stitching. I’m sure many of them hated it back then, if they paused for a moment and thought about what else they might like to be doing.
So I’m grateful that women today have choices, but I do like to watch my shows and stitch along with Elizabeth Bennett and Daphne Bridgerton.
Here are the basics and a few tips to get you started stitching.
Beginner Cross Stitch Basics
Cross stitching is literally just that: you are sewing x’s or crosses into fabric with a woven grid to keep everything even. You can either sew a row of bottom stitches (the first part of the x) and then go back and sew the top stitches, or do one x at a time. It’s up to you!
Some things to remember:
- Your top stitch (the line of your x on the top) should always be in the same direction. I give a lot of directions below about how to sew the stitches — ultimately it doesn’t matter how you stitch the basic cross, as long as you do it consistently and neatly, and always do the top stitch in the same direction
- You don’t tie knots in cross stitch. You weave your ends under the backside of your stitches — four to five stitches is enough — and then clip the ends, leaving around 1/8 inch tail. See the instructions below for how to do this when you are starting.
- Clip the ends as you go. Otherwise, it makes a mess and they get caught up in your stitches.
- Try to keep an even tension on your stitches. This takes a little practice but you’ll get better at it quickly.
- Don’t carry your thread very far on the back of your stitching, otherwise, the color can show through on the front and it won’t look nice.
- This is supposed to fun and enjoyable. If any of the instructions or tips don’t work for you, figure out what does and do it your way!
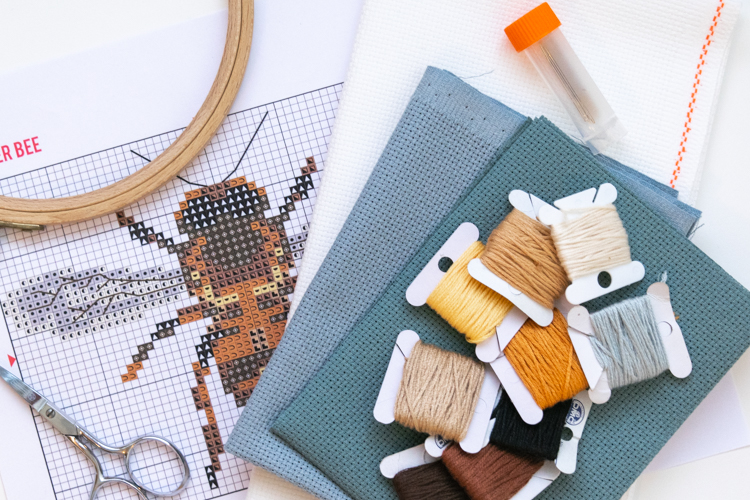
Cross Stitch Supplies
- 14-count Aida cloth, at least 10 inches square or large enough for your pattern (I used the color Mediterranean Sea)
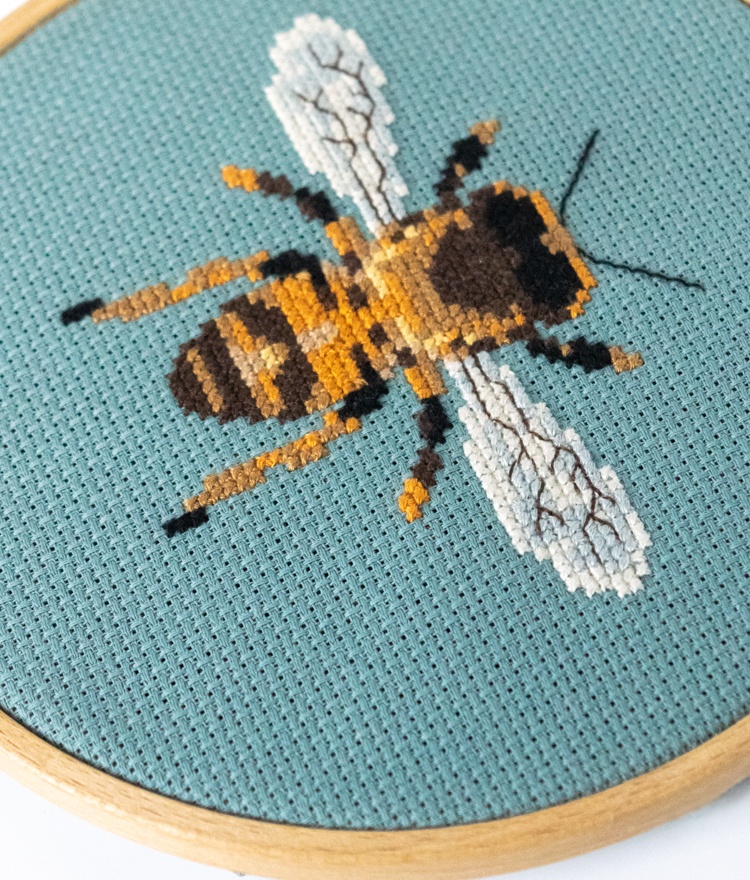
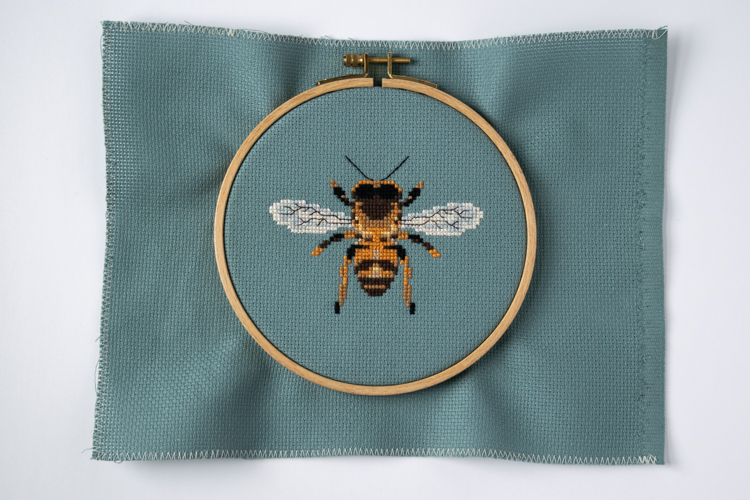
- a cross stitch pattern, Amber Bee, or pattern of your choice (some good free options: a beetle, a flamingo, lemons, Mexican flowers, or an echeveria)
- embroidery floss in colors for your pattern
- cross stitch needle
- embroidery hoop or frame
- small sharp scissors
There are a few other inexpensive tools that make cross stitch way more pleasant for me:
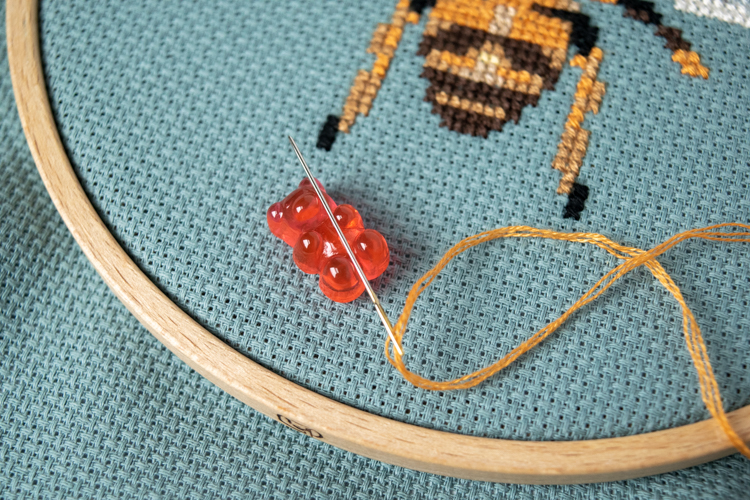
- A needle minder: this is a strong magnet that you attach to your cloth to hold your needle whenever you need to set it down. They come in many different styles. We got these cute gummi bear ones in a few different colors, but you can also get just a plain magnet, or make your own!
- A needle threader: I have a really hard time getting two or three strands of floss through the needle eye. So much so that I find myself getting very frustrated and dreading when I have to change the thread. These little things are so cheap and work so well, I will be using them for all my embroidery from now on.
- A hands-free magnifying light: eye strain is real, people. Get this if you don’t have perfect eyesight.
Beginner Cross Stitch Instructions
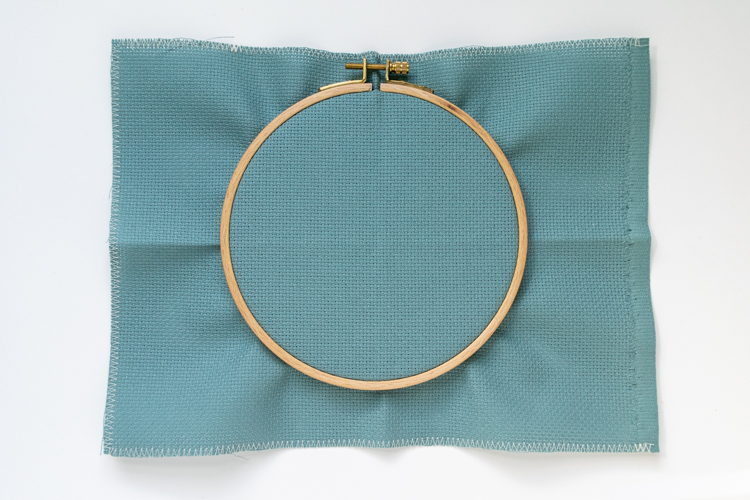
- Finish the Aida cloth edge, stretch it into your hoop
The Aida cloth tends to fray very easily, so you want to finish the edges of your fabric before you start sewing. You can either use some Fray Check along the edge, or sew a zigzag stitch with a sewing machine (or use a serger), or fold masking tape over the edge of the fabric.
This isn’t technically required, but having done a project without finishing the fabric edges, I recommend it.
After you finish the edges, press your fabric with an iron. Then find the center of your fabric by folding it in quarters. The center is where the creases meet.
Place your fabric over the inside or smaller part of your embroidery hoop, and fit the outside hoop on top so that your fabric is smooth, making sure that the center of your fabric is in the center of your hoop. Tighten the screw until it holds the fabric snug. Be sure your fabric isn’t pulled so tight that it’s distorted. You don’t want to stitch with your fabric pulled in a weird way.
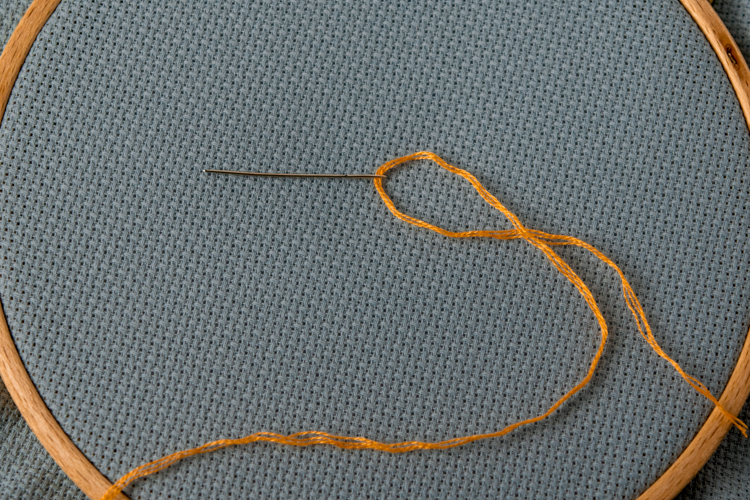
- Cut your embroidery floss and thread your needle
I want to cut your floss or thread about 12–18 inches long. I usually pinch the end, unspool the thread down to my elbow, and cut it just below my elbow.
Then you want to pull out each strand of floss separately. Some patterns call for two strands of floss, some for three, and for backstitching, you use only one strand. The Amber Bee pattern says to use two but I used three. I wanted it to look a bit fuller, since bees are fuzzy, and three strands give better coverage. That’s the reason to separate each strand of floss coverage. You don’t want the strands twisted around each other when you sew with them — you want them to lie flat and spread out.
You can use a thread conditioner like Thread Magic at this point if you have some. Then thread your needle with however many strands of floss you are using.
Then I like to “love” my thread, as Natalie Chanin taught me. You just run the thread through your fingers a few times to transfer some of the oil to the thread and release the tension from the manufacturing process. You can say a little mantra to yourself about how beautiful your stitches will be. 🙂 - Find the center of your pattern
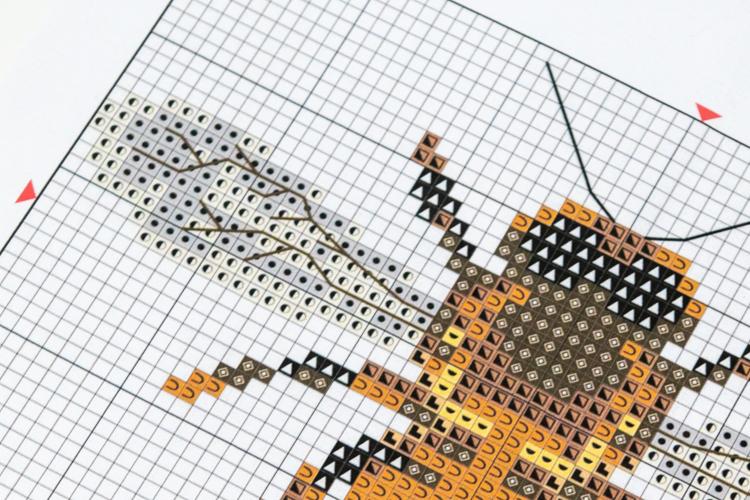
You can find the center of your pattern by looking for the red arrows on the edges — where they meet is the center. This is where you want to start your stitching. I started a few stitches over and one row up so I could do the big orange section in the middle of the bee in rows.
You don’t need to start exactly dead center unless you are working on a finished piece of fabric, like a linen napkin. I knew I was going to have plenty of extra fabric on all sides, and that I was going to trim it down and could center the design when I framed it. - Make the first part of the stitch
When you look at the Aida fabric, you will notice that there are small little squares woven into it, with holes at the four corners. To start your first stitch, at the center of your fabric, bring your needle up through the lower left hole of the square, and back down through the top right hole, so it makes a diagonal line across the square.
Leave a couple of inches of thread on the backside of your fabric when you pull your floss through. - Tack down the thread tail
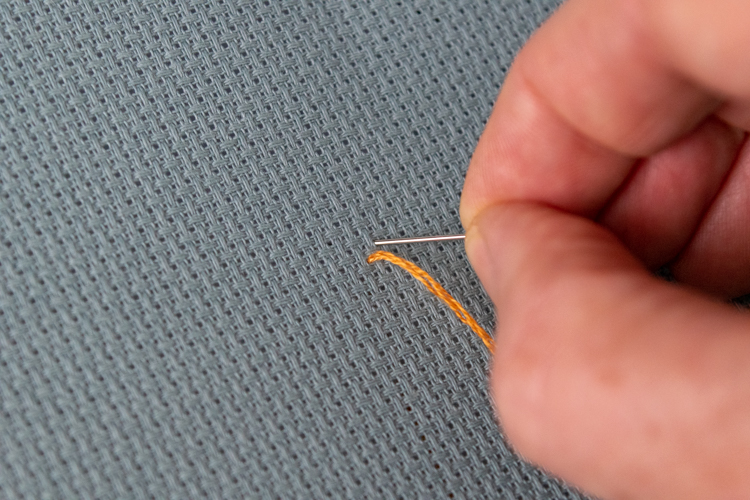
Next bring your thread up through the bottom right hole, except this time make sure you are sewing over the tail of floss you left on the back.
You are not going to sew any knots in your cross stitch — you just tack down the tail as you sew. This takes a little getting used to, and I find I forget to do it after a couple of stitches. Make sure you sew it down for at least four to five stitches! And trim off the extra (not too close) right away! I end up catching strands of the tail in my stitches if I don’t trim off the extra, and it makes a real mess, so don’t be like me. - Finish your stitch (or make a row)
To finish your first stitch, bring the needle down through the top left hole. Now you have made your first stitch!
To make the next stitch, you just come up through the bottom left hole of the next square you want to sew and keep going.
If the next square you want to sew is above the one you just finished, then the top left hole of the stitch you just finished is the same as the bottom left hole of the one you are starting, so when you start your next stitch you would just undo the one you just finished! Uh oh.
Instead, just sew that first part of the next stitch in reverse: come up through the top right corner and back down through the bottom left, and then continue with the rest of the stitch as you normally would.
Sometimes it also makes sense to make a row of stitches and do the first part of all the stitches and then come back across and do the second part. It’s up to you if you want to work this way. Sometimes it’s easier and makes sense, and other times it’s easier to work individual stitches. - How to end your thread
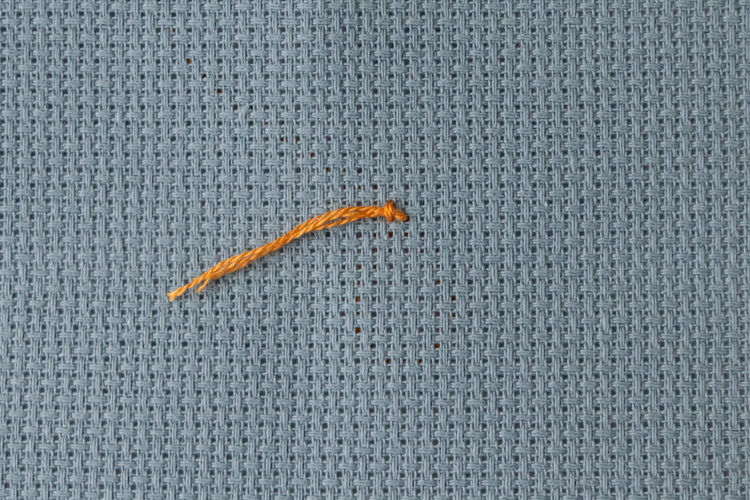
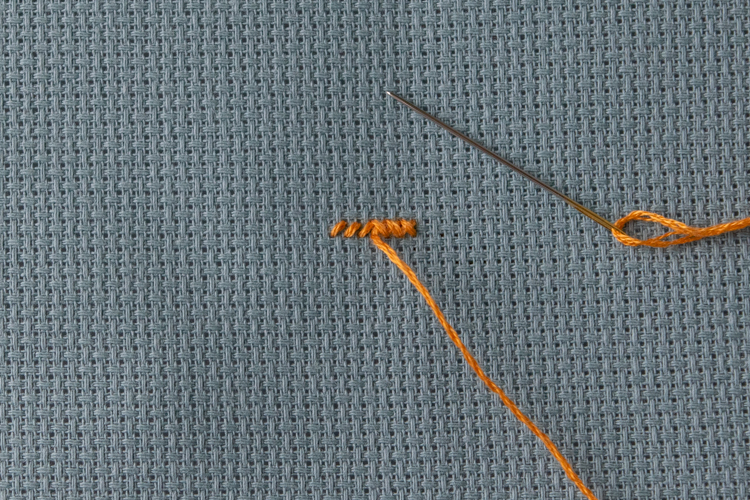
When you run out of thread or finish a color or section on your pattern, sew back under four to six stitches on the back side of your work. Trim the extra thread but not too close (leave 1/8 to 1/4 inch).
- Continue stitching the pattern
Now you know everything you need to finish your pattern (except for backstitching, which is the next step). Keep filling in the squares of your pattern according to the chart.
One thing I find makes it easier: if you are sewing next to existing stitches, try to come up through unoccupied holes when you can. It’s easier to go down than up through holes that have thread in them, so try to figure out your stitch pattern so that you can do that as much as possible. This will make more sense to you as do more stitches. - How to backstitch
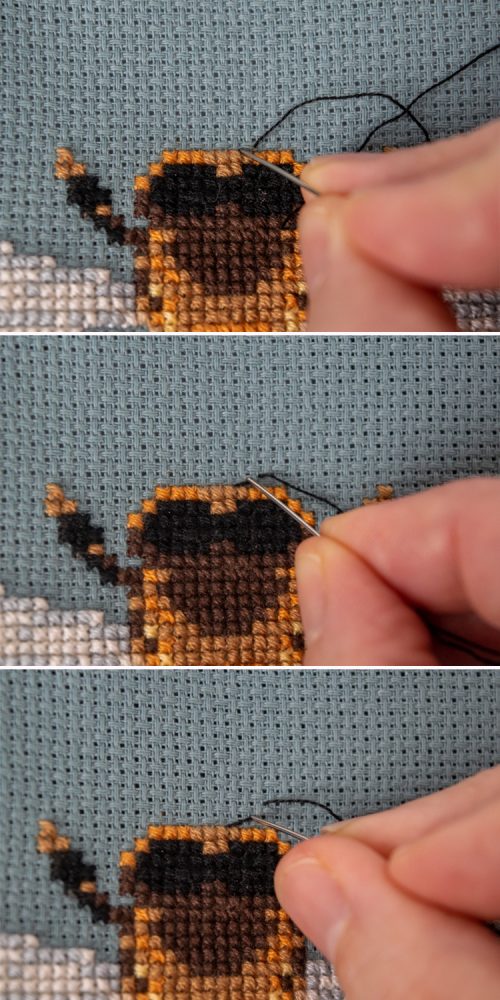
Some patterns call for backstitching, which is a way of sewing fine lines or outlines into a design made up of x’s.
To sew backstitch, you use only one strand of thread. Tack down the thread tail by sewing under a few of your stitches on the back of your work. You are actually going to sew each stitch backwards:
• poke your needle up to the front side at what would usually be the endpoint of your first stitch if you were doing a running stitch (we’ll call this #1)
• then bring your needle down at the point that would usually be the beginning of your stitch (#2)
• bring your needle up again at the far side of the next stitch (#3)
• then bring it back down again at your original starting point (#1)
So you are sewing back towards your starting point with each stitch but looping forward underneath. Backstitching makes a nice, connected, fine line of stitches that is good for detail or outlining. - Finishing your cross stitch
What you do next with your finished piece is up to you! Many people like to use the hoop itself as a frame and tack down the extra fabric in back with a running stitch. You can also mount your cross stitch on acid-free sticky board and put it in a picture frame or shadow box, which is what I am going to do.
But of course you can make your cross stitch into a more functional piece as well — a pin cushion, a small pillow,

If you liked this sewing project, check out my tutorial on how to make a waterproof makeup bag or how to sew and wax a DIY bread bag.
Please pin this post if you like it, and please join my email list!