
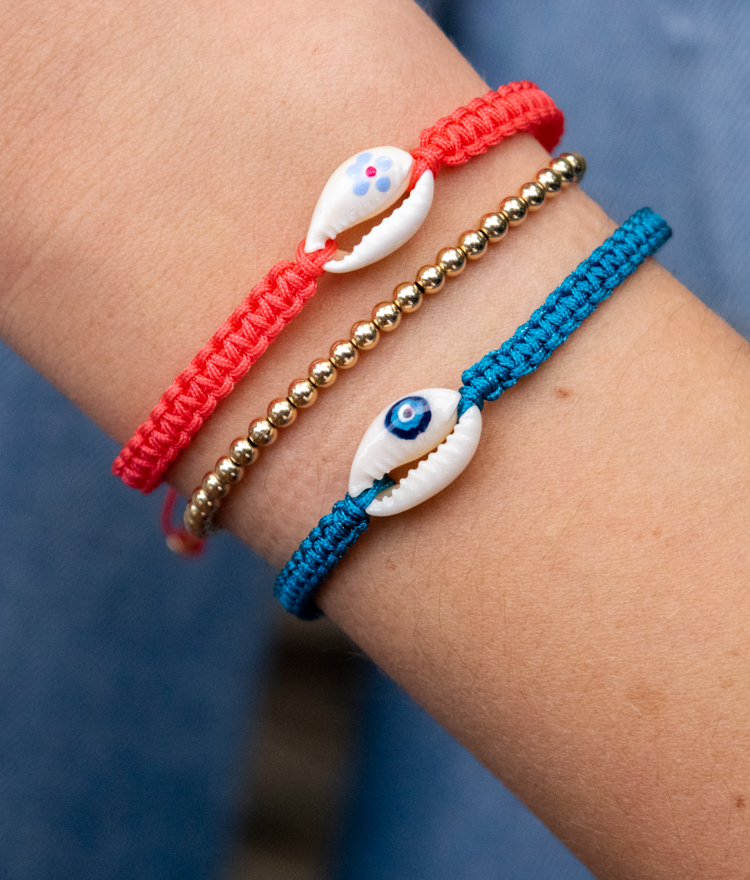
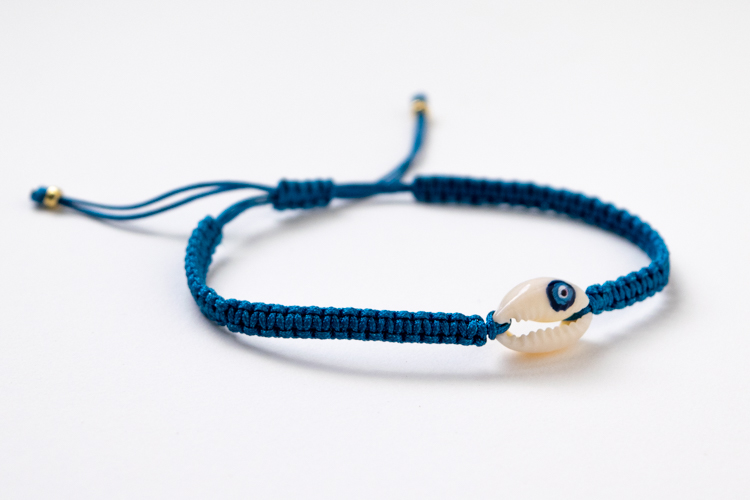
This is an easy tutorial for a cute DIY shell bracelet — perfect for summer or a beach vacation. Oooooh, I’d love a beach vacation right about now…
I love cowrie shells. They’re such a reminder of happy days at the beach or vacations to tropical islands.
I prefer the simpler bracelets — ones that could be the adult version of something I might have made at camp. Somehow the blinged-up ones just don’t work for me. But if you like those, go for it! They come in gold, silver, rose gold…
I like painting the shells with some of the nail art designs that are all the rage. Some of the designs, like the dotted flower and the evil eye, are very easy to do with a little practice. (I do recommend practicing on some scrap cardboard or cardstock to get the feel for it.) Of course, if you mess up on the shell just wipe it off and start over!
You could always just leave the shell plain for a very classic look. I might add a couple more seed beads on either side with a plain shell — just slide them on before you start tying the square knots.
I hope your DIY Shell Bracelet brings you visions of happy summer days, warm sun on your face, and sand between your toes!
If you like DIY jewelry, check out my Macramé Beaded Anklet tutorial, and also this Daisy Chain Seed Bead Necklace.
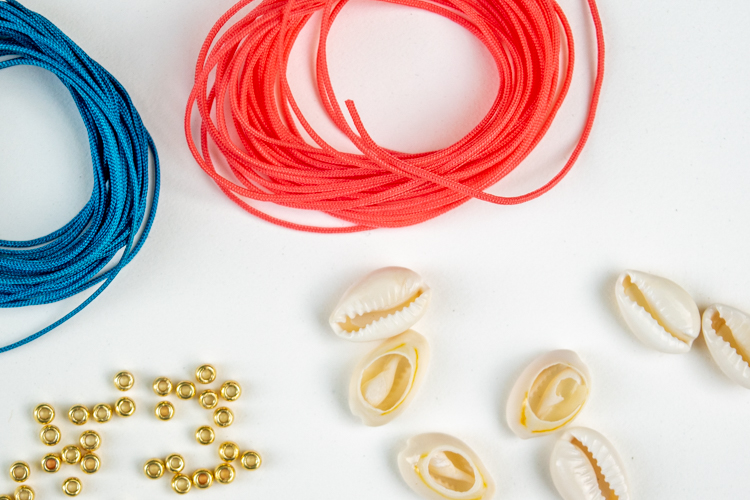
Shell Bracelet Supplies
- 4 yards 0.5mm nylon Chinese knotting cord
- Cowrie shells with a cut back, about a 1/2 inch long
- nail polish and topcoat
- nail art brushes and dotting tools (or fine brush and toothpicks)
- nail polish remover (optional)
- scrap card stock or thin cardboard
- scissors or cord cutter
- lighter (only if you don’t have a cord cutter)
- ruler or measuring tape
- clipboard, large safety pin, or macramé board
- big eye needle (optional)
- 8/0 seed beads (optional)
Time needed: 1 hour and 30 minutes
Shell Bracelet — Step by Step Instructions
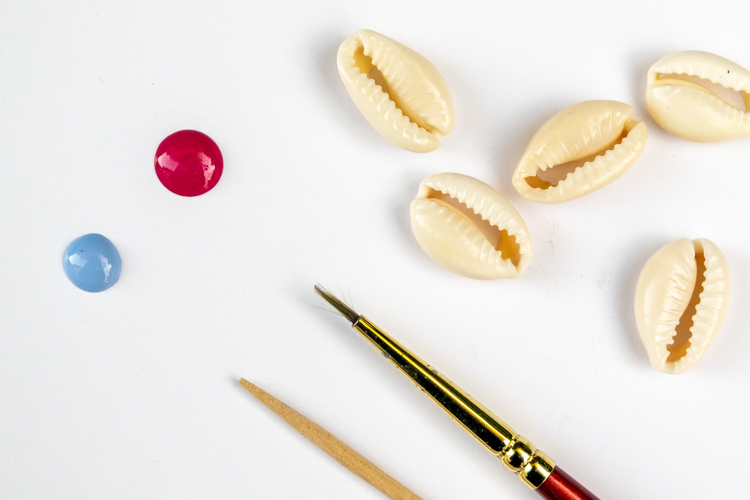
- Paint your cowrie shell
I used nail polish to paint the evil eye and the flower design on the shell, using a very fine brush and a toothpick or a nail art brush and a dotting tool. Once it was well dried, I sealed it with a layer of topcoat so it would be more durable.
The nail art tools really make it a lot easier, I will say that. Make little puddles with the nail polish on your cardboard to dip your tools into. They will start to dry as you work, so don’t make them too big and just make new ones as you need to.
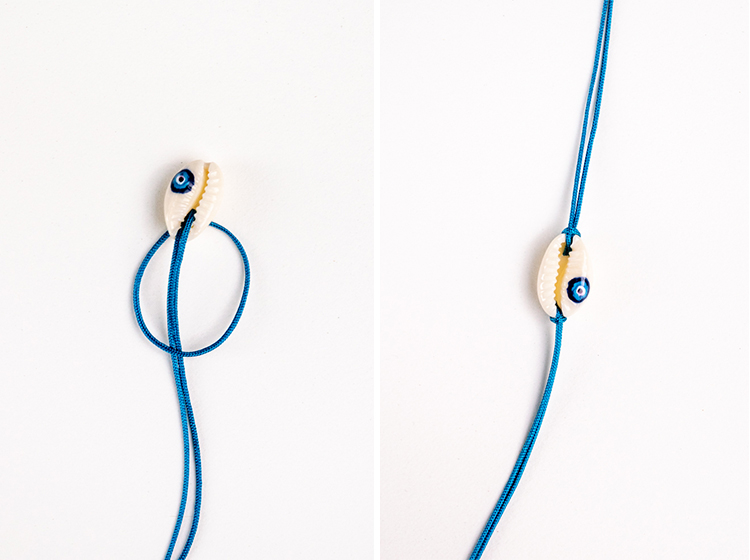
- Cut your nylon cord and loop through shell
Cut the knotting cord into two 36-inch, two 30-inch, and one 12-inch length. Fold one 30-inch piece in half, push the loop up through the cowrie shell from the underside, fold it over the shell, and pull the ends of the cord through the loop until it is snug. Repeat this on the other side of the shell.
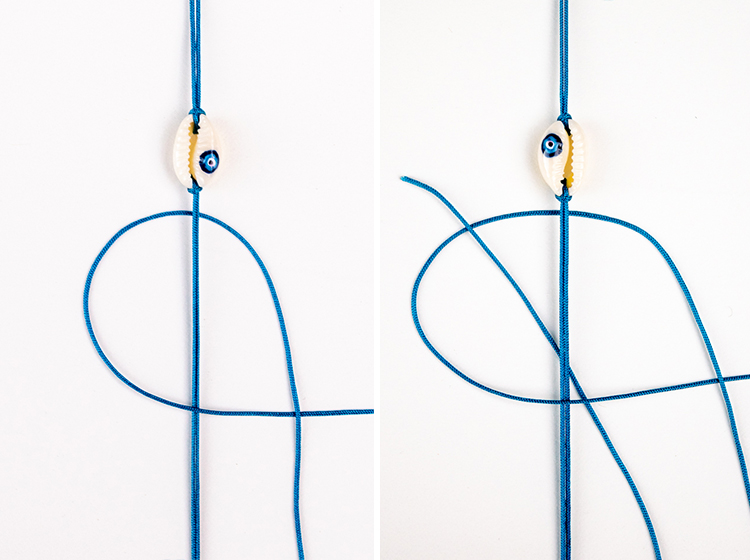
- How to tie a square knot — step one
Center the 36-inch cord under the two middle strands on one side. Fold the left cord over the middle strands, then lay the right cord on top of it. Pull the right cord under the left and middle strands and through the loop on the left side. Pull the knot tight as you slide it up to the top next to the shell.
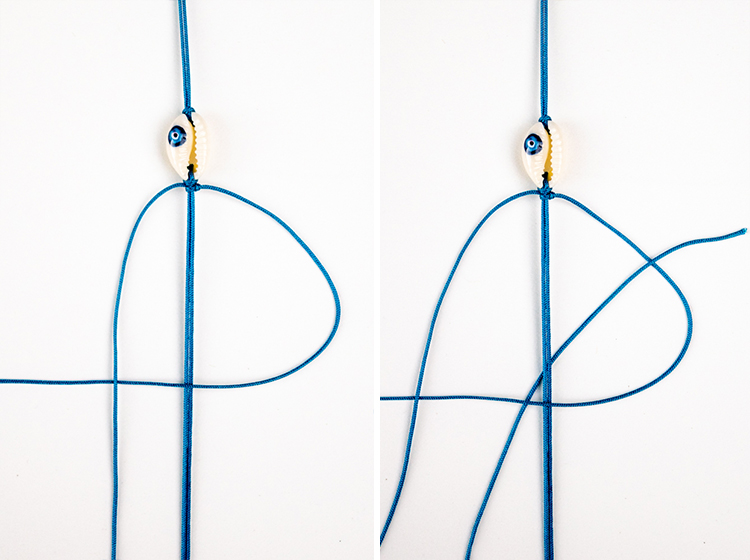
- How to tie a square knot — step two
You repeat the same sequence but switching sides:
Fold the right cord over the middle strands, then lay the left cord on top of it. Pull the left cord under the right and middle strands and through the loop on the right side. Pull the knot tight as you slide it up to the top next to the first knot.
Tips:
• Make sure you pull your knots evenly snug but not too tight. Your bracelet will come out better if you use consistent tension — don’t start out really tight and then get looser or vice versa.
• It’s pretty easy to undo the knots in the cord, so if you notice a mistake or a particularly uneven stitch, you can go back and fix it.
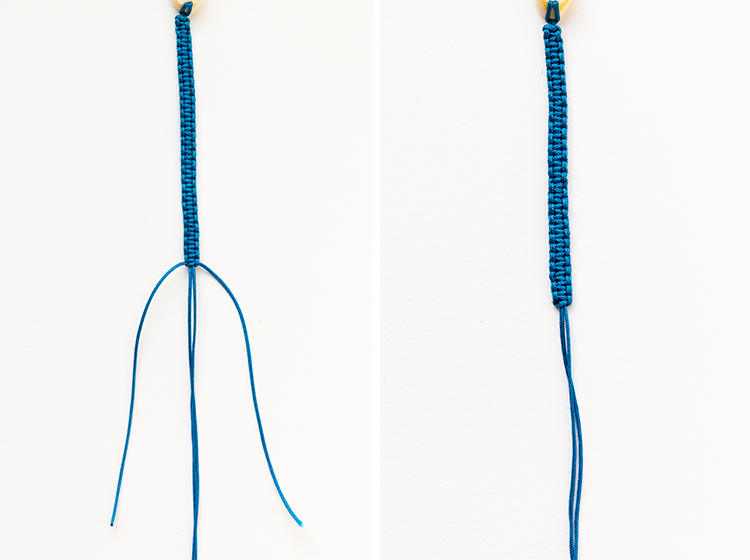
• If your knots look uneven, sometimes it’s just a matter of gently sliding them a little closer together. - Continue tying the square knots
Repeat the steps of the square knot — left, right, left, right — until it’s as long as you would like it. (Each side of my bracelet is 2 1/2 inches.) Don’t forget that the clasp will take up approximately half an inch, so you need to account for that as well when you are deciding how long to make it.
- Cut and seal the knotting cord
Once you have finished knotting, cut the outside cords (the ones you’ve been using to tie the knots) with a cord cutter, or with scissors. Carefully melt the ends with a lighter if you use scissors.
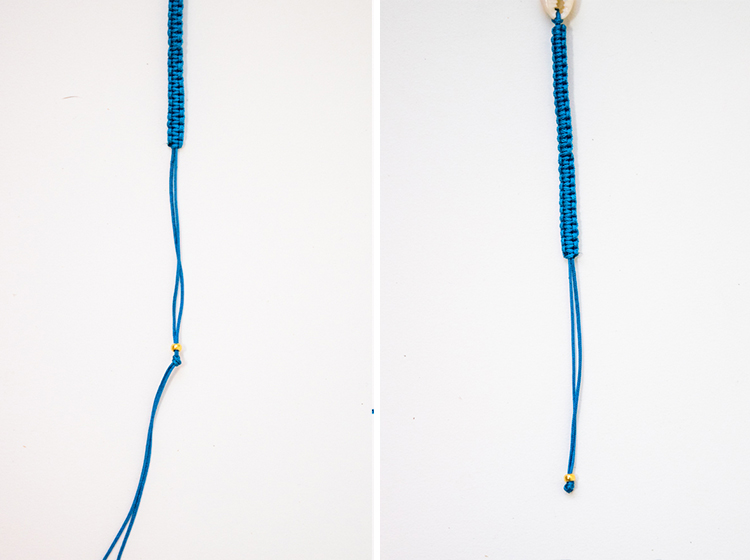
- Add beads to the ends (optional)
I like to add 8/0 seed beads to the ends of my cord when I make a sliding clasp. It’s entirely optional but I think makes it look a little more finished.
Using a big eye needle, slide a bead onto both sides of the cord (it’s easier to do this one side at a time). Tie an overhand knot about 2 inches or a little more from where your knotting ends. Cut the cord lengths just after this knot. Seal the ends with the lighter if you use scissors. - Tie the two sides together overlapping
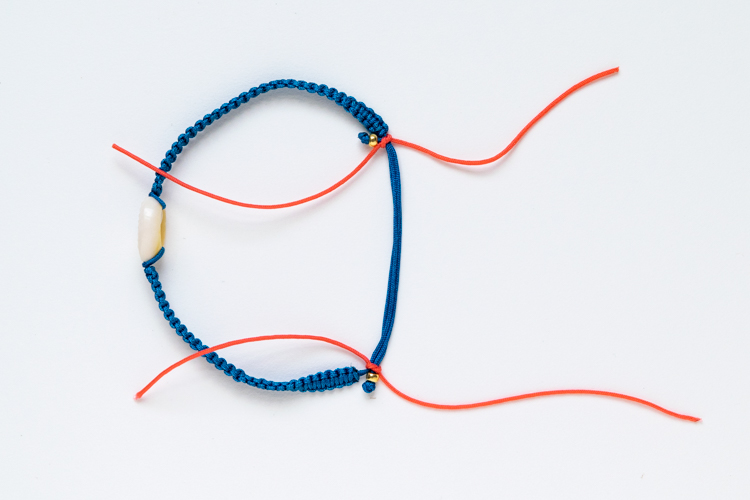
Using two shortish (6–8 inches) pieces of scrap cord or string, overlap the two ends and tie them together. Try to untwist the end cords as much as you can when you secure them, so that when you knot the clasp they are nice and flat.
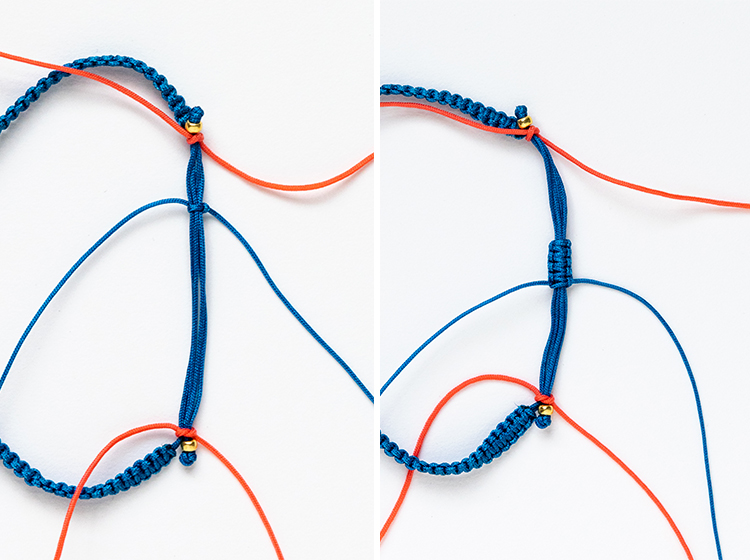
- Tie the sliding clasp
Find the midpoint of the 12-inch piece of cord and place it behind the overlapped pieces. Tie about 10 square knots (one knot is made up of both sides, left and right), or until the clasp measures about 1/2 an inch. (It’s really up to you how long you make it, so do whatever looks good to you!) Then cut the outside cords with a cord cutter, or with scissors. Again melt the ends with a lighter if you use scissors.
Tip: Test your clasp before you cut the cords. It should slide pretty easily but not so easily that it won’t hold the bracelet in place.
Please pin this if you like it! And don’t forget to sign up for my email list :).
Thanks for the inspiration and great instructions. I had a great time making these for my little niece and her friends. I glued “googly eyes” on some, really cute.
Thank you for the excelent tutorial. It was most helpful for me.
El Magnifico ❣️