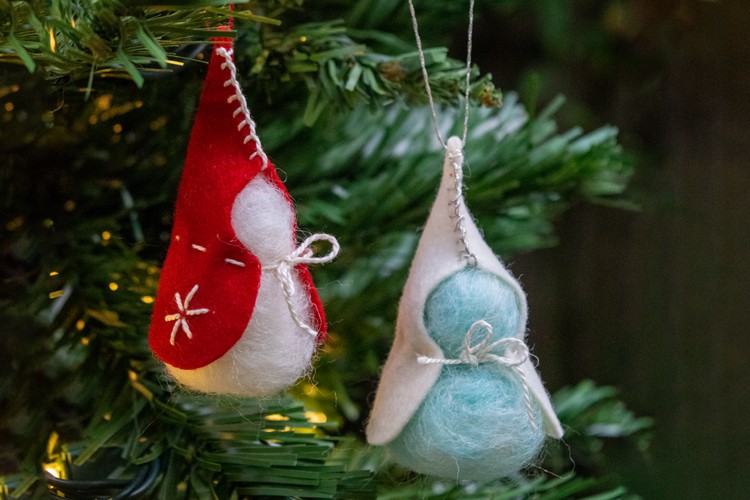
These gnome Christmas ornaments are a great easy, indoor project when you need a quick win. Sometimes you just need something you can finish in an hour, just to get that quick dopamine hit — so many things in our lives complicated and drawn out. And what’s not to love about gnomes, am I right?!
You can keep the Christmas gnome ornaments simple and clean, or embellish them with beads, bells, metallic thread, hand-dyed felt, or more elaborate embroidery. Whatever makes you feel good. You do you, sistah.
The little felt gnomes work well as ornaments of course, but you could also use them as a gift topper, or as part of a winter display or tableau. (My kids went to Waldorf school, and when they were little we always had a nature table set up somewhere in the house for seasonal treasures.) You could actually make these for any season if you switched up the color palette. Easter gnomes? Halloween gnomes? Why not?
If you are looking for other homemade Christmas decorations, check out this project to make a Dried Orange Garland or this one to make Origami Paper Lanterns.
Gnome Ornament Supplies
- a piece of 4-inch x 5-inch wool felt fabric, 1.2mm thickness (or thereabouts)
- Pearl cotton size 8
- chenille needles
- scissors for detail
- wool roving
- felting needle
- gnome pattern
- optional: metallic embroidery floss, beads, small bells, or other embellishments
Time needed: 1 hour
Christmas Gnome Ornament Instructions
- Print out pattern
Download the PDF of the pattern and print it out at full size.

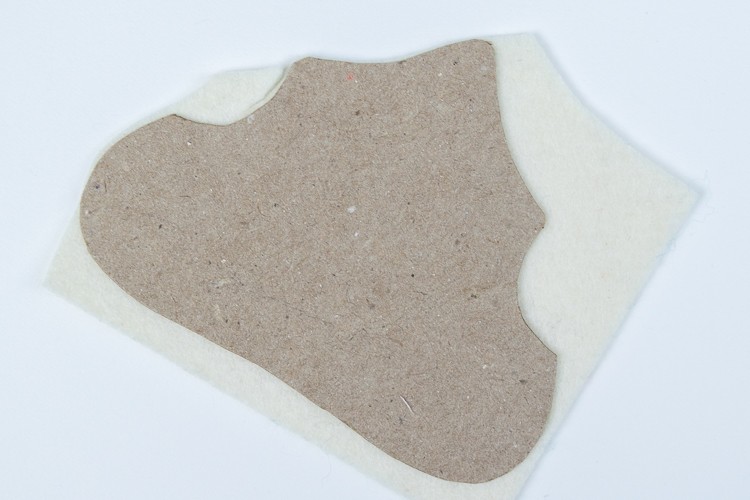
- Cut out pattern from thin cardboard
This step is optional. You could just cut the felt out using the paper pattern as a guide. Or trace it onto the felt using transfer paper. I find it easier to have a cardboard template, and then you can use it over and over.
- Cut pattern out of felt
Using either the cardboard template or the paper pattern, cut the gnome cape out of the felt. Don’t worry about getting it perfect at this stage. Once you have it cut out, fold the cape in half down the center axis and even up the sides. Also, clean up any uneven or sloppy cuts.
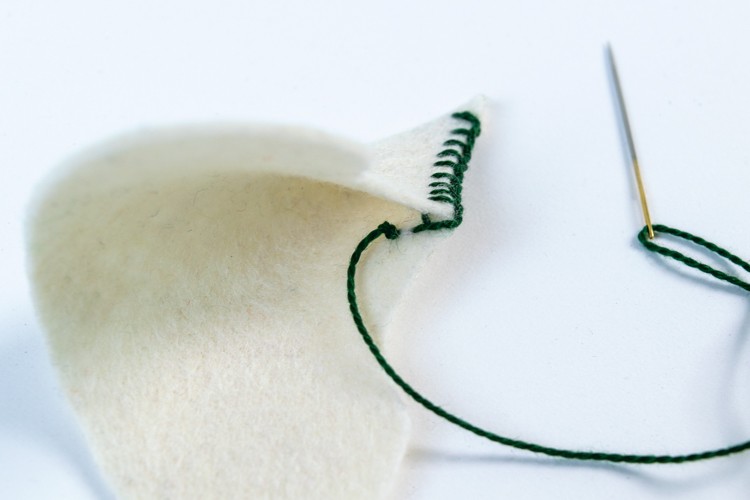
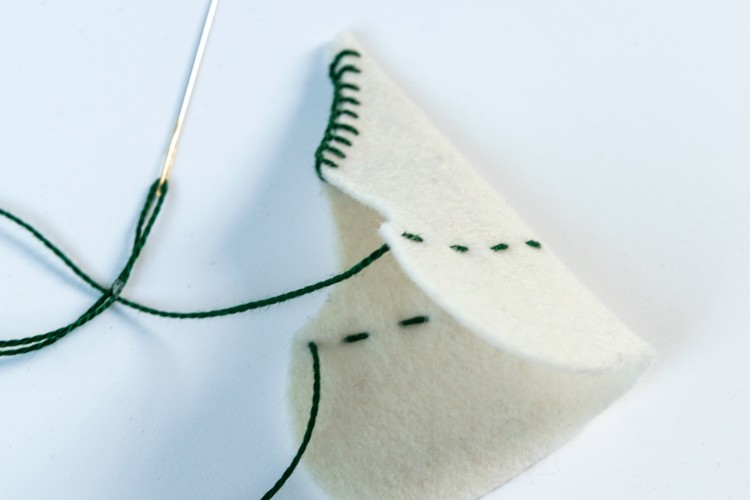
- Sew the cap with blanket stitch
Starting at the tip of the hat, you are going to sew up the gnome’s cap using blanket stitch. Using your thread of choice, thread the needle and tie a knot at the end.
You want to start sewing the blanket stitch about 1/8 inch down from the tip and 1/8 in from the edge, coming from what will be the inside of the cap. I’ve marked it on the pattern with an asterisk.
I think this video does an excellent job of teaching how to sew blanket stitch if you aren’t very familiar with it. I made my stitches about 1/8 apart and long, but you do you. - Finish up the cap
Once you have sewn up the cap, bring your thread to the inside and tie an overhand knot snug to the felt. Then thread the needle through just a little bit of the felt fibers on the inside of the cap, for about half an inch, so the end won’t be flapping around. Trim off your excess thread.
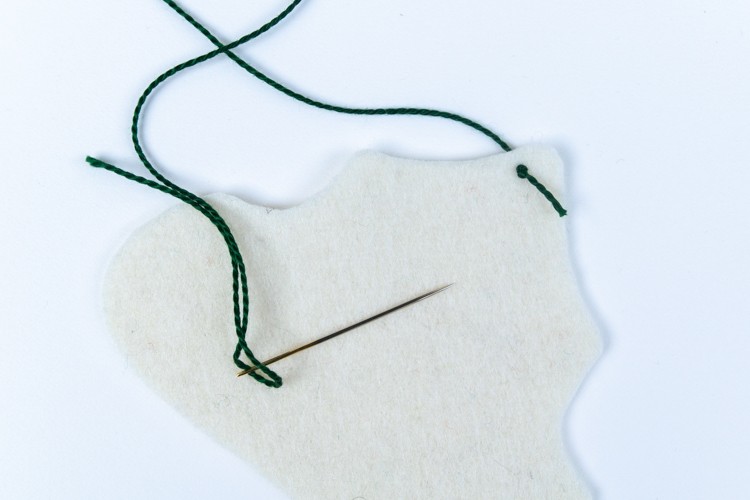
- Sew the gathered neck
Cut a piece of pearl cotton at least 10 inches long, and thread your needle. Using the dashed line on the pattern as a guide, sew a running stitch through the felt, leaving a tail 4 to 5 inches long at the beginning. You don’t need to tie a knot in your thread since you are going to tie a bow with the other side.
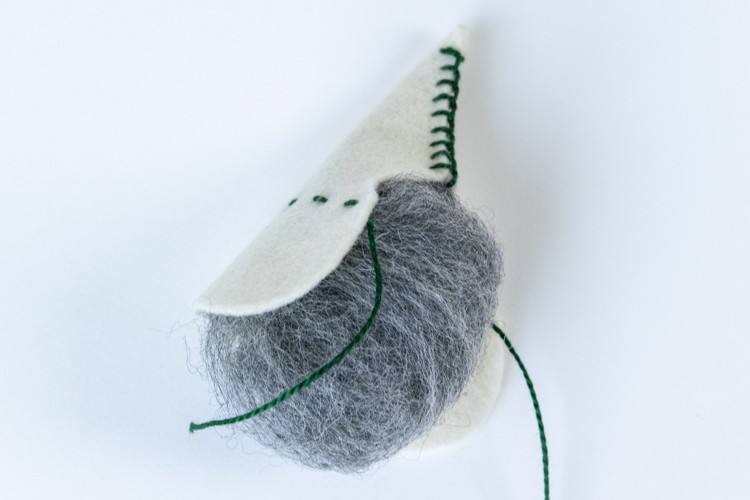
- Create stuffing with wool roving
Make a bean-shaped ball with your wool roving that’s a little bigger than your gnome. You want one side and one end to be smooth — those will be the front and the bottom.
Use your felting needle to lightly poke the roving so it holds together. Be very careful about poking on the smooth side and end (the front and bottom) since the needle punches can be very visible. - Stuff your gnome with roving
Try fitting your roving ball into your gnome cape. You may need to shape it a bit more — make the head a little smaller or more cone-shaped, the bottom a little flatter. You want the roving to be bursting out a bit so that when you tie the cape on, it fits very snuggly and it looks full and pudgy.
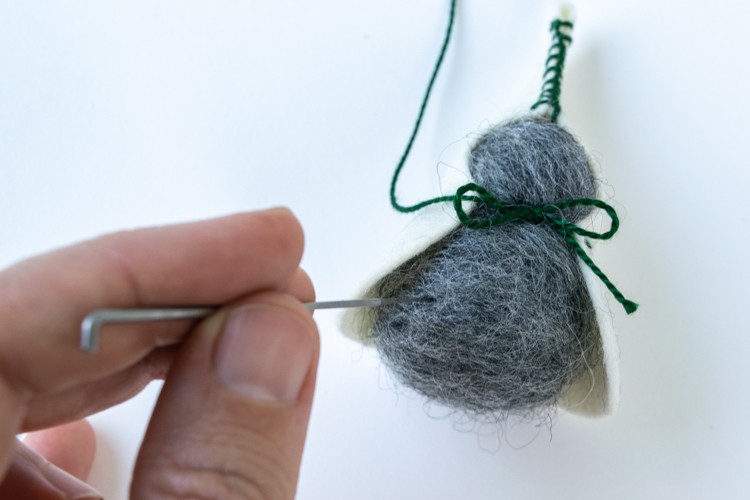
- Tie the cape
Once you have the roving shape worked out as you want it, tie the cape on with a bow. You will want to cinch the felt a little bit around the string, so you get a nice gentle, ripple in the fabric. Trim the ends of the string so they are even.
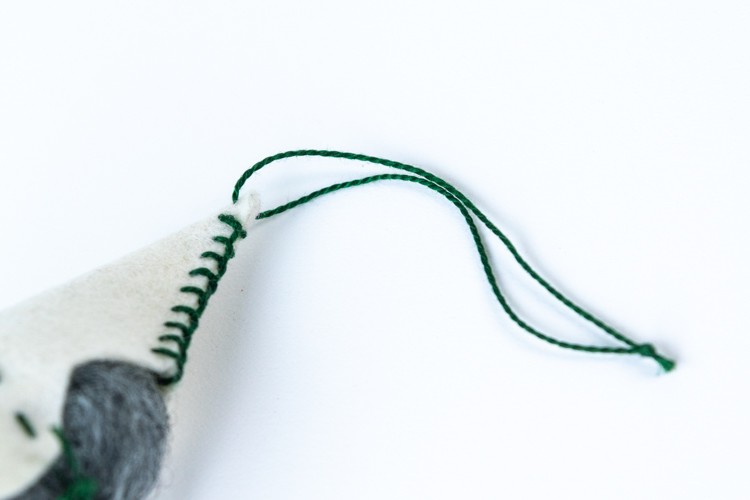
- Add a loop for hanging
Cut another piece of pearl cotton or floss about 10 inches long. Thread your needle and make a loop through the tip of the hat. Tie a knot about 3 to 4 inches from the top of the hat. Trim off the ends.

Please pin this post if you like it, and please join my email list!