
Sashiko stitching (a kind of Japanese embroidery) is easy to learn. I’ve created the perfect project for a beginner to get started and created a free downloadable pattern.
Sashiko is one of my favorite forms of embroidery because it’s easy to get great results as a beginner, but there is a world of history, technique, and complexity behind its surface of simplicity.
History of Sashiko
Sashiko embroidery has its roots in the seventeenth and eighteenth centuries as a way to increase the durability and warmth of clothing, as well as to mend and patch worn fabric. A simple running stitch with thick cotton thread is used to make geometric patterns in cotton, linen, or hemp fabric.
Getting Started
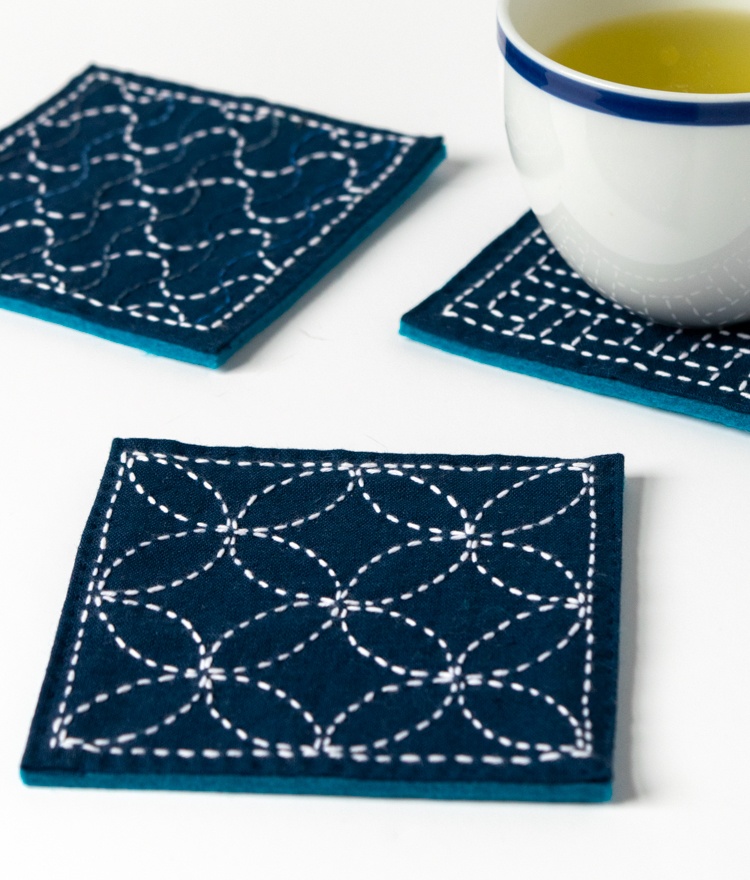
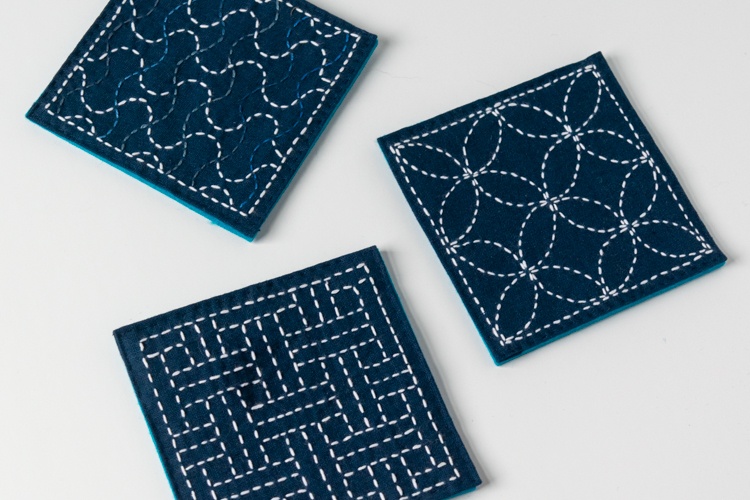
The best way for a beginner to get started with sashiko stitching is with small projects like samplers, handkerchiefs, and coasters. The patterns I’ve used for the coasters are traditional sashiko patterns, made by repeating curved and straight lines, and inspired by the natural world.
For your first sashiko stitching project I recommend starting with one of the straight line patterns, either Sankaku (triangles) or Ajiro (wickerwork). You’ll get a feel for how to move the needle and how to hold the fabric more easily with the straight lines, and then you’ll be better prepared to tackle curved ones.
Sashiko is really about many stitches coming together as a whole, and the rocking motion of the needle (unshin) to easily and quickly create the stitches. Try not to focus too much on making each stitch perfect and instead see each one as a tiny part of a much larger pattern and whole.
How to do Sashiko Stitching
- Your stitches should ideally be the length of a grain of rice (short grain not long grain!) but you will need to adjust this as you go along to make your rows end in the right place and so that your stitches don’t cross or touch (more on that below). The distance between your stitches should be about a third the length of your stitch. Again, don’t get hung up on perfection here.
- Some folks never tie knots in sashiko, and some do. If you are using a heavier fabric and the backside will not be visible on your finished piece, you can tie a simple quilter’s knot when starting and ending your thread. There are two alternative methods to securing your threads in sashiko:
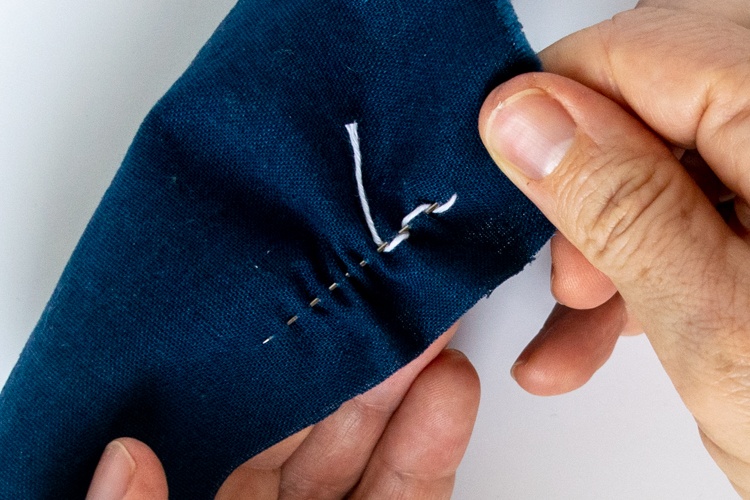
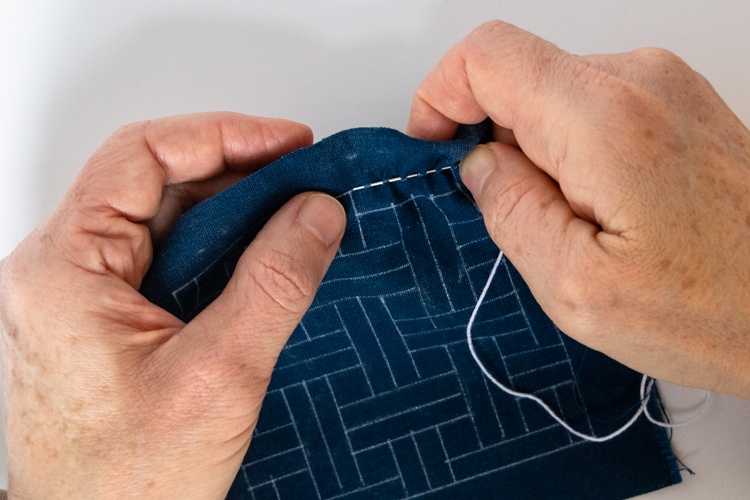
You can sew a few backstitches when starting your thread: insert your needle about an inch and a half (3–4 stitches) from the starting point of the line that you want to work and make several stitches back toward its beginning. When you reach the starting point, turn and work as you normally would, going over the stitches you just made.
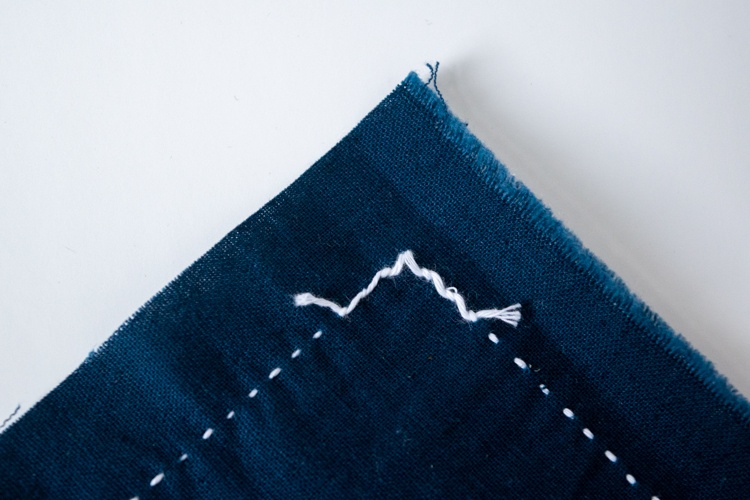
You can weave your ends under the backside of your stitches (four to five stitches is enough) and then clip the ends, leaving around 1/8 inch tail. It’s a little tricky when you are starting a row – you really have to pay attention to your first few stitches on the backside to make sure you catch that tail.
- Clip the thread ends as you go, leaving about a half-inch tail. Otherwise, it makes a mess and they get caught up in your stitches.
- If you are having trouble pulling your thread through the fabric, try pulling the fabric instead. It’s ok if it gets bunched up — just smooth it out as you go along.
- You carry your thread jump to a new line in the pattern — you don’t need to start each line or section with a new one. Just be sure to leave some slack in your thread on the back of your fabric, so it doesn’t bunch up when you are finished.
- Use the longest needles for the long straight lines, and shorter needles for the curved lines.
- Your stitches should not cross each other or touch at intersections or anywhere they meet. Here is an illustration of what that looks like in different situations.
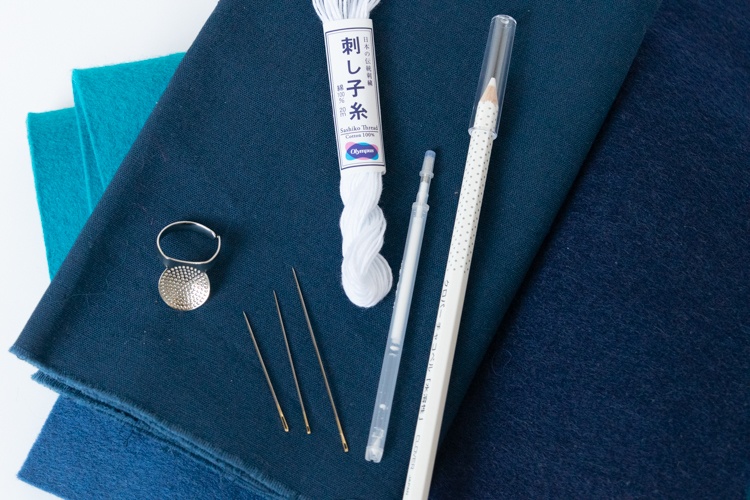
Sashiko Supplies
- cotton or linen fabric — indigo blue or white/cream fabric is traditional (I always wash, dry, and press fabric before I sew with it, but if you are using fabric with a printed sashiko pattern, don’t wash it or you will wash off the pattern!)
- a sashiko pattern
- white sashiko thread (you can use off-white or another color if you prefer)
- sashiko needles (different sizes)
- sashiko thimble
- chalk paper for pattern transfer
- chalk pen or heat erasable pen
- fabric scissors
- poly-cotton thread to match your fabric
- wool felt (2.5mm or thicker)
- sharps hand sewing needle
- small sharp scissors
Sashiko Coaster Instructions
- Print out the pattern and cut it out
Download and print out the pattern you want to stitch. Leave about half an inch or more of a border around the pattern so you can pin it to the transfer paper and fabric.
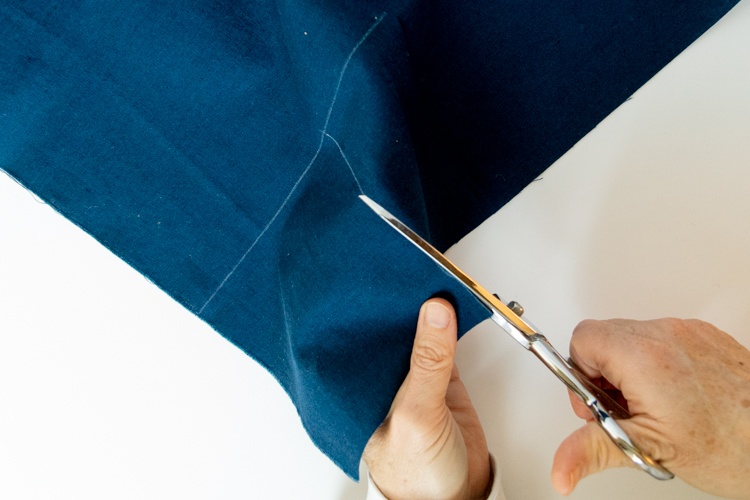
- Cut your fabric
Cut a 6-inch square out of the fabric you want to stitch. You can do this either with a rotary cutter and quilting ruler or with sewing scissors.

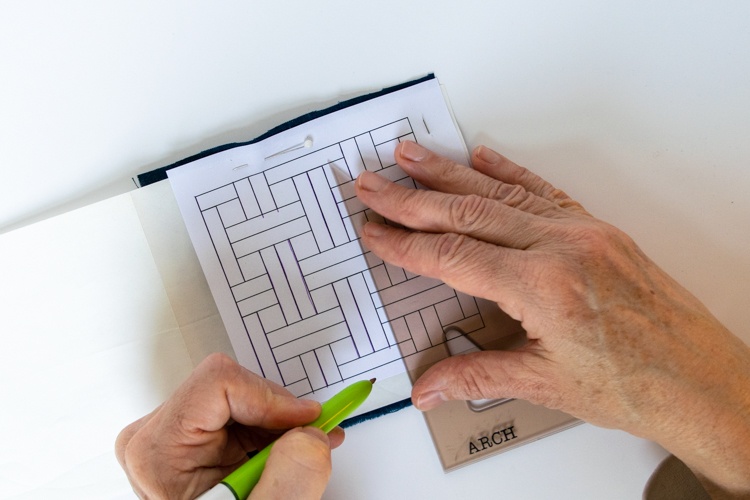
- Transfer your pattern
With the right side of your fabric facing up, lay your transfer paper on top of your fabric square with the chalky marking side down. Then lay your pattern on top of the transfer paper. Make sure to center the pattern on your fabric square as much as possible and get the sides nice and parallel. You will have some extra seam allowance to square it up after you do your stitching so it doesn’t need to be perfect.
Pin all three layers together on two adjacent sides so none of the layers can shift. If you pin two perpendicular sides then that leaves one corner free so you can check that the pattern transfer is working.
With a pen or pencil, go over all the lines of your pattern to transfer them to your fabric. I like to use a colored ballpoint pen so I can see which lines I’ve already drawn.
If you are using a pattern with straight lines, having a small straight edge to guide you makes the process much faster and cleaner.
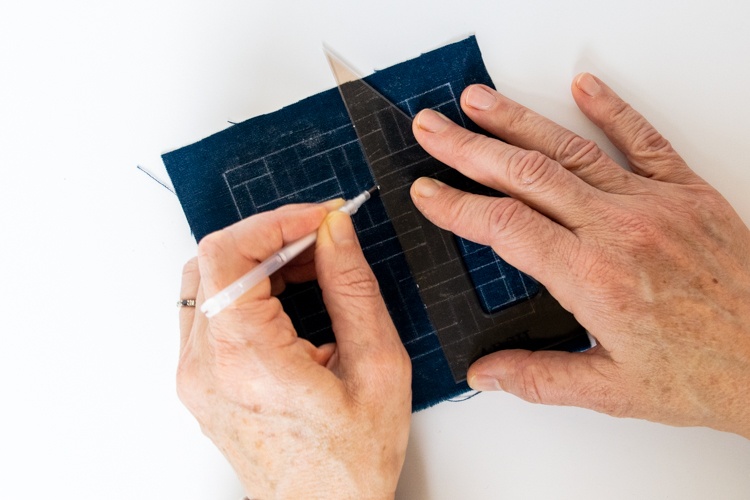
Once you are sure that you have clearly transferred all of the pattern lines, you can unpin the layers. - Go over pattern with chalk pen (optional)
I like to go over the lines of the pattern again with a heat-erasable pen or chalk pen. Otherwise, the lines get rubbed off as I’m working and are hard to see and I end up redrawing them over and over.
- Stitch the outside frame
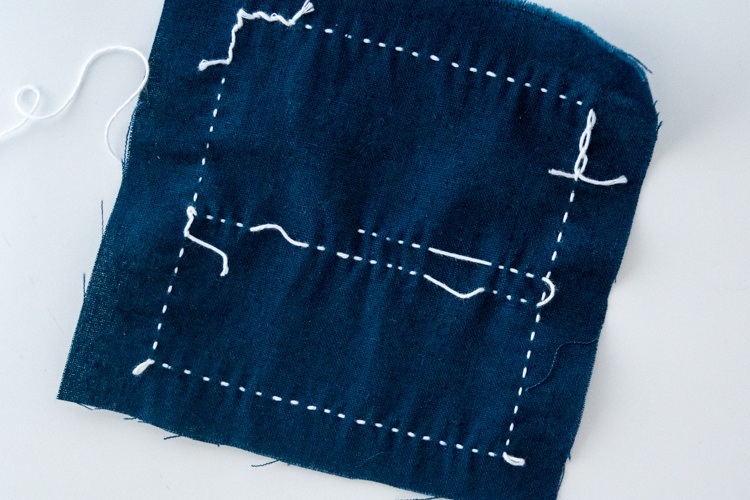
Starting at one corner of the outside frame, stitch all four sides of the frame of your pattern. You can tie a knot in your thread or tack down your thread as you sew — it’s up to you. Leave a little loop at each corner so your stitches don’t pucker the fabric.
- Continue stitching the pattern
Start stitching the longest lines of your pattern first. working out to the edges. Sometimes the longest lines are in the center of the pattern, and sometimes they are diagonal to the frame. The Shippo-Tsunagi (Seven Treasures) pattern is an example of this.
Keep stitching your pattern, sewing all the lines parallel in one direction before switching to the next.
There are some patterns that are traditionally sewn in a particular order. The purpose of this is to use the thread in the most economical way without jumping around too much. As you stitch, sew long rows across the whole pattern, instead of just finishing the design in one particular section. You will be able to sew faster and use less thread. - Rinse and let dry
Once you have finished sewing your pattern. Hand wash your piece in cold water with gentle soap. You want to rinse any remaining chalk or pen marks from your fabric before you iron it. Press it with an iron before you trim the seam allowance.
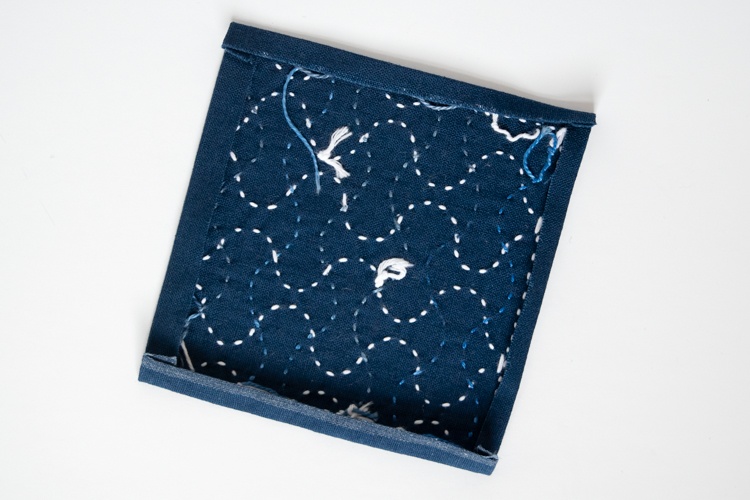
- Press seam allowance
Trim your fabric evenly to 5/8 an inch from your pattern frame, and then press under leaving a 1/4 inch border on the outside of your frame. Your coaster should now be 4 1/2 inches square.
- Cut your felt
Cut a felt square so it is the same size as your sashiko coaster. It should be about 4 1/2 inches, but your’s might be a little different.
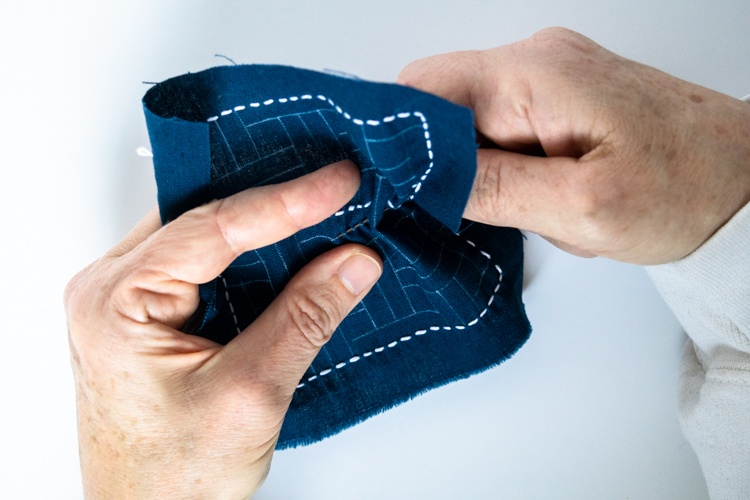
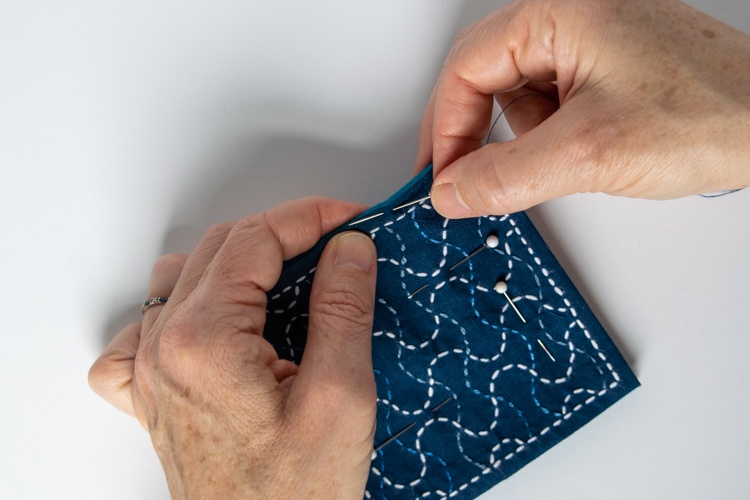
- Sew the sashiko fabric to the felt
Using your regular sewing needle and matching thread, sew your sashiko fabric to your cut felt using a running stitch. I find that I don’t need to go all the way through the felt with the needle except at the corners where there are more layers of the sashiko fabric.

If you liked this embroidery project, check out my tutorial on how to make embroidered fingerless gloves, or try out cross stitch if you’ve never done it before.
Please pin this post if you like it, and please join my email list!
very cool project
Thank you so much for the details and information, I can’t wait to get started!
Love your instructions. Simple and to the point. Thank you.
I am about to take an introductory Sashiko
class, and the information included in this
article is very informative.
Muchas gracias, muy juegas las instrucciones.
Very clear instructions. Love it. Th am you.
Thank you for the clear and easy to understand short tutorial. A good start for a beginner like me. I will give it a go.