I love making friendship bracelets with beads. It’s so easy, and really kicks them up a notch and makes them feel special. Follow the steps below and you’ll be whipping out bracelets like a fiend.
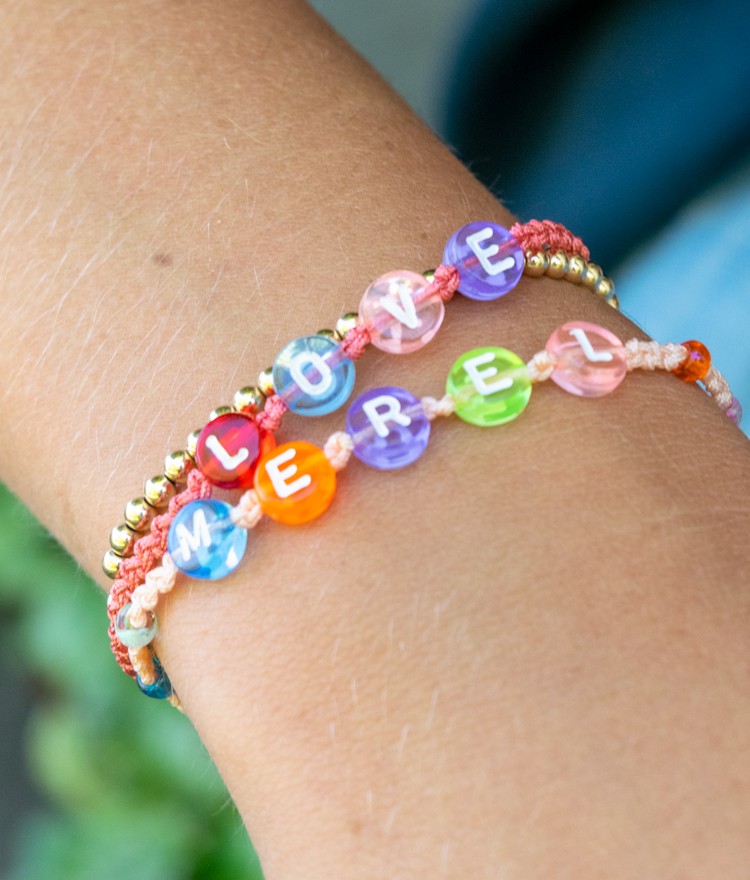
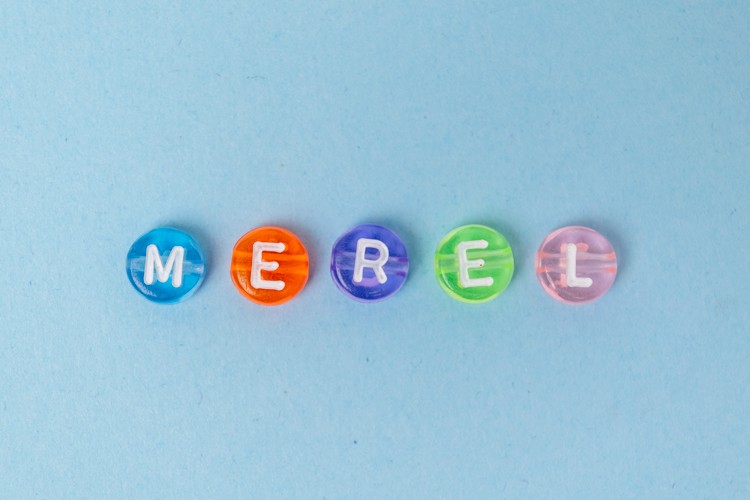
Something about the glowing colors of these letter beads really makes me happy. They also remind me of summer camp arts and crafts, like lanyards and tie-dyeing and friendship bracelets. Sort of inherently joyful and easy.
So letter beads and friendship bracelets — the perfect combination? Maybe you need a break from the news, or the sun, or something to do on a rainy day?
If you like DIY jewelry, check out my Macramé Beaded Anklet tutorial, and also this Daisy Chain Seed Bead Necklace.
Learn to tie the essential macrame knots for jewelry and home decor.
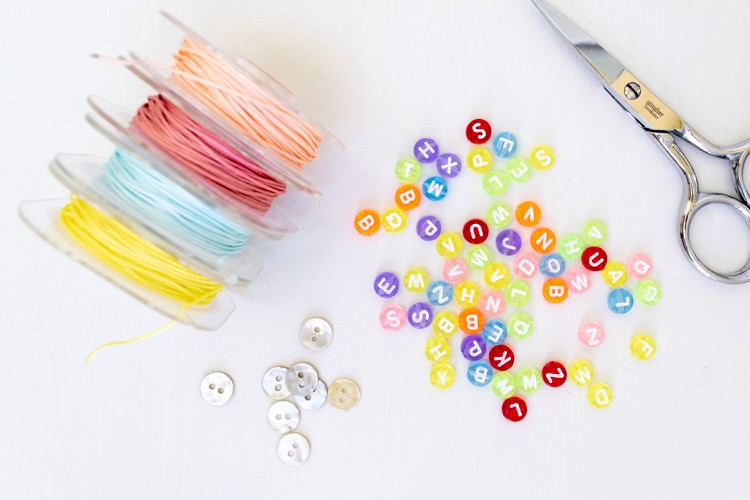
Bracelet Supplies
- 1 yard 0.5mm nylon Chinese knotting cord (I used Sun Kissed for the MEREL bracelet, and Coral for the LOVE one)
- alphabet letter beads
- a small two-hole button, around 9mm wide
- scissors or cord cutter
- lighter (only if you don’t have a cord cutter)
- ruler or measuring tape
- big eye needle
- clipboard or large safety pin
- 5mm beads (optional)
Time needed: 1 hour
Friendship Bracelet with Beads — Step by Step Instructions
- Cut your nylon cord
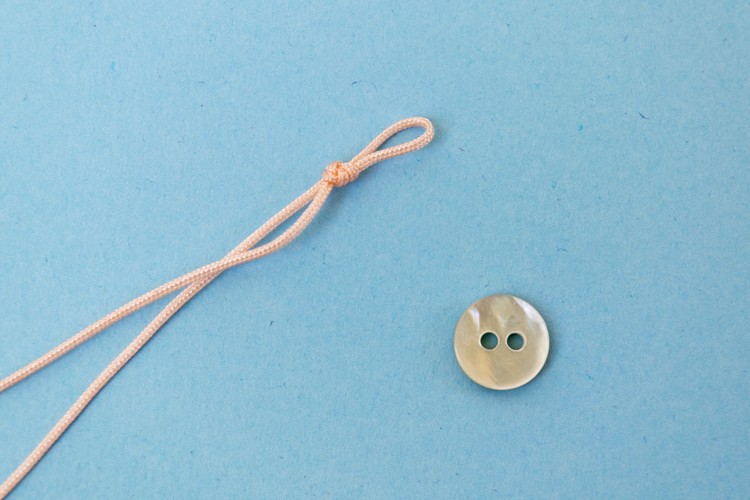
Cut a piece of cord one yard long. Tie an overhand knot at the halfway point, making a small loop about half an inch long, or just large enough to fit your button through. It should be a pretty tight fit.

- Melt the ends of the cords
Using the cord cutter or lighter, melt the ends of the cords so they don’t fray. If you are using a lighter, you don’t want them to fatten out as they melt, so quickly run your fingertips over the ends after you remove the flame. Be careful not to burn yourself!
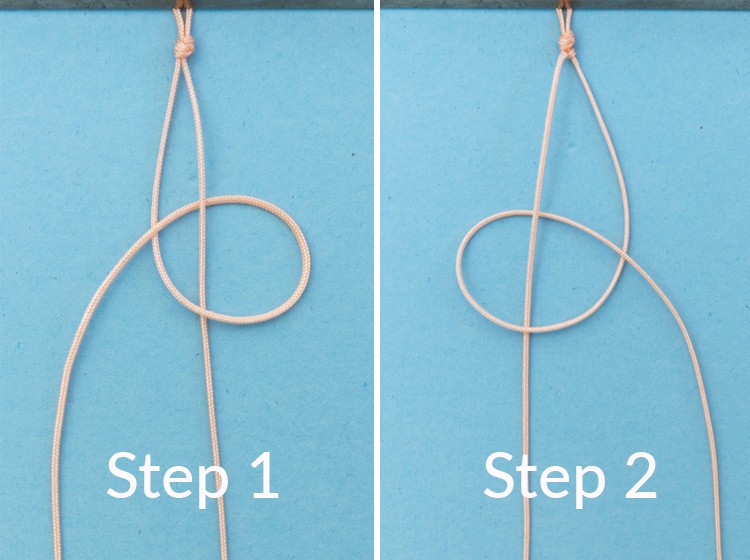
- How to tie a knotted chain
The knot you will be using for the main part of the bracelet is called the knotted chain. It’s a very simple knot. Basically you are just looping one cord around the other, alternating sides. See the picture below. Repeat Steps 1 and 2 until you have the length you want.
Tip: The only trick to the knotted chain is to make sure the cords do not cross over as you are tying the knots and adding the beads. So make sure that the cord that you start with on the left, stays on the left, and the same for the right.
It is very helpful to mark the end of the cord on one side so you can tell the sides apart. You can do this with a marker pen, or nail polish, or something similar. I kept the big eye needle attached on one cord, which served the same purpose and made it easy when it was time to add a bead, but it did make the knot tying a little trickier.
- Measure and plan your letter beads and bracelet size
Measure what size you want your finished bracelet by wrapping a piece of cord around your wrist. Then subtract an inch for the fastening bits.
Spell out your word with the letter beads, and measure how much length they will take up. You can butt the beads against each other, or tie a couple of knots between them to create a little space. If you are leaving space, be sure to space out your beads the proper amount so you get an accurate length measurement.
Example: I want my finished bracelet to be 7 inches around, so subtracting an inch for the fastening, that leaves 6 inches of beads and knots. The letter beads are 1/4 inch wide, and I want two knots between them (tying one with each side) which add 1/8 inch each. So for 5 letters that’s 5 times .25, and then the spaces between the letters are 4 times .125, or:
(5 x .25) + (4 x .125) = 1.25 + .5 = 1.75
So my word is going to take up 1 3/4 inches, leaving 4 1/4 inches for knots and other beads, or 2 1/8 inch on either side of the letters. So now I know I need to knot or bead 2 1/8 inches before I start adding letter beads.
- Attach your cord to a solid surface
You can use a clipboard and clip the loop to the top, or a large safety pin to attach it to a pillow or your pants. I have a macramé board but found it didn’t work that well for this project, at least at the beginning, because the loop at the top was too small.
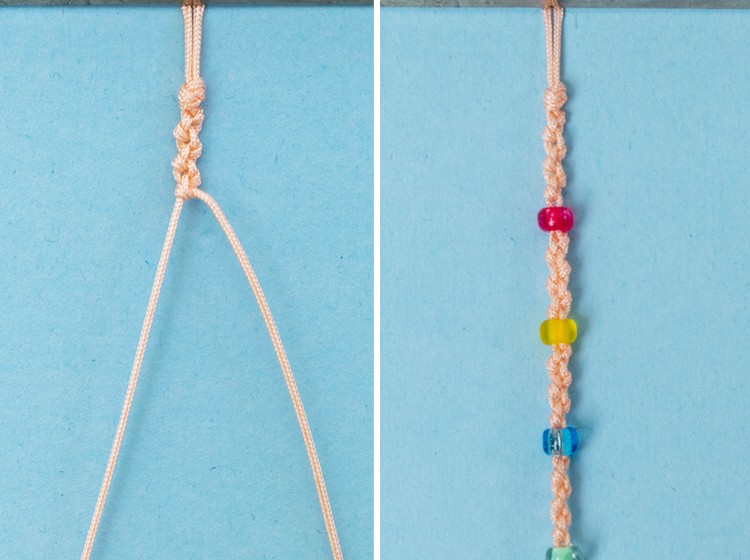
- Start tying the knotted chain
Make sure that you alternate sides when tying your knotted chain knots, otherwise it creates a twisting pattern. (The twisting pattern could be nice too, just be aware that the side you are tying the knots with will get used up much faster than the other side, so you’ll need to make the knotting cord much longer.)
I did a pattern of three complete chain knots (so six total knots, three each side) and then added the smaller beads.
To add beads, you need to slide them onto both cords. Insert one cord through the hole, and then use a big eye needle to get the other side through. As I mentioned, I just left the needle on the end of the cord as I worked, which made it easy to add the beads.
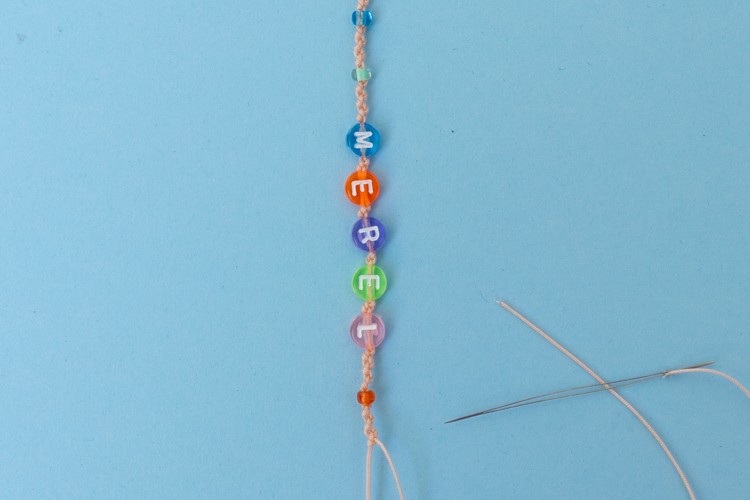
- Add the letter beads
As you add the letter beads, make sure they are going to read correctly once you are finished! It would be very easy to add them so your letters read backwards. If you are adding space between your letters, be sure to add the same amount of knots between all of them.
- Finish the other side of the bracelet
Finish the second side of your bracelet to match the first side. It’s also a good idea to try it around your wrist and make sure it’s the correct size.

- Add the button
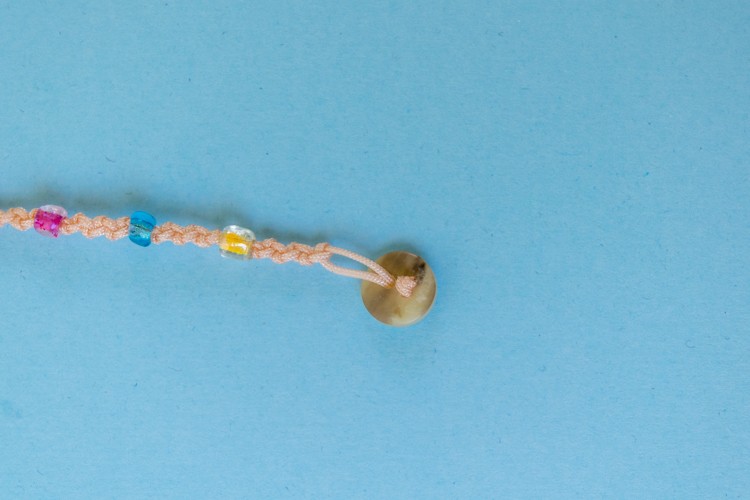
Slide both sides of your cord through the buttonholes. Make sure you have it facing in the right direction, so it’ll be right side up when you put it on. Tie an overhand knot with the cord and trim off any extra. You can leave a little space in the cord between the knotted chain and the button, or you can slide the button right up next to your knotted chain — it’s up to you.

- Enjoy
Show off your new bracelet!
Please pin this if you like it! And don’t forget to sign up for my email list :).
Looking for more fun, summer beading projects? Check out this Daisy Chain Seed Bead Necklace!

These look amazing and like they’ll be so much fun to do. I was looking for something special to give to a friend that is not doing so well – this is PERFECT. Love all your ideas!