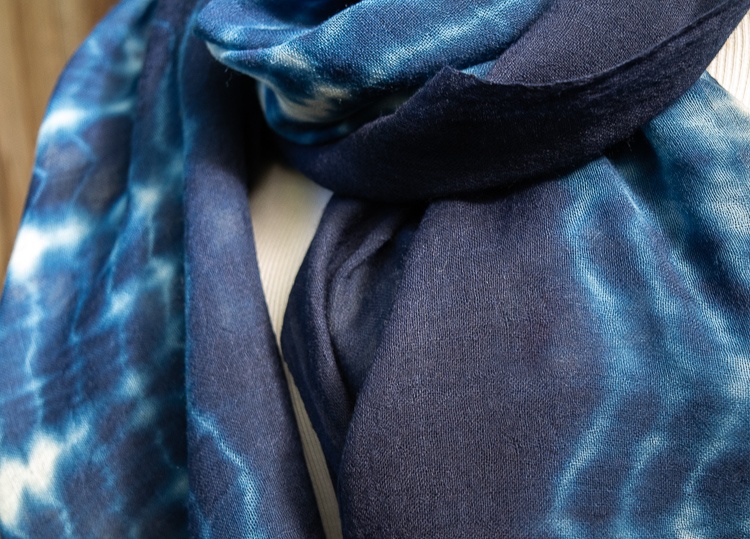
This DIY Shibori indigo wool scarf was so easy and turned out so much better than I could ever hope for! Follow these steps and make one for yourself, your mom, your sister…
I love making gifts for people instead of just buying something. One, it gives me an excuse for a project — “I can’t file paperwork today! I have to go buy craft supplies and then work on this cool project cuz it’s Betsy’s birthday this week.”
But also, the one finite resource we all are bound by is time, and when we commit our time to someone it is an acknowledgment of their importance. And yeah, there’s a little bit of flexing going on. “This beautiful thing that you think I plonked down a bunch of cabbage for at some swanky boutique? I effing made that beetches. I got mad skillz.”
This scarf is one such item. I will admit, I didn’t really know how it was going to turn out. I didn’t do any test runs, and it was my first time trying this technique, and my first time dyeing wool, and only my second time dyeing with indigo. Yikes. But that’s good news! I am no expert! You can do this too!
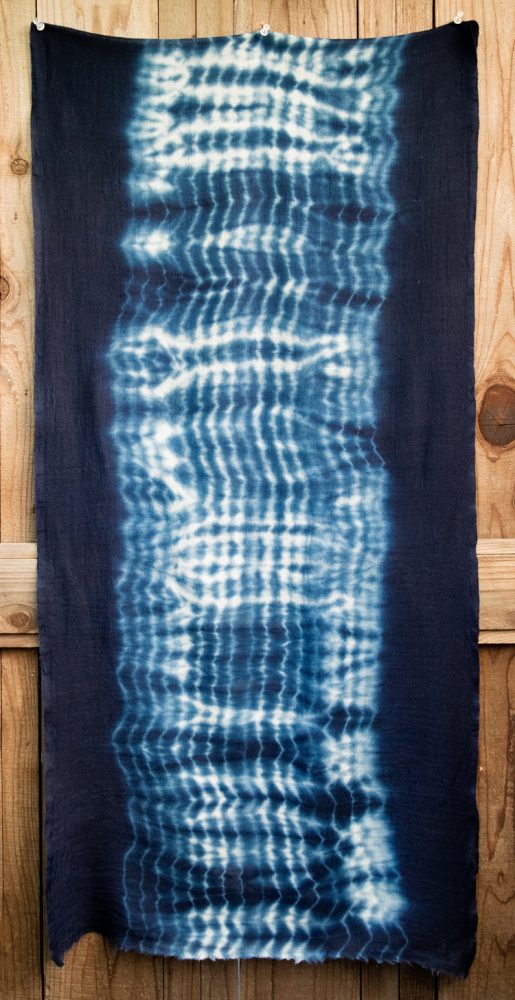
The final results kinda blew me away. Super happy with the depth of the color (the wool just sucked up the indigo and did not let go), and the pattern from this style of Shibori (suji, which is pleating and binding with string).
Supplies
- Jacquard Indigo Kit or supplies to make an indigo vat if you have the know-how
- 5-gallon bucket with a tight-fitting lid
- Long stick or spoon for stirring
- Wool Scarf (I used the 22 x 90 size)
- lightweight cotton string
- detergent and large pot for scouring (I used Dawn, and you can use a pot you use for cooking since you won’t be using anything toxic)
- Long rubber gloves
- Drop cloths to protect surfaces
- Bucket for clean water prewetting
- Small pan or bowl to squeeze out your pieces
- Pan or tray for dyed pieces to oxidize in
- White vinegar
- Clothesline (or somewhere to hang your scarf to dry)
- Iron (optional but helpful)
- Synthrapol or Dharma Professional Textile Detergent

Instructions
- Scour your scarf
In a large pot, add a teaspoon of detergent and enough water to cover the scarf. Add the scarf and heat the water until it is just below a simmer. Turn off heat, cover, and let sit for 8–12 hours or overnight.
- Set up your dyeing work area
Drape your work area with drop cloths. Fill up your soak bucket with fresh water. Get all your supplies laid out so you aren’t hunting around for stuff — ya know, your basic mise-en-place. Also, you will spend a certain amount with your hands in the vat, so think about the ergonomics for that. Put your pan for drips and squeezing right next to the vat.
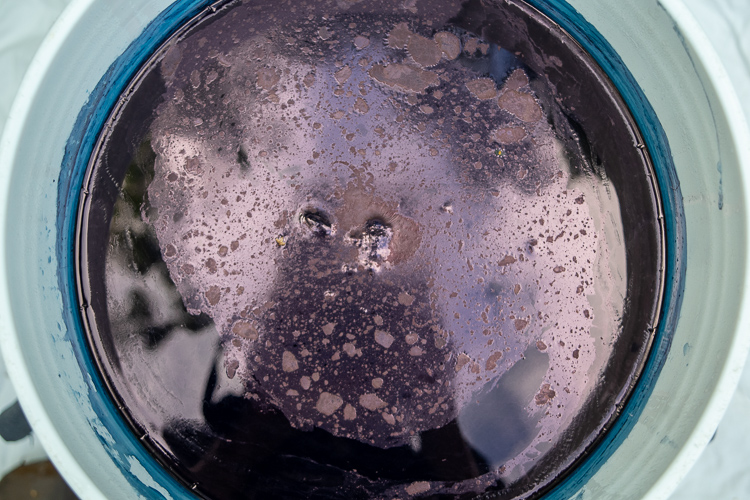
- Get your vat started
Mix up your vat according to the directions in the kit. It will need to sit for an hour after you mix it to reduce and let the sediment settle. It should look like Mountain Dew after an hour of reducing.

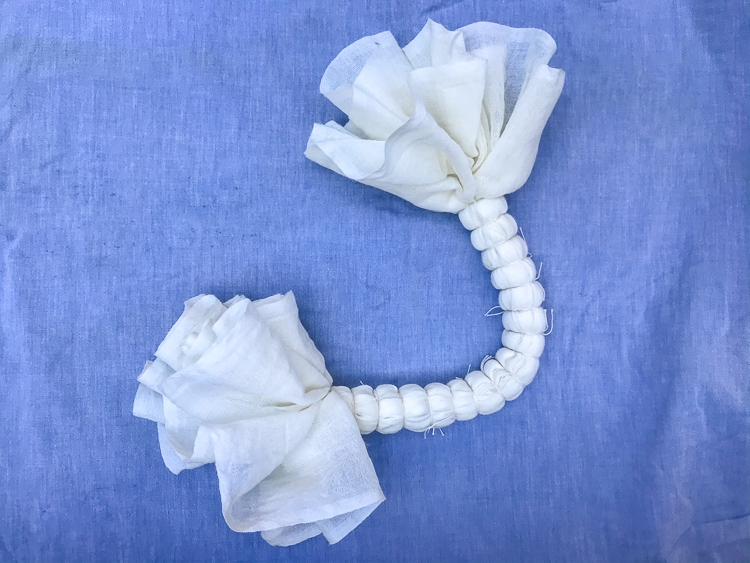
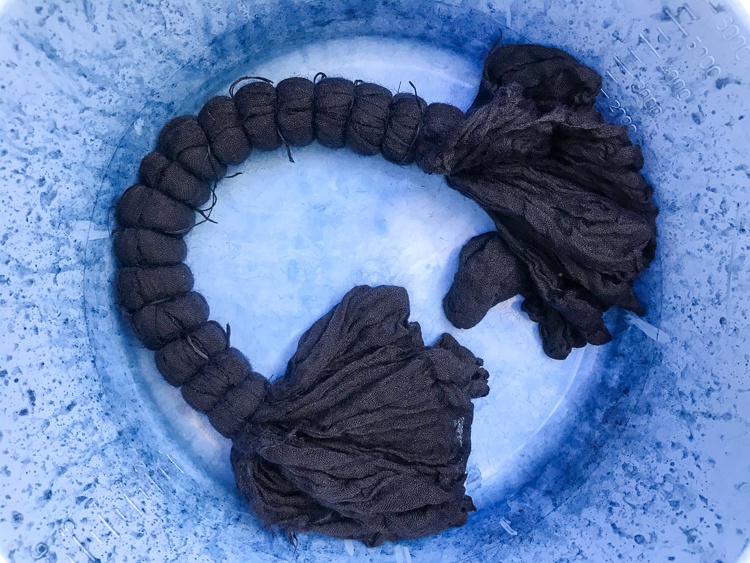
- Pleat and bind
I ironed the scarf before tying it, cuz I be like that. Starting at one of the short ends, gather the scarf in loose pleats of an inch or two with your hands. You can be as precise or as loose as you want with this. I was very loose. Put a rubber around each end to hold it together while you tie the string.
- Tie string around the scarf
Find the middle of your scarf and then take a 5 or 6-inch piece of string and tie it tightly at that spot. You can use just a basic granny knot. Moving out towards the ends, continue tying the string around the scarf at even intervals. I tied mine 3/4 of an inch apart, but you could do them closer if you want more of the scarf to stay white, or looser if you want the dye to penetrate more and make the pattern bluer. Leave 4 to 5 inches unbound on each end. Remove the rubber bands as they are no longer needed.
- Prewet the scarf
Soak the bound scarf in the bucket of clean water so it is thoroughly wet, and then squeeze out the excess water.
- Dye the scarf
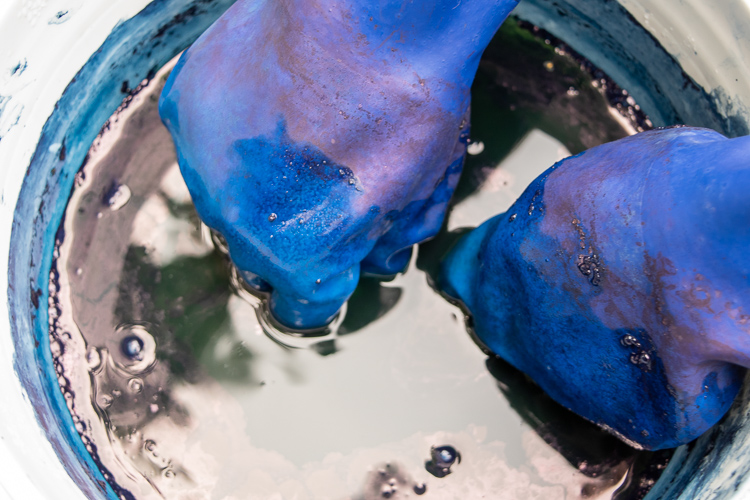
Wear your gloves! You need to push the flower (the scummy foamy bits floating on the top) to the side before you carefully slide your scarf into the vat. You want to gently move the loose ends of the scarf around and squeeze the tied portion so that the indigo can penetrate into the layers. But be very careful not to agitate the vat—no bubbles, no splashing, no drips— so that you don’t speed up the oxidizing of your vat.
- Set your scarf aside to oxidize
Carefully remove your scarf from your vat, squeezing it out over your pan or bowl next to your vat. Now your scarf needs to oxidize fully before you can redip it in the vat. Your scarf will be Mountain Dew green when you take it out of the vat, but almost immediately will begin to turn blue as the indigo oxidizes. It will take anywhere from 20-30 minutes to an hour to fully oxidize. Remember, the air also has to penetrate through all those tightly bound layers!
- Redip (optional)
Once it has fully oxidized you can redip. Remember that the color will go much lighter once it is completely washed and dried. With indigo, you achieve darker shades through multiple dips, not by one long dip. Redipping will also even out the color and make it a more consistent blue.
*I did three 15 minute long dips for my scarf because I wanted a nice deep indigo. - Rinse, remove the string, and hang to dry
Once you have achieved the color you want, give the scarf an initial rinse in cold water. Then carefully snip the strings binding the scarf without cutting the scarf itself. Once it is unbound, give it a thorough rinse and hand wash with a little Synthrapol or textile detergent.
- Hang to dry
Hang your scarf to dry, preferably out of the sun. Iron on the wool setting. I found that the little fibers on the ends were a little bit felted when I was done, which I liked since then they won’t pull and unravel. Hate it when that happens.
Please pin this post if you like it, and please join my email list!
Love this shibori DIY? Check out these Indigo Shibori Cloth Napkins!