
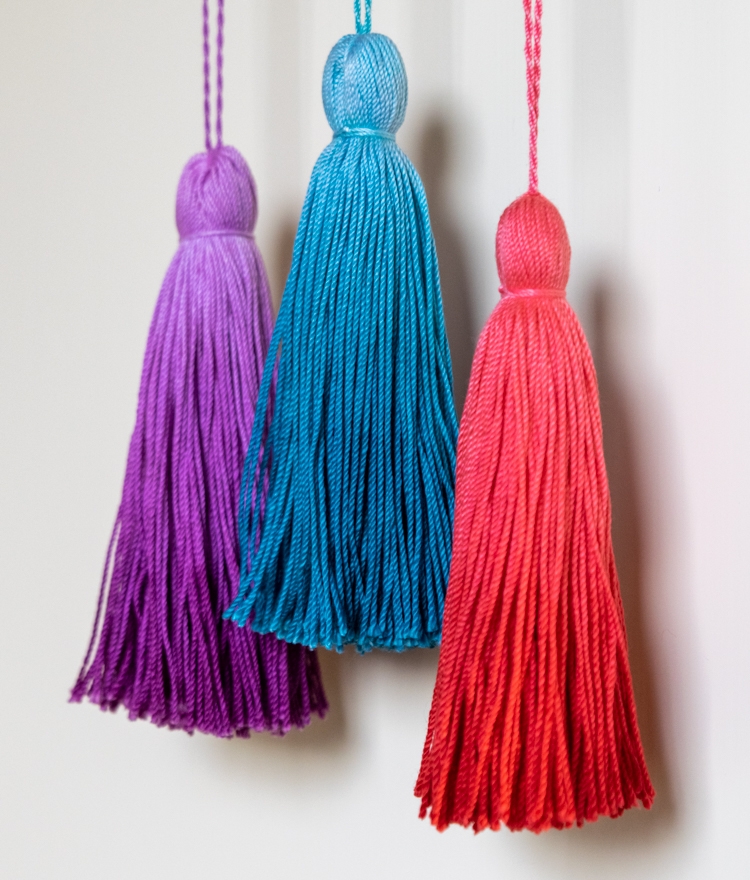
I know, I know. Tassels are super trendy, right along with ombré, and I’m sure we’ll all look back on them like headbands in the 80s and scrunchies and Doc Martens in the 90s (oh wait those are back…). I had small children in the 2000s so I have no idea what was trendy. The Wiggles? Elmo?
These dip-dyed ombré tassels are one of those quick crafting dopamine hits. Fast and fun. And of course, the colors! So many choices… and if you get into combining colors like in this chart… honestly it’s maybe too much. And lest you think I’m pushing Rit Dye cuz they pay me, they don’t. I don’t do sponsored posts… yet (growth mindset!).
So bust out your saved yogurt containers and make some of these cuties in your favorite colors. I’m going to clip one on my purse just to zhoosh it up a bit this winter, but they’d also be cute on gifts, keychains, doorknobs, what else??
Supplies
- Crochet thread
- Piece of cardboard 4 1/2 inches wide and at least 3 inches long
- scissors ( I like these)
- empty containers and jars
- latex or rubber gloves
- bamboo skewers or chopsticks
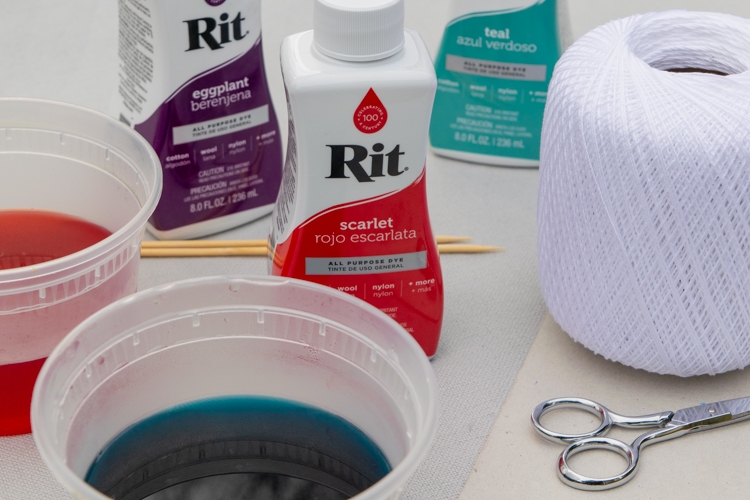
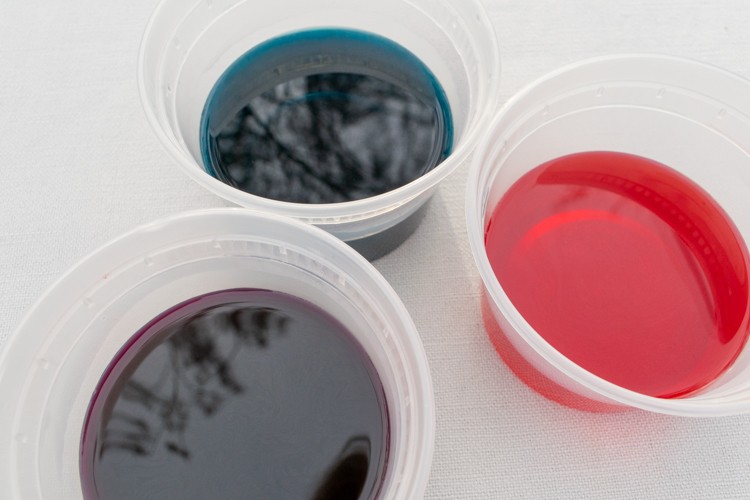
- Rit Dye (I used Teal, Eggplant, and Scarlet)
- measuring spoon that you don’t use for food
- yarn or embroidery needle
Time needed: 2 hours
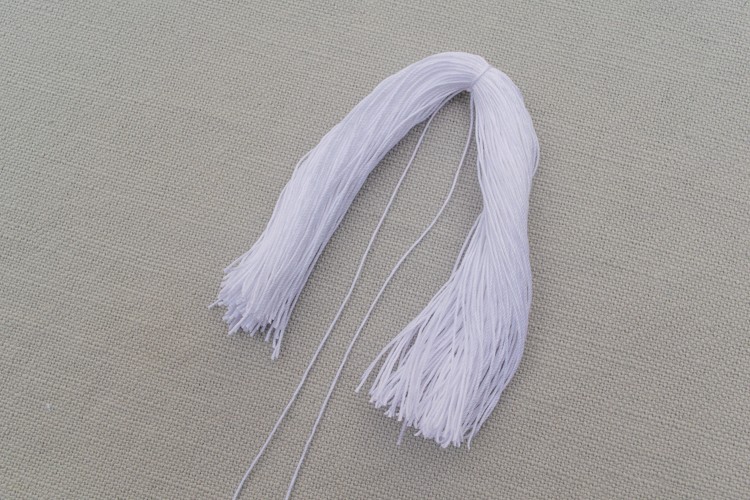
- Start the tassel
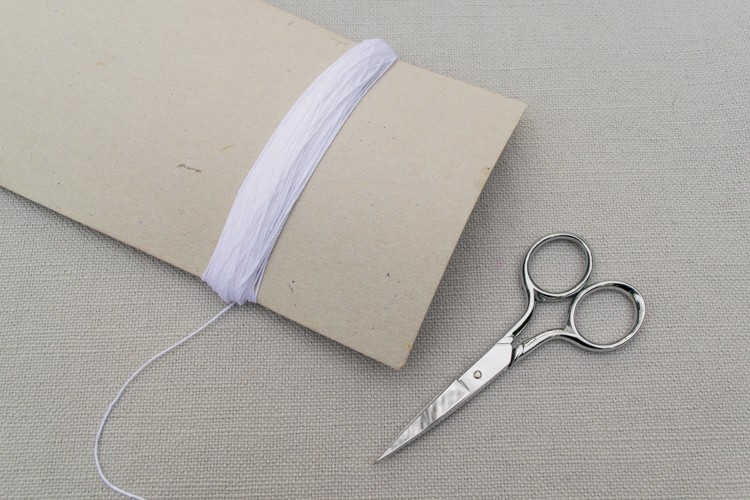
Wrap the thread around the cardboard widthwise (so around the 4 1/2 inch side), until it’s a half-inch in diameter when you hold it together with your fingers. Cut the thread. I make a little mark on the cardboard so I start and end on the same edge, and then I make that the bottom of the tassel.

- Tie the tassel threads together
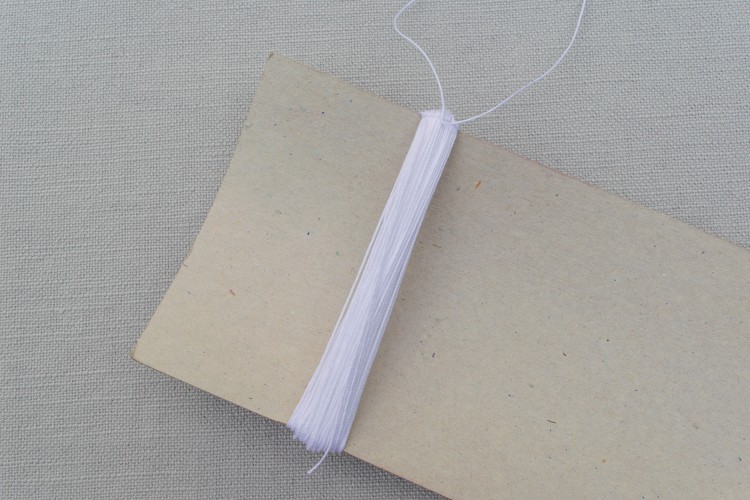
Cut a piece of thread about 10 inches long. Wrap it under the thread on one side of your board and then slide it up to one edge of the board. Try to get it as close as you can to the edge of the board, but don’t worry if it’s not exactly centered. Tie a knot with this thread as tightly as you can. This will be the top of your tassel.
- Cut the tassel off the board
On the opposite side from where you just tied it together, cut through all the threads wrapped around the board. Keep them as even as you can, but don’t fuss over it. You will trim the ends when you are all finished to even them all up.
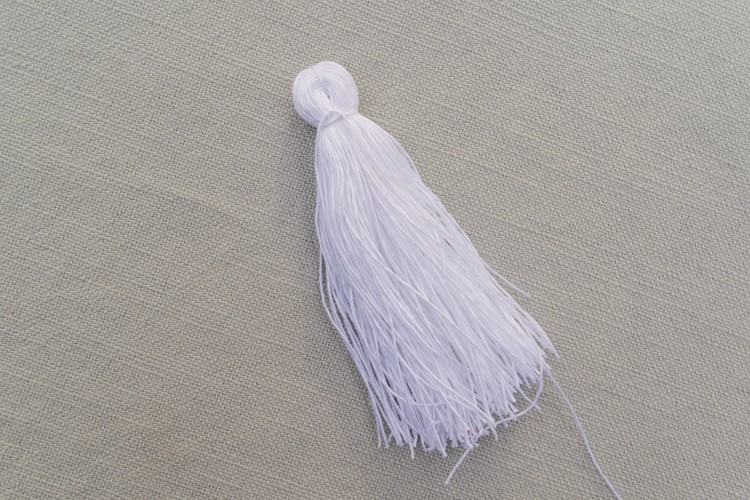
- Finish your tassel
Slide your first knot around so it’s on the inside of your tassel. Cut another piece of thread about 6 inches long and wrap it around your tassel about a half an inch or so below the top. Wrap it around twice and tie it off tightly. Pull the ends to the inside of your tassel using a yarn or embroidery needle.
- Mix up your dye bath
Add 1 cup hot water, 1/2–1 teaspoon* liquid Rit Dye, and 1 teaspoon salt to your container or jar. Stir until salt is dissolved.
*I highly recommend doing some tests with some scraps of string to test the dye strength. Start with a 1/2 teaspoon and then add more to adjust to your liking. Also, make sure you shake the bottle well! Huge difference in the strength of the dye. - Prepare tassel for dyeing
Wet your tassels thoroughly, then wrap them in a clean towel or cloth and wring them out. You want them wet but not soaking.
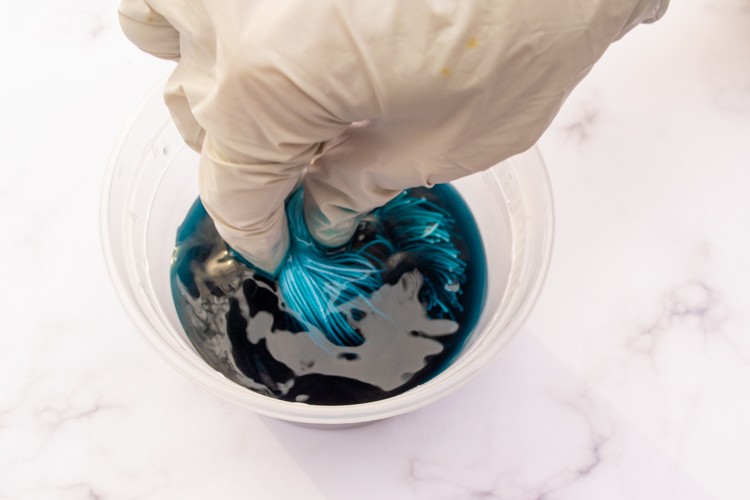
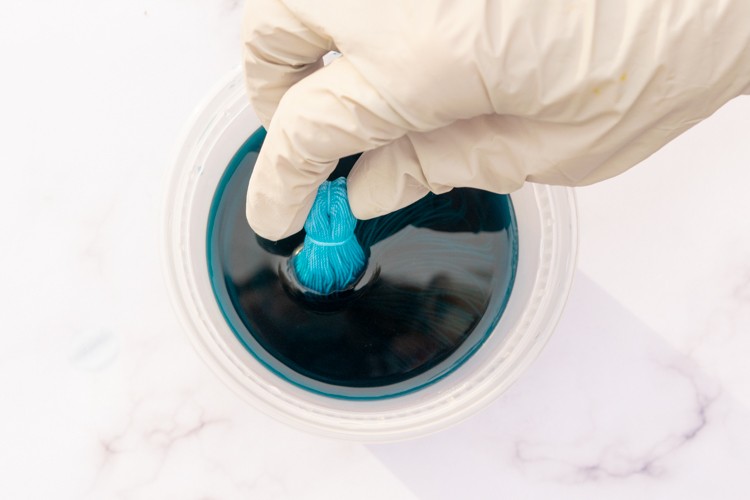
- First dip in the dye
Wearing your gloves, put your tassel in the dye bath for 10 seconds or so, until you get a nice even light color. Swish it around gently while it’s in there. Squeeze the top part so the dye gets in there too. Rinse your tassel out after this first dip, and wring it out again in a clean rag.
- Second dip in the dye
Hold your tassel by the top with clean (gloved) fingers, and dip it back into the dye bath so that the bottom two-thirds is submerged. Keep it in there for 2 minutes or so, swishing it around occasionally and lifting it up and down slightly so you don’t get a hard line between the shades.
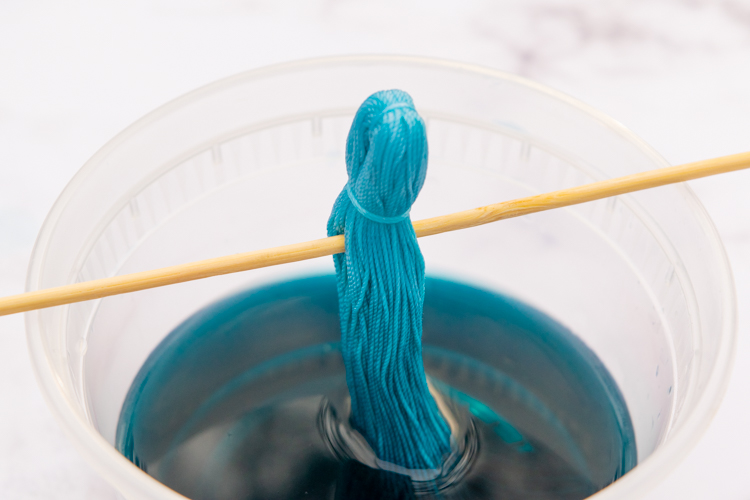
- Third dip in the dye
After two minutes, lift your tassel so that only the bottom third is submerged. You can use a skewer or chopstick to hold it over the dye bath at this point. For this last dip, check on it every ten minutes or so and see how you feel about the depth of color.
You want to continue to swish it around a bit and dip it up and down in the dye occasionally, so you get a smooth transition between colors. The longer you leave it immobile in the dye, the more likely you are to get a sharp line between shades. If that happens, never fear. Just dip your tassel down into the dye a little more, until the line is submerged a little, and leave it in, checking on it frequently, until the line is gone. - Rinse your tassel
When you are happy with the color, rinse out your tassel until the water runs clear. I like also like to dip mine in a container with a little fabric softener mixed with water. It allows the strands to hang a little more freely.
- Comb it out
Comb out your tassel with a wide-toothed comb. This part reminds me of brushing out my dolls’ hair for some reason, and that makes me happy.
- Trim your tassel
Using your scissors, trim your tassel to your desired length. It works better if you don’t try to trim all the strands at once. It’s easier to get them even if you do it more like a haircut.
That’s it! What are you going to do with your tassel?? I like to attach a jump ring and large lobster clasp to mine so I can hook them onto my purse or my keys, but I think I’m going to hang some from some doorknobs, y’all.
Please pin this post if you like it, and please join my email list!