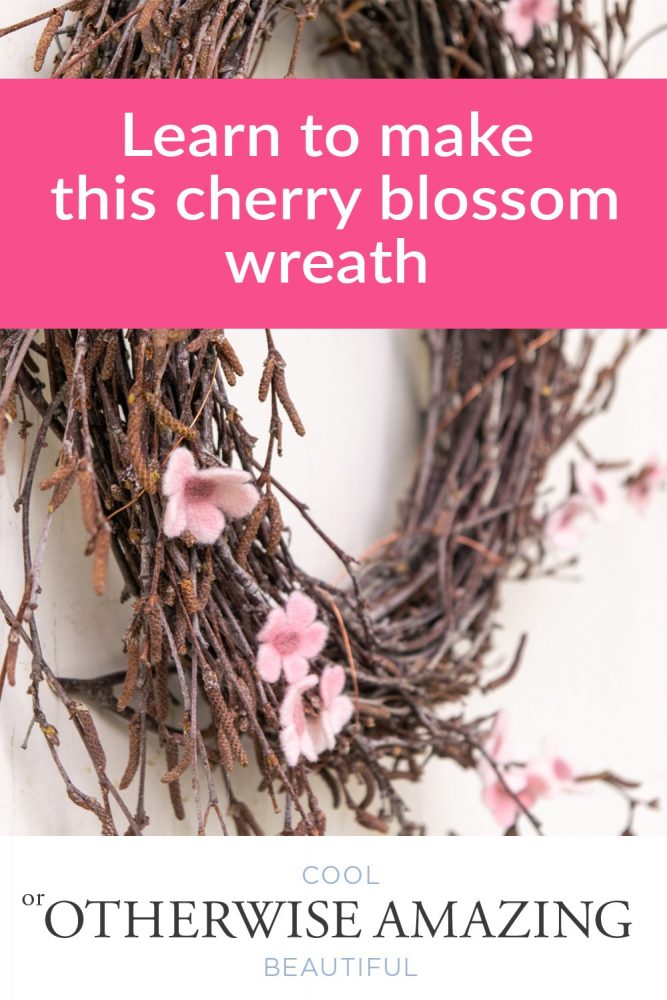
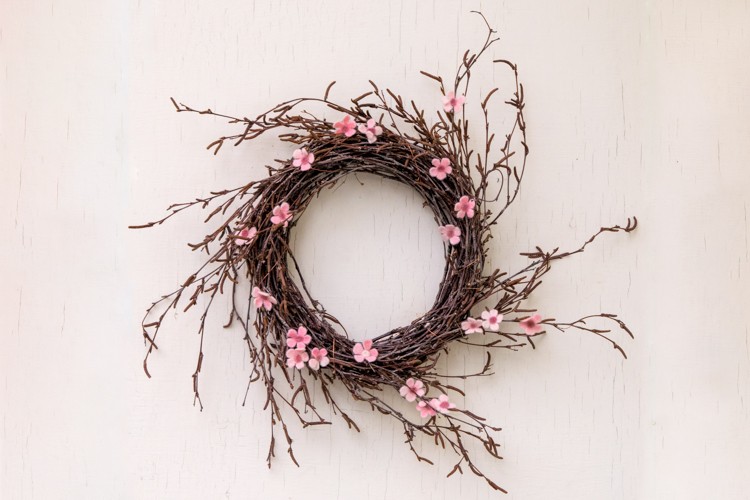
There’s a certain time of year when I just start to crave the clean, spare but fresh look and feel of spring. This DIY spring wreath — with little felt cherry blossoms made from hand-dyed wool — is my attempt to capture that and hold onto it a little longer.
I love flowers made out of felt. There’s something about the colors and the texture of felt that somehow captures and enhances the essence of a flower.
Cherry blossoms are one of my favorite flowers — the soft, pale flowers contrasted with the dark, bold branches. Right? So good.
This spring wreath will allow you to capture a piece of that to have around your house for months, unlike the real thing. It could even last for years if you are careful with it!
Spring Wreath Supplies
- wreath jig
- fresh birch branches or something similar
- 24 gauge copper wire or something similar, about 6 feet
- pruners
If you want to buy a finished wreath and just make the flowers, you can find beautiful birch twig wreaths on Etsy.
- pink or white felt for flower petals (there are a lot of good choices here for both colors of felt)
- darker pink or purple felt for flower centers (or pistils)
- craft glue or needle felting tools
- glue gun
Instructions: Spring Wreath with Felt Cherry Blossoms
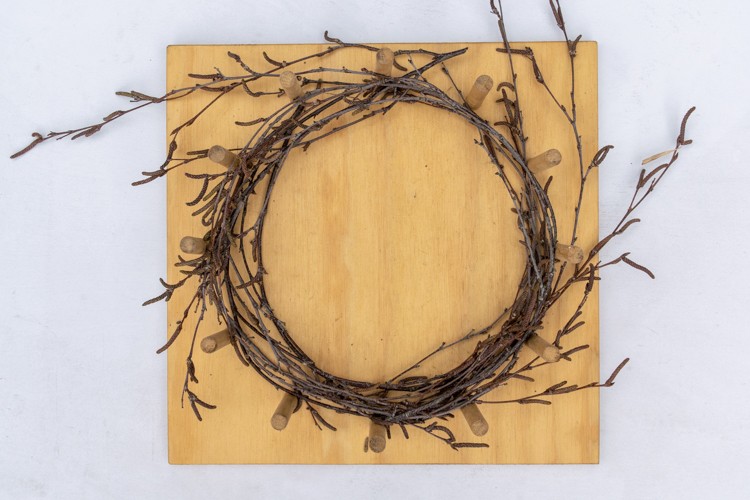
- Add the branches to the jig
Fit your branches into the jig one at a time, making sure they all go in the same direction. Stagger them so the branch ends are spread around the circle. Pull out some of the ends so they hang outside the jig posts.

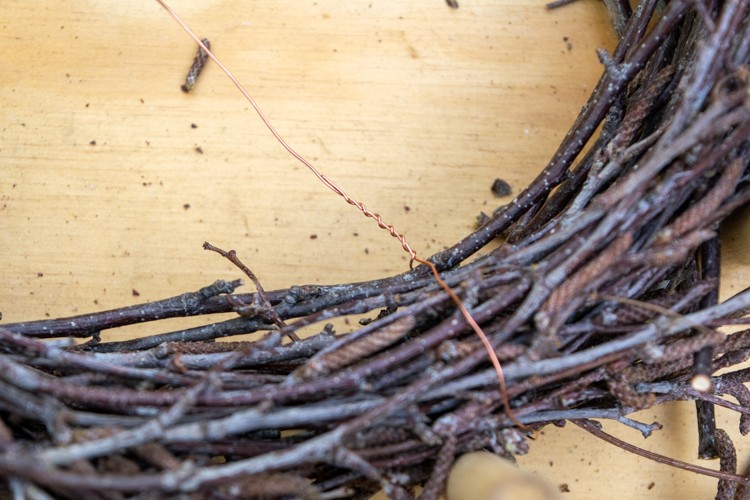
- Secure the wire around the branches
Without removing the branches from the jig, wrap the wire around them and on the inside of your wreath, twist the wire tightly around itself for an inch or so. Slide this part to the backside of your wreath.
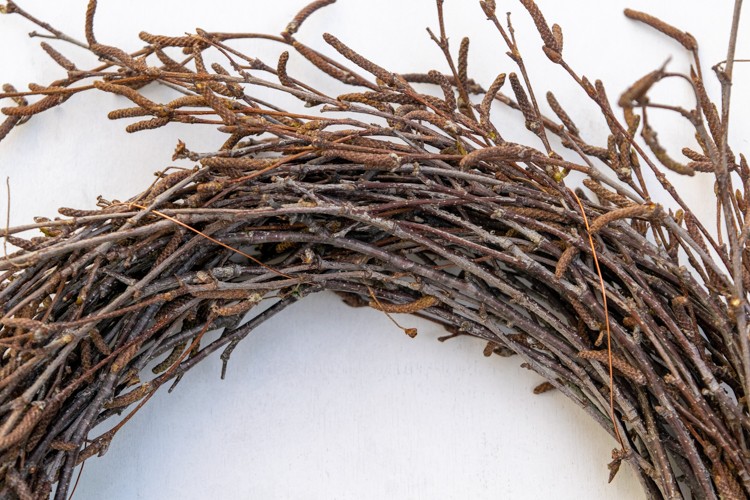
- Wrap the wire around the wreath
Still keeping the branches in the jig, wrap the wire around the branches, skipping every other peg. Don’t wrap the wire so tightly that the branches are really squished together. As you go, pull some of the short ends on the top and sides loose from the wire.
When you’ve gone all the way around, carefully lift it off the wreath jig, and twist the wire around just above your starting twist to secure it. Cut off any stray branches or bits that are bugging you. - Cut circles out of felt
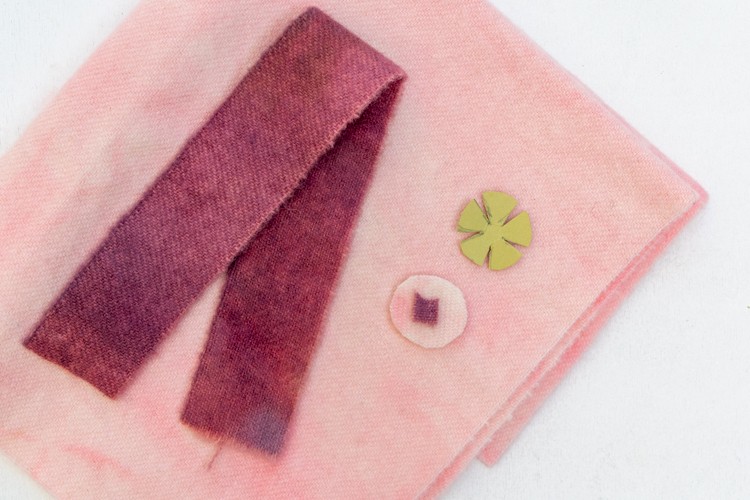
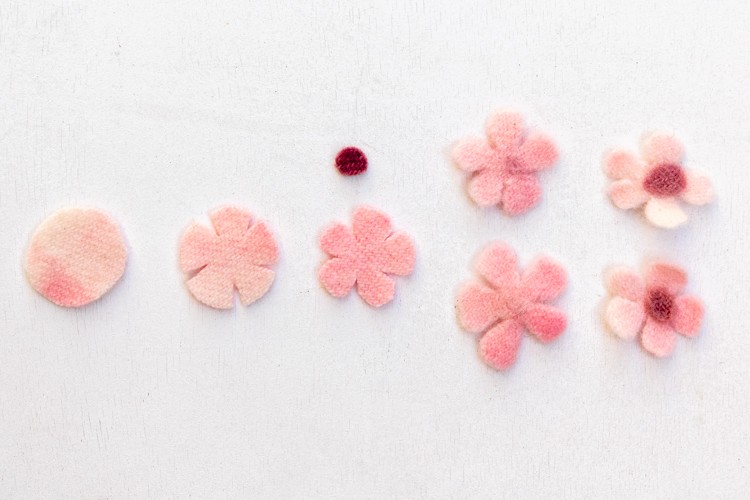
Cut 20 circles roughly one inch in diameter out of your flower petal color. Cut the same number of circles, roughly 1/4″ in diameter, from the pistil color.
*You don’t need to be precious about the size and shape of each flower and pistil. In fact, it’s better if they are a little bit different from each other. - Cut flower petal shapes out of petal circles
You can make a template for your petals as I did, or just wing it. Make sure you leave about 1/4 inch area in the center when you cut the slits. Round off the edges of the petals.
- Felt your flower parts
Fill up a bowl or sink with warm water and a little bit of soap. Put all your flower parts in the soapy water and rub them together gently between your hands. This gives them a fuzzier, softer look that is a little more natural and prettier. Squeeze them out with a towel or cloth and then lay them out to dry. Bunch up or fold up the petal parts so they don’t all dry flat.
- Attach the pistils to the petals
Once they are dry you can attach the centers (pistils) to the petals by either gluing them with a little bit of craft glue or by needle felting them together.
- Figure out your flower placement
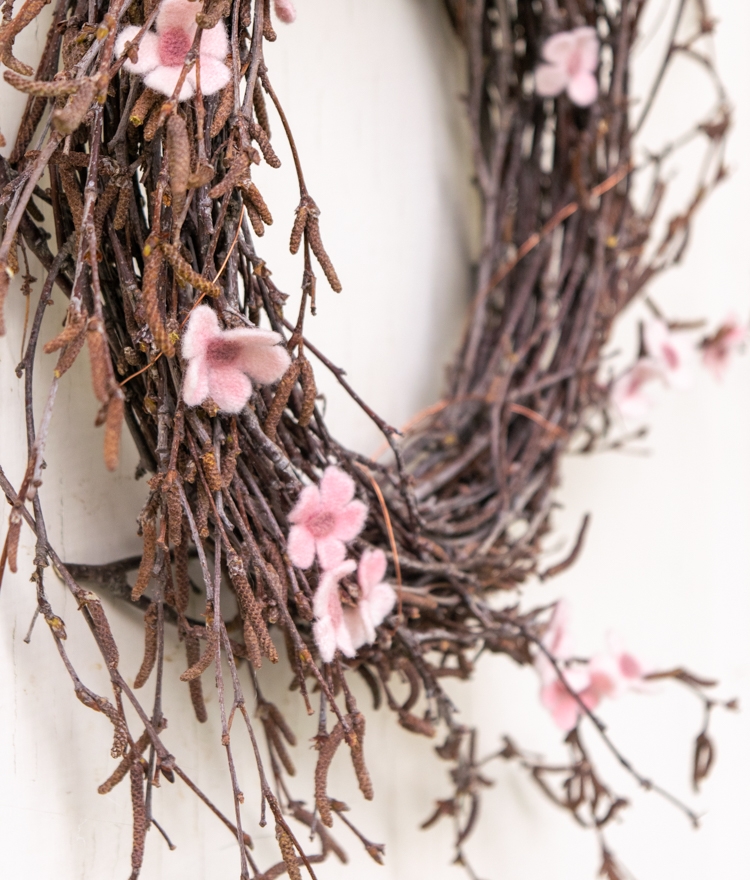
When your flowers are all assembled and dry, start placing them on your wreath to figure out how you want them arranged.
Here are a few tips:
• Clump them together in groups of 3 or 5 (odd numbers are always better compositionally)
• Less is more — if you don’t like how it looks, take a few off
• Leave some areas of bare branches — the beauty of cherry blossoms is the soft, pale the flowers contrasted with the stark branches
• Take a picture — sometimes it’s easier to see what isn’t working when it’s a two-dimensional image
• Two tricks I use as a designer: squinting (makes everything blurry which can help see the bigger picture) and taking a break, at least 20 minutes but ideally overnight (fresh eyes will allow you to see the composition much more clearly) - Glue your flowers on to the wreath
Once you have the flowers placed as you want them, use a hot glue gun to attach them to the wreath, taking them off and gluing them on one at a time. I found it easier to squeeze a drop of glue onto a little silicone mat and then stick the flower back onto the drop of glue and pull it up again with kind of a wiping motion. Then I didn’t end up with thin strands of glue everywhere.
Please pin this post if you like it, and please join my email list!