
Many recipes for making bread at home with a sourdough starter can be daunting for a beginner, especially when they dive into the concepts behind bread-making and don’t answer the most basic question: what should I do next?
(Note that this recipe requires a starter and a dutch oven, like a Le Creuset.)
My husband shares this simple, step-by-step guide with friends interested in getting started. Once comfortable with the hands-on process, anyone can dive into the more nuanced aspects of making delicious bread. (Notes below with some additional info.)
Once you’ve mastered this process, check out this tutorial on how to sew a waxed bread bag to keep your loaves fresh.
It starts with making your first loaf!
Time
Allow for 24 hours to make a loaf, working at short intervals during that period (allow for 36 hours, for feeding your starter before using it).
Tools & Materials:
- a kitchen scale (we use the My Weigh KD8000, but you definitely don’t need one so fancy — the Escali Primo is a good one)
- 2 bowls, one medium, one large
- 1 clean cotton dishcloth
- small mesh sieve
- 5-7 quart dutch oven (we use the Le Creuset 7.25 quart, but the Lodge 7.5 quart is a great option)
- parchment paper
Ingredients:
- 480g flour (a mix of white and whole wheat, at minimum 50% should be white)
- 340g water (spring, or boiled water allowed to cool, about 1.5 cups)
- Salt
- A sourdough starter, fed within the last 12 hours
(*Notes on water and sourdough starter at the end of the recipe/guide)
I suggest starting mid-morning, say around 10 AM. Of course, adjust your times based on your start.
Sourdough Bread Recipe
- Begin: Create Your Levain (10AM)
Combine in a small bowl:
• Half a cup water
• 100g of flour (50/50 mix of white and whole wheat)
• Three tablespoon scoops of your fed starter (see note at end of this post)
Mix together your small amount of flour, water, and starter. Cover with a dish towel and leave in a warm place. We leave ours in a small room with our boiler heater. An oven with the light on will suffice. The warmth matters.
Leave the levain alone to build for five hours before using it. - Four Hours Later: Create Your Autolyse (2PM)
This is the combination of flour and water that will become a delicious loaf of bread tomorrow morning. For now, just combine (in a different bowl) and let glutens begin to form, roughly an hour before the levain is ready.
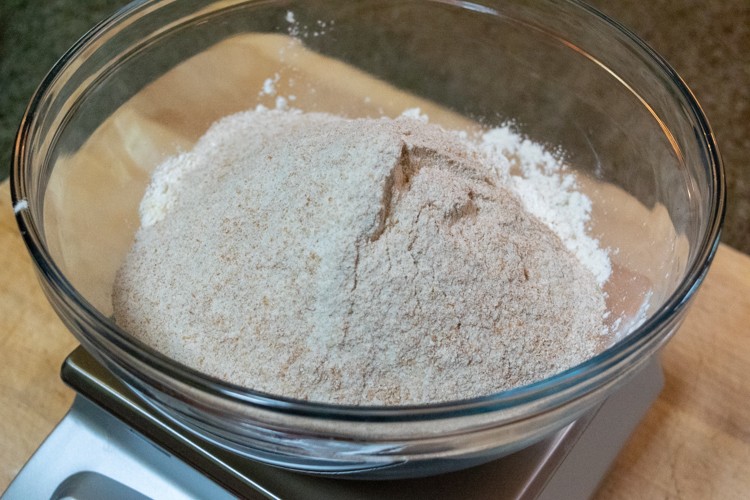
Combine in a large bowl:
• 480g of flour (ratios explained below)
• 300g of water (about 11oz water if using a measuring cup instead of scale)
Ratios: White flour (sifted) holds the glutens you need to get your loaf to rise. Whole wheat (unsifted) contains the flavor and nutrition. You’ll always need at least 50% of white flour and, in time, will have your own favorites. Location and personal taste make a difference. For now, combine white and whole wheat in at least a 50/50 ratio. You might even consider 70/30 in favor of white.
Mix together the two flours and the water in a large bowl until combined (the flour will absorb most of the water) and set aside, bowl covered with a dishtowel, for an hour.
- An Hour Later: Add Levain to Autolyse (3PM)
(Note, you are five hours into bread making and only now do you combine levain and flour/water together.)
Scoop about half a cup of your levain (which will have risen considerably over five hours and should be quite bubbly) and, with your hands, mix it vigorously into your big bowl of flour and water, your autolyse.
Once mixed together, set aside again for an hour, bowl covered with towel, in a warm spot.
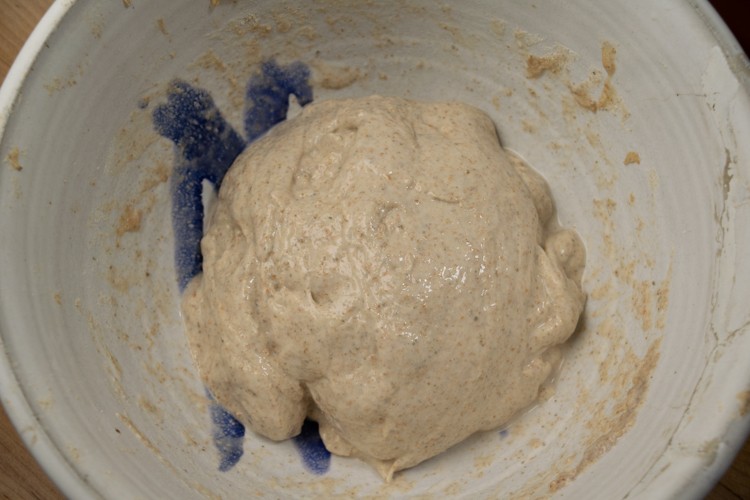
(The rest of your levain? Set aside to make pancakes!) - An Hour Later: Add Water and Salt to Your Dough Mix (4PM)
Salt adds flavor and also slows the ferment caused by yeast, water, flour, gluten, and other goodies in your mix. Don’t skip the salt, it doesn’t go well for anyone.
Add to your dough:
• 40g of water (about 1.5oz if using a measuring cup)
• 2 teaspoons salt (14 grams)
With your index finger, jab a bunch of holes into your dough. Sprinkle salt liberally over the surface, so some falls into the holes. Add the water. Mix vigorously with your hands, twisting and folding for as long as it takes to feel well mixed. Set aside, again, in a warm location covered in a dishtowel.
So begins what you will see referenced in many places as you get deeper into home bread making: the bulk ferment. - 30 Minutes Later: Begin Folding (4:30PM)
(Whatever time it happens to be for you, set a series of alarms on your phone: 15 minutes from now; 30 minutes from now; 45 minutes from now; an hour and fifteen minutes from now; an hour and forty-five minutes from now; two hours and fifteen minutes from now.)
Now is the time to fold your dough at regular intervals, helping glutens to form and strengthen during this bulk ferment period. As you’ll see from the above alarm settings, you start with four folds at fifteen-minute intervals, and as the dough develops, ease into three more folds at thirty-minute intervals. Easy peasy.
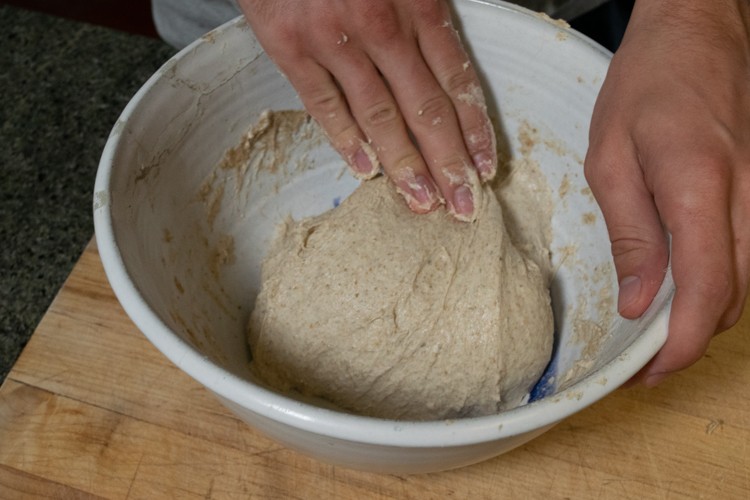
Starting folding:
Wet your hand and extend it out, flat at the bottom, as though you are creating a flat scraper (see pic).
Using the flat edge of your wet hand, work in a circle to completely separate the dough from the walls of the bowl. (Your end goal, simply, is to have the dough no longer sticking the side of the bowl.) Spin the bowl as you work, pulling at the dough with your flat, extended hand.
Once the ball of dough is no longer sticking to the bowl, begin four folds:
• Reach under the dough at the furthest point away from you. Pull the dough up and forward, towards you and what is now the front of the bowl. Fold it forward and over the dough as much as you can. (See pic)
• Move the bowl a quarter turn and repeat the process.
• Turn again, and fold again — and then repeat, until you have folded the dough four times at each of its four “corners.”
• Follow this process for the intervals described above.
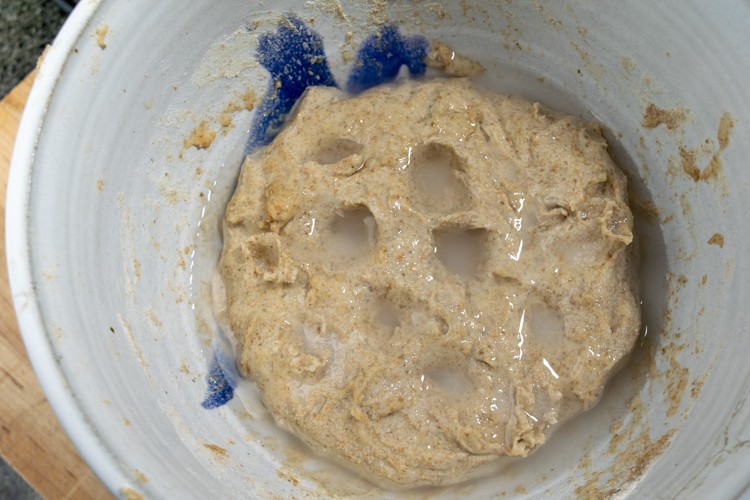
I highly recommend setting alarms to remind you. Easy to blow through this timing forgetting to fold, and it is necessary to stay on top of it for building a good loaf. - Two Hours and Fifteen Minutes Later: Leave the Dough to Continue Bulk Ferment (6:45PM)
Once you have completed your final fold, set aside the dough again, in a warm location and covered with a dish towel. Your folds are completed but the bulk ferment is not.
Let your dough sit in the bowl, covered, in a warm location, for an additional hour and fifteen minutes. Total bulk ferment time will have been four hours. - Hour and Fifteen Minutes Later: Shape and Rest Your Dough (8PM)
This is a moment that, later, you will likely expand upon and adjust as you become comfortable baking with a sourdough starter and have a few loaves under your belt. There are nuances to this period of resting and shaping, but here is a simple way to start for now.
The goal: get the dough out of the big bowl in which it has been bulk fermenting for the day, into a smaller container in which it will spend the night, inside your fridge.
Set aside a small bowl, something slightly larger than the size of the dough to accommodate any small rise it still might have.
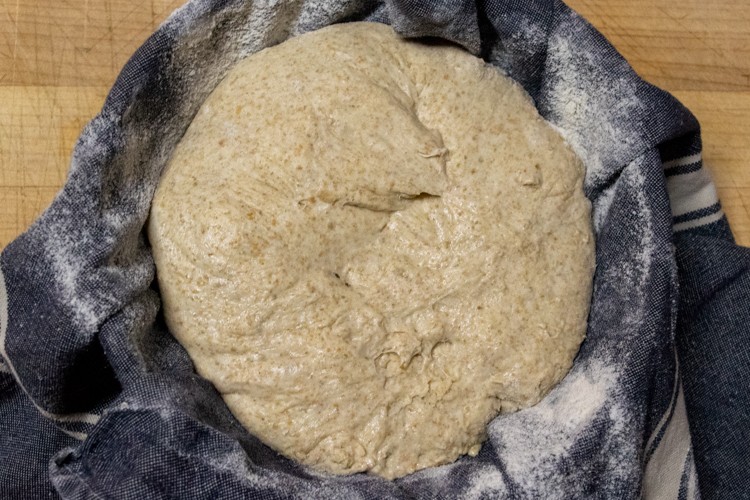
Drape a clean dishtowel inside this new bowl. Sprinkle rice flour (or regular white flour if that’s what you have) to cover the towel inside the bowl. You are doing this to prevent the dough from sticking to the towel after a night of cold rest.
Fold the dough one more time, with a wet hand, four times around the bowl. Lift it out of the big bowl and place in the floured dishtowel, inside the small bowl. (As shown in pic.)
Let it rest on your counter, at room temperature, for 30 minutes. - Thirty Minutes Later: Cover and Refrigerate (8:30PM)
After a busy day, your dough now rests overnight in the fridge. As you know, a fridge can sap water out of what you store in it, so cover the bowl with a plate, something that retains as much water inside the dough as possible during this rest.
- Next Morning (8:00AM)
Timing is flexible here, get started whenever you happen to get started. We turn on the oven, as below, when making morning coffee.
Place a dutch oven (we use Le Creuset but this Lodge one is a good budget option ) into your oven. Make room (remove a rack) so that the dutch oven sits in the middle of your heating space, easily. Key is your dutch oven – it helps to replicate the small space and heat available to industrial bakers, creating a combination of heat and steam essential to baking your loaf of bread.
With the empty dutch oven inside, turn on the oven to 500ºF convection bake. (If you don’t have convection, fine — but ideal to use if you have it.) Leave the oven and container inside to heat up for an hour. - An Hour Later: Bread Out of Fridge Into Oven to Bake (9AM)
Remove the dough from the fridge.
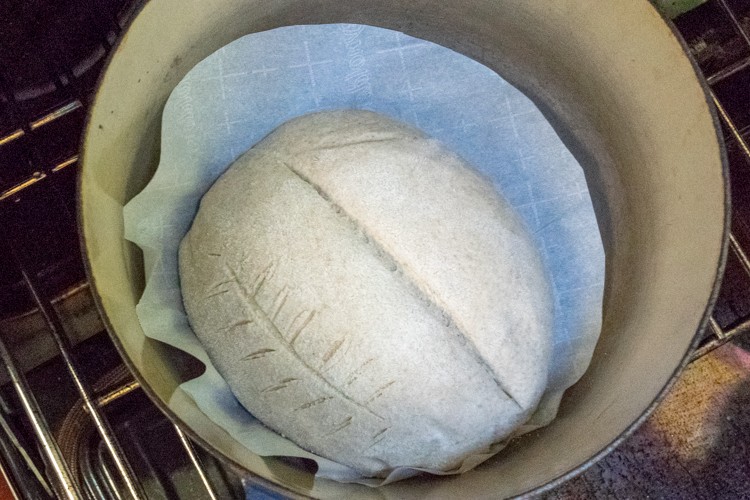
Sprinkle the surface of the dough with rice flour (preventing sticking later when placed on parchment paper).
Cut a piece of parchment paper in a circle, roughly the size of a plate, just slightly smaller than the inside of your dutch oven.
Place the parchment paper on top of the bowl you have just removed from the fridge.
Place a plate on top of the parchment paper.
With both hands, pick up the bowl and plate everything them, and flip.
Now inverted, remove the bowl, then remove the towel in which the dough has been sitting.
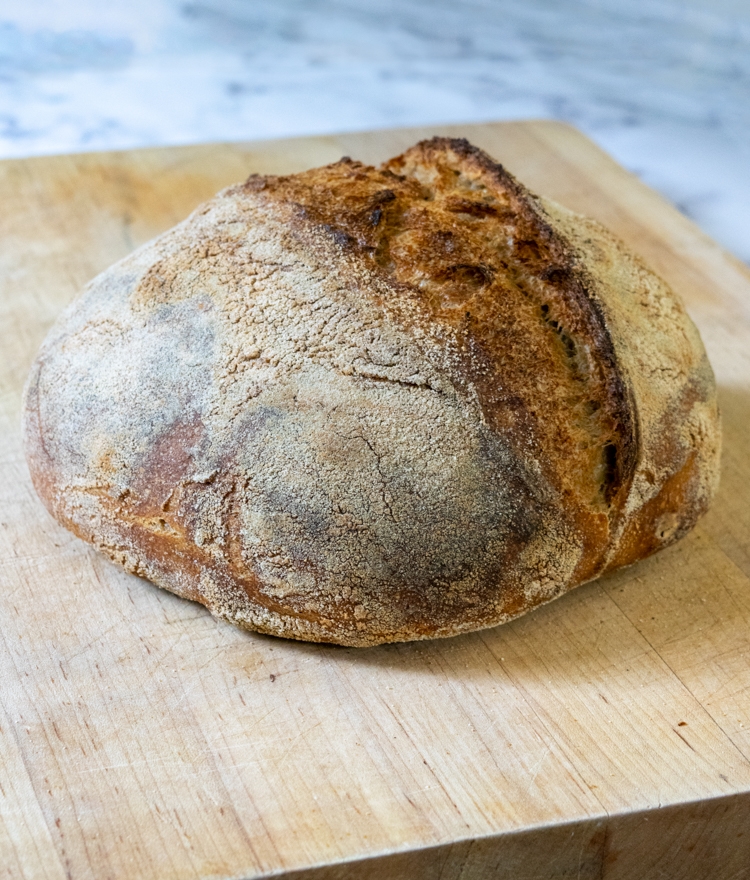
You’ll now have a dough, in boule shape, sitting on a piece of parchment on a plate. Woot!
Open the oven, remove lid from heated dutch oven, drop the parchment paper and dough into the pot, replace lid, place back in the middle of the oven, close oven door and leave for 25 minutes.
After 25 minutes (when you’ll start smelling the aroma of delicious bread), remove the dutch oven lid, lower oven temp to 450ºF without convection, and let the now-risen loaf of bread darken on the outside. There is no fixed time for this, but check the loaf every ten minutes or so, to ensure it isn’t burning. When it looks good (eyeball it), remove the dutch oven — place your freshly baked loaf on a wire rack, let it rest for at minmum an hour. - An Hour Later: Eat! (10AM)
No instructions required here, right, except to say: your new loaf deserves good butter!

Notes:
- Twelve hours before you start this process, feed your starter. A healthy, well-fed starter creates a healthy levain. So, if you do begin at 10 AM, the night before (10 PM) follow your process for feeding your sourdough starter. I recommend: 50g old starter, 100g water, 100g flour, in a bowl on your kitchen counter overnight.
- This process is a slightly adjusted hybrid of what we have learned from a number of sources, including Bon Appetit, The Perfect Loaf, Joshua Weismann, and others.


I thought your Dutch oven would crack by preheating with it empty…?
Not at all. We use a Le Creuset dutch oven. We did replace the plastic lid handle with a metal one. It became very brittle over time from the heat and broke.
Turned out amazing! Thanks for the recipe.